.NET
- Spawning Processes into Interactive Sessions
- NET Core CORS Setup
- Net Deep Copy/Cloning
- C# Equality Operator Overloading
- When Two Referenced Assemblies Have Overlapping Namespace
- DotNet Assembly Searching
- C# CLIWrap Chaining Multiple Statements
- C# Calculate Hash of List<T>
- C# Check Two Lists<T> Are Equal
- Named Async Locks
- Good Article on Net Core With or Without IIS
- NET Core Func Variables
- C# Unit Tests with Async Task Signature
- Process Logging Behavior
- Dotnet Dev on Linux
- NET Core Error Responses
- NET Core Test API
- Six Ways to Multi-Thread
- Return Multiple Values from Async Method
- Strongly Typed Constant Parameters
- Consuming Services Inside Startup
- NET Core Background Services
- Consuming NET Core Background Service with DI
- C# Disposed in Derived Types
- Duplicating .NET Core DI
- Unit Testing with IServiceProvider
- Unit Testing Conventions
- VS IDE Suppress Compiler Warnings Project Wide
- #nullable Warning
- .NET Framework Unit Testing Issues
- Unit Testing for an Exception
- Unit Test Cheat Sheet
- C# Unit Test Template Classes
- Xamarin
- PostgreSQL DotNet DataType Mapping
- Missing AspNetCore Nuget Packages
- Ubuntu: How to Kill DotNet Runtime
- HowTo Run DotNet Core App as Standalone
- Cancellation Token as Method Parameter
- .NET Process Boilerplate
- Updating Controls from Non-GUI Thread
- VS Project Conditional Constants
- .NET Core In-Memory Cache
- C# Lambdas
- .NET How to Create and Publish Nuget Package
- How To Add Release Notes to Nuget Package
- Nuget Build and Publish Scripts for Multiple Targets
- Create Nuget for Multiple Targets or Architectures
- Nuget Package Reference
- Code Signing References
- HowTo: Create a New Cloud Service or Library
- Visual Studio 2022 Offline Installation
- Getting Correct Scheme, Host, Port Behind a Proxy
- URIService Behind Hostname Separated NGINX Server Blocks
- Mocking a DBContext for Testing
- Net Core DI Truths
- IServiceProvider vs IServiceScopeFactory
- How to Create IOptions Instance
- HowTo Access DI Services
- HowTo Make .Net Desktop App DPI Aware
- Unit Tests with PostgreSQL Backends
- EF - DataContext Attributes
- EF - Backend vs .NET Datatypes
- Using Visual Studio with Git
- EF: Derived Stored Types
- EF: Data Contexts - DbContexts
- EF: Dynamic DBContext
- EF: Logging
- VS Library - csproj Contents
- .NET 5 Global Using Error
- Template Project Structures
- NET5 Unit Test CSPROJ Content
- NET6 Unit Test CSPROJ Content
- NET7 Unit Test CSPROJ Content
- NET5 CSPROJ Content
- NET6 CSPROJ Content
- NET7 CSPROJ Content
- Sorting a List Collection of Type
Spawning Processes into Interactive Sessions
Starting a Windows process using .NET is normally an easy thing.
You call Process.Start() with a little setup, and the process runs.
But, that starts a process in the same Windows session as the thread that calls Process.Start().
This, of course, doesn’t work for a Windows Service, since a service runs in a non-interactive Windows session (session 0).
For a Windows Session to spawn processes into interactive user sessions, a few steps are required.
Specifically, we have to:
-
Identify the target session
-
Retrieve the primary access token
-
Duplicate the primary token
-
Copy environment variables
-
Assign the working directory
-
Create the process
Here’s a library that I’ve pieced together, that abstracts the calls and ceremony needed to start a process in an arbitrary Window session, without handle leakage.
LeeWhite187/OGA.ProcessExtensions.Windows.Lib
It was adapted from ng-pe/cassia and murrayju/CreateProcessAsUser
See the repository page for example usage.
NET Core CORS Setup
Here’s a quick rundown on how to setup CORS in a NET Core API.
It takes three pieces:
-
CORS Policy Name
-
AddCors to Services
-
Add UseCors to Middleware
All three of the above elements are done in your Startup.cs.
-
Define a string, somewhere in your Startup.cs to name your CORS policy, like this:
public class Startup : OGA.WebAPI_Base.WebAPI_Startup_Base { private string MyAllowSpecificOrigins = "_myAllowSpecificOrigins"; public Startup(IConfiguration configuration, IWebHostEnvironment env) : base(configuration, env) { dashboard.service.Program.Config = configuration; } } -
Register Cors with the Service Provider, like this:
public void ConfigureServices(IServiceCollection services) { services.AddCors(options => { options.AddPolicy(name: MyAllowSpecificOrigins, policy => { policy.WithOrigins("http://192.168.1.109:4200", "http://192.168.1.109:5000"); }); }); } -
Add CORS to your middleware stack, like this:
public void Configure(IApplicationBuilder app, IHostApplicationLifetime lifetime, IServiceProvider sp)
{
    //app.UseStaticFiles();
    app.UseRouting();

    app.UseCors(MyAllowSpecificOrigins);
    app.UseAuthentication();
    app.UseAuthorization();

    app.UseEndpoints(endpoints =>
    {
        endpoints.MapControllers();
    });
}
NOTE: We’ve added 'app.UserCors' after UseRouting, and before Authentication.
This is the proper order of calls, based on this article: NET Core Middleware Registration Order
Advanced Handling
If your application requires more complex Origin allowance determination than can be statically set in a WithOrigins clause of a CORS policy, you can defer origin checks to your own method call, by pointing the policy to a custom method, like this:
services.AddCors(options =>
{
    options.AddPolicy(name: MyAllowSpecificOrigins,
                      policy =>
                      {
                          policy.SetIsOriginAllowed(this.CORSValidateOrigin);
                      });
});
NOTE: The above configured the CORS policy to call this.CORSValidateOrigin for every received web request.
This allows you full control over what origins are allowed.
The callback you would use, accepts a string and returns a bool. Here’s what a CORS callback would look like that allows all origins (during development):
/// <summary>
/// Custom handling method that evaluates incoming web request origins for allowance by CORS.
/// Specifically, we allow all in this application.
/// </summary>
/// <param name="arg"></param>
/// <returns></returns>
private bool CORSValidateOrigin(string arg)
{
    // Allow ALL origins...
    return true;
}
Your custom origin validation method can allow web requests, however you deem fit. Could be from a json file, an in-memory lookup, database query, or a hardcoded list.
You just have to be mindful of any latency penalty your check method adds to request performance.
Net Deep Copy/Cloning
Below are some references for different methods of accomplishing deep copies of object types.
NOTE: You will need to evaluate which technique is better for your use case, as there is no single solution for all. This is because of several factors:
-
Time-cost
Faster methods generally require adding cloning methods to each class type. -
Reflection usage (or not)
Reflection can be very slow, if not building an expression tree to reuse -
If the type is serializable
Not all types can be serialized, without losing state.
Specifically, an object type must have enough serializable properties to recreate its state.
If part of its state is stored some private field, then serialization will not produce a faithful copy. -
If the type is derived from another
Some serialization methods have trouble handling properties of a type’s base classes.
And, there are cases where serializing a list of objects that have a shared base type, ends up with a list of base type copies, losing all derived type data.
This is especially true when cloning, via generic T serialization, from a list of derived objects of a common base.
Quick and Dirty
Obviously, any deep cloning method that uses serialization, will ensure a complete copy.
Good reference: https://medium.com/@dayanandthombare/object-cloning-in-c-a-comprehensive-guide-️-️-d3b79ed6ebcd
This article benchmarks the different methods: https://code-maze.com/csharp-deep-copy-of-object/
https://github.com/havard/copyable
https://github.com/force-net/DeepCloner
Reflection Deep Copy
Here’s a reflective method that performs a deep copy.
It inspects the actual type of the given instance, in case the given instance was passed in as a base type.
Doing so, allows it to work with collections of derived types that share a common base.
NOTE: This method uses reflection, so it’s slow.
NOTE: This method also ignore any private fields of the type, which may lose state during the copy.
static public T DeepCopyReflection<T>(T input)
{
    // Get the actual type of the instance, in case it's a derived type,
    //  but was passed in as a base.
    var type = input.GetType();
    // Get the properties of the fully-derived type...
    var properties = type.GetProperties();
    // Create an instance of the fully derived type, and cast it back down
    //  to the base type given...
    T clonedObj = (T)Activator.CreateInstance(type);

    // Iterate properties of the type...
    foreach (var property in properties)
    {
        if (property.CanWrite)
        {
            object value = property.GetValue(input);
            if (value != null && value.GetType().IsClass && !value.GetType().FullName.StartsWith("System."))
            {
                property.SetValue(clonedObj, DeepCopyReflection(value));
            }
            else
            {
                property.SetValue(clonedObj, value);
            }
        }
    }
    return clonedObj;
}
C# Equality Operator Overloading
Here’s a good example for how to implement operator for equality (==, !=, .Equals()).
This is taken from the Version3 type in OGA.SharedKernel.Lib.
NOTE: These overrides include method signatures for older and newer NET Framework versions.
Equal / Not Equal (==, !=, Equals())
This first block is for equality and inequality overloading.
        #region Operator Overloads

        /// <summary>
        /// Implements the IEquatable interface, same as the native Version class.
        /// </summary>
        /// <param name="v1"></param>
        /// <param name="v2"></param>
        /// <returns></returns>
        // Force inline as the true/false ternary takes it above ALWAYS_INLINE size even though the asm ends up smaller
        [MethodImpl(MethodImplOptions.AggressiveInlining)]
#if (NET452 || NET47 || NET48)
        public static bool operator ==(cVersion3 v1, cVersion3 v2)
#else
        public static bool operator ==(cVersion3? v1, cVersion3? v2)
#endif
        {
            // Test "right" first to allow branch elimination when inlined for null checks (== null)
            // so it can become a simple test
            if (v2 is null)
            {
                // return true/false not the test result https://github.com/dotnet/runtime/issues/4207
                return (v1 is null) ? true : false;
            }

            // Quick reference equality test prior to calling the virtual Equality
            return ReferenceEquals(v2, v1) ? true : v2.Equals(v1);
        }

#if (NET452 || NET47 || NET48)
        /// <summary>
        /// Implements the IEquatable interface, same as the native Version class.
        /// </summary>
        /// <param name="v1"></param>
        /// <param name="v2"></param>
        /// <returns></returns>
        public static bool operator !=(cVersion3 v1, cVersion3 v2) => !(v1 == v2);
#else
        /// <summary>
        /// Implements the IEquatable interface, same as the native Version class.
        /// </summary>
        /// <param name="v1"></param>
        /// <param name="v2"></param>
        /// <returns></returns>
        public static bool operator !=(cVersion3? v1, cVersion3? v2) => !(v1 == v2);
#endif

        #endregion
The above equality logic requires an override of Equals().
Here’s what that looks like:
NOTE: The virtual Equals() method that we override accepts a type of Object.
So, we include an override for that, and a type-specific public overload of the same method name that does the work for both.
#if (NET452 || NET47 || NET48)
        /// <summary>
        /// Implementation of the IEquatable interface.
        /// </summary>
        /// <param name="obj"></param>
        /// <returns></returns>
        public override bool Equals(object obj)
#else
        /// <summary>
        /// Implementation of the IEquatable interface.
        /// </summary>
        /// <param name="obj"></param>
        /// <returns></returns>
        public override bool Equals([NotNullWhen(true)] object? obj)
#endif
        {
            return Equals(obj as cVersion3);
        }

#if (NET452 || NET47 || NET48)
        /// <summary>
        /// Implementation of the IEquatable interface.
        /// </summary>
        /// <param name="obj"></param>
        /// <returns></returns>
        public bool Equals(cVersion3 obj)
#else
        /// <summary>
        /// Implementation of the IEquatable interface.
        /// </summary>
        /// <param name="obj"></param>
        /// <returns></returns>
        public bool Equals([NotNullWhen(true)] cVersion3? obj)
#endif
        {
            return object.ReferenceEquals(obj, this) ||
                (!(obj is null) &&
                _Major == obj._Major &&
                _Minor == obj._Minor &&
                _Patch == obj._Patch);
        }
        /// <summary>
        /// Public override of GetHashCode to satisfy compiler warning for overriding Equality.
        /// </summary>
        /// <returns></returns>
        public override int GetHashCode()
        {
#if (NET452 || NET47 || NET48)
            int hash = 11;
            hash = hash * 18 + this._Major.GetHashCode();
            hash = hash * 18 + this._Minor.GetHashCode();
            hash = hash * 18 + this._Patch.GetHashCode();
            return hash;
#else
            return HashCode.Combine(this._Major, this._Minor, this._Patch);
#endif
        }
Comparison Overloading (>, <, >=, <=)
And, this block is for greater and less than overloading:
        #region Operator Overloads

#if (NET452 || NET47 || NET48)
        /// <summary>
        /// Implements the IEquatable interface, same as the native Version class.
        /// </summary>
        /// <param name="v1"></param>
        /// <param name="v2"></param>
        /// <returns></returns>
        public static bool operator <(cVersion3 v1, cVersion3 v2)
#else
        /// <summary>
        /// Implements the IEquatable interface, same as the native Version class.
        /// </summary>
        /// <param name="v1"></param>
        /// <param name="v2"></param>
        /// <returns></returns>
        public static bool operator <(cVersion3? v1, cVersion3? v2)
#endif
        {
            if (v1 is null)
            {
                return !(v2 is null);
            }

            return v1.CompareTo(v2) < 0;
        }

#if (NET452 || NET47 || NET48)
        /// <summary>
        /// Implements the IEquatable interface, same as the native Version class.
        /// </summary>
        /// <param name="v1"></param>
        /// <param name="v2"></param>
        /// <returns></returns>
        public static bool operator <=(cVersion3 v1, cVersion3 v2)
#else
        /// <summary>
        /// Implements the IEquatable interface, same as the native Version class.
        /// </summary>
        /// <param name="v1"></param>
        /// <param name="v2"></param>
        /// <returns></returns>
        public static bool operator <=(cVersion3? v1, cVersion3? v2)
#endif
        {
            if (v1 is null)
            {
                return true;
            }

            return v1.CompareTo(v2) <= 0;
        }

#if (NET452 || NET47 || NET48)
        /// <summary>
        /// Implements the IEquatable interface, same as the native Version class.
        /// </summary>
        /// <param name="v1"></param>
        /// <param name="v2"></param>
        /// <returns></returns>
        public static bool operator >(cVersion3 v1, cVersion3 v2) => v2 < v1;
#else
        /// <summary>
        /// Implements the IEquatable interface, same as the native Version class.
        /// </summary>
        /// <param name="v1"></param>
        /// <param name="v2"></param>
        /// <returns></returns>
        public static bool operator >(cVersion3? v1, cVersion3? v2) => v2 < v1;
#endif

#if (NET452 || NET47 || NET48)
        /// <summary>
        /// Implements the IEquatable interface, same as the native Version class.
        /// </summary>
        /// <param name="v1"></param>
        /// <param name="v2"></param>
        /// <returns></returns>
        public static bool operator >=(cVersion3 v1, cVersion3 v2) => v2 <= v1;
#else
        /// <summary>
        /// Implements the IEquatable interface, same as the native Version class.
        /// </summary>
        /// <param name="v1"></param>
        /// <param name="v2"></param>
        /// <returns></returns>
        public static bool operator >=(cVersion3? v1, cVersion3? v2) => v2 <= v1;
#endif

        #endregion
NOTE: The above comparison overloads requires a type-specific CompareTo() implementation override.
So, here’s one that you can work from:
NOTE: The virtual CompareTo() method that we override accepts a type of Object.
So, we include an override for that, and a type-specific public overload of the same method name that does the work for both.
#if (NET452 || NET47 || NET48)
        /// <summary>
        /// Implementation of the IComparable interface.
        /// </summary>
        /// <param name="version"></param>
        /// <returns></returns>
        /// <exception cref="ArgumentException"></exception>
        public int CompareTo(object version)
#else
        /// <summary>
        /// Implementation of the IComparable interface.
        /// </summary>
        /// <param name="version"></param>
        /// <returns></returns>
        /// <exception cref="ArgumentException"></exception>
        public int CompareTo(object? version)
#endif
        {
            if (version == null)
            {
                return 1;
            }

            if (version is cVersion3 v)
            {
                return CompareTo(v);
            }

            throw new ArgumentException("Invalid Version Instance.");
        }

#if (NET452 || NET47 || NET48)
        /// <summary>
        /// Implementation of the IComparable interface.
        /// </summary>
        /// <param name="value"></param>
        /// <returns></returns>
        public int CompareTo(cVersion3 value)
#else
        /// <summary>
        /// Implementation of the IComparable interface.
        /// </summary>
        /// <param name="value"></param>
        /// <returns></returns>
        public int CompareTo(cVersion3? value)
#endif
        {
            if (value == null)
            {
                return 1;
            }

            return
                object.ReferenceEquals(value, this) ? 0 :
                value is null ? 1 :
                _Major != value._Major ? (_Major > value._Major ? 1 : -1) :
                _Minor != value._Minor ? (_Minor > value._Minor ? 1 : -1) :
                _Patch != value._Patch ? (_Patch > value._Patch ? 1 : -1) :
                0;
        }
When Two Referenced Assemblies Have Overlapping Namespace
You will come across a problem at some point, where you will use a class, that exists in two libraries that your project references.
This problem is identified by the CS0433 compiler error, “The type exists in both…”.
To workaround this, without updating one of the assemblies, which might not be possible if they are third-party, you can use an alias.
NOTE: This will work with raw assemblies and nuget packages.
To do so, right-click the assembly and give it an Alias, like this:
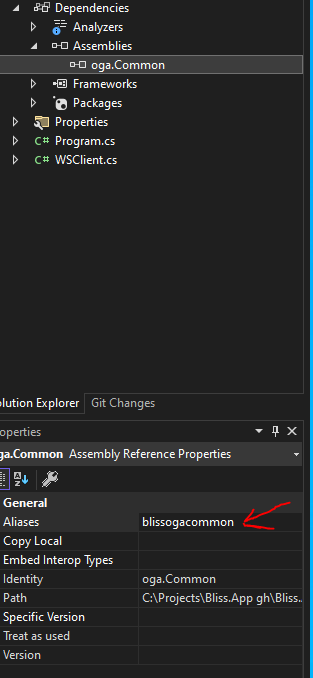
Then, place an extern alias statement for the alias at very top of each source file where you are using the class (whose name exists more than once). Like this:

 This extern alias now shifts the aliased assembly into the alternate name, so you can distinguish them and pick the class from the appropriate library.
You can now reference classes in the aliased assembly, like this:
var fff = new blissogacommon.oga.Common.SpecialTypes.Serialization_Helper();Or, like this:
var fff = new blissogacommon::oga.Common.SpecialTypes.Serialization_Helper();And, still have access to the other class in the non-aliased namespace, like this:
var fff = new oga.Common.SpecialTypes.Serialization_Helper();DotNet Assembly Searching
Here are notes about the Assembly Helper classes that are part of OGA.SharedKernel.Lib and OGA.Common.Lib.
Use Cases
There are several use cases for searching loaded and referenced assemblies for classes and types.
Here are some examples:
-
Identify top-level derived configuration types
This is handy, to determine the most-derived type in an application, so all base types of it can point to it. -
Find all classes that derive from a common base
One example is finding all API controller types, so they can be hooked up for DI. -
Find all types decorated with a particular attribute
This is another way of finding types for a shared purpose, in case they don’t all share a common base. -
Determine if a type is a base for a set of classes
This is handy when we need to determine -
Output assembly list to the log or for dependency admin
This is good diagnostic for a starting process, so a developer can review the startup section of the log to determine if extraneous dependencies exist. -
Output runtime dependencies to a Central Catalog Service
Collecting the list of used and referenced assemblies, of a running process, helps determine what processes need to be updated to current library versions. - Determine if any referenced assemblies are duplicates with different version, PublicKeyToken, or CultureInfo.
This would be libraries that are referenced by other library dependencies, but not loaded, and cannot be located. - Determine if any referenced assemblies are missing.
This usually occurs when two libraries (or a library and the process) have a dependency on a library, but are expecting different versions of it.
How Managed
Since the logic to properly iterate assemblies and references is non-trivial, we’ve centralized it to a single class type called, Assembly Helper.
NOTE: See Revision Info section, below, for updated types and interfaces.
The implementation of this class type, currently exists in OGA.Common.Lib.
But, a static reference is exposed in OGA.SharedKernel, so that libraries can use it as needed.
Doing so, requires three things:
-
IAssemblyHelper - Assembly Helper Interface
-
Assembly Helper Static Reference (held by called: AssemblyHelper_Base)
-
Assembly Helper Implementation (called, AssemblyHelper_v3)
IAssemblyHelper
This interface provides the call surface for all consuming libraries and code to work query assembly data.
It is named, IAssemblyHelper, and located in OGA.SharedKernel.
The interface holds the list of queries that can be performed against assemblies, to support the use cases above.
Static Reference in AssemblyHelper_Base
Also in the OGA.SharedKernel library, is the AssemblyHelper_Base type.
This type includes the public static reference to the available Assembly Helper instance for the process.
The static reference is the calling point for all consuming libraries and code.
The base type is also a sentinel instance of the static reference, until a live Assembly Helper is created.
The idea being that, if the running process (or unit test) doesn’t initialize the Assembly Helper at startup, the base type will throw exceptions for the developer.
Assembly Helper Implementation
There’s a class type, called AssemblyHelper_v2, that inherits from the base and interface, above, that includes the actual query logic.
It currently lives in OGA.Common.Lib.
Initialization
For consumers to have assembly data available, the assembly helper must be initialized on process startup.
This includes process start and unit test startup. See below for how to accomplish each.
During Process Start
During process start, an instance of the Assembly Helper needs to be created and applied to the static reference, so the process and any dependent libraries can use it.
This is done when a Program.cs:Main calls the Consolidate_Main method of Program_Base.cs (from OGA.Common.Lib), here:
// Setup the Assembly Helper, so it's available for any early startup logic...
{
  var ah = new OGA.Common.Process.AssemblyHelper_v3();
  OGA.SharedKernel.Process.AssemblyHelper_Base.SetRef(ah);
}
The above logic is part of Consolidated_Main. It creates and applies the instance for use.
During Unit Tests
Similar to process start, unit tests also need to stand up an instance of the Assembly Helper, so any dependent libraries can use it.
This is done by the Assembly Initialize method of the TestAssembly_Base from OGA.Testing.Lib.
To leverage this, just include a copy of the TestTemplate_Assembly in any unit test project you create.
It will automatically standup the Assembly Helper instance before tests run.
Revision Info
The Assembly Helper is on its third version.
Here are the implementation versions:
- V1 - AssemblyHelper (original, before improvements)
- V2 - AssemblyHelper_v2 (first update)
- V3 - AssemblyHelper_v3 (as of 20250119)
V1
V1 was the first implementation of the Assembly Helper.
It existed as only the AssemblyHelper class type, with no interface or base class.
V2
V2 was introduced when there became a need for libraries to use the functionality of AssemblyHelper, but not require a dependency on OGA.Common.Lib.
To accomplish this, V2 split the Assembly Helper into the three components:
- Interface
- Base
- Implementation
This obviously raised the complexity of the Assembly Helper, but allows libraries to reference just OGA.SharedKernel.Lib, while the parent process references OGA.Common.Lib, and initializes the AssemblyHelper implementation.
As well, this allows future modifications to the class type, while maintaining a common interface for all versions.
Second is a base class that holds the static public instance of the Assembly Helper, once initialized.
This similar to how V1 exposed its static instance.
The interface and base class are both part of OGA.SharedKernel.Lib, so they can be referenced by all libraries and process types.
The implementation (AssemblyHelper_v2) lives in OGA.Common.Lib, and gets initialized on process start or Unit test start.
V3
V3 was created to address the diagnostic need to identify missing libraries and duplicate libraries with differing versions.
This version created a new Interface (v3) that adds a few diagnostic public property lists for duplicate and missing assemblies.
The interface also includes a public property to identify the class version of the implementation, making it easier to future proof.
This version also created a new implementation (v3) that performs the startup checks for duplicate and missing assemblies, and publishes lists of any found.
This version (v3) inherits the V2 interface, providing the same functionality of v2.
C# CLIWrap Chaining Multiple Statements
Normally, each call to CLIWrap is performed inside an independent terminal session.
So, there multiple calls will not affect eachother, like one to set an environment variable, another to change folders, and a third to start a process, with that environment variable and working directory.
A couple of ways exist to still make this happen.
Compound Statements
This is the quick and dirty method of chaining statements together with '&&', such as:
echo 'value' && cd /etc/nging/sites-available && cat ./newconfig.conf
The above is gibberish statements, but illustrates how multiple commands can be chained into one statement.
And, we can pass the above as a single statement to a CLIWrap call.
The downside of this is that, we wouldn't know which failed, if a failure occurred.
With Directives
CLIWrap provides some directives for the more common commands that would be chained together.
WithEnvironmentVariables - allows us to set environment variables for the specific command session.
WithWorkingDirectory - allows us to change the working folder before the command executes.
If your commands that require execution in the same session go beyond the above, you could think about a persistent shell stream. See below.
Persistent Shell Streams
This technique uses a single open CLIWrap session, and we pass command statements through standard input, one at a time.
In this technique, we are ensured that all statements will execute in the same session, and that we get responses and exitcode from each one.
And when we are done, we close the session, similar to a user closing an interactive terminal session with 'exit'.
We close with exactly that as well.
Below is mockup of this reactive (conversational) method of sending subsequent commands, and process the response of each, before exiting the session.
using CliWrap;
using System;
using System.Text;
using System.Threading.Tasks;
using System.IO.Pipelines;

class Program
{
    // Marker to help us identify which line contains the exit code
    private const string ExitCodeMarker = "__EXITCODE__";

    static async Task Main(string[] args)
    {
        // Set up a string builder to accumulate lines of output
        // for parsing in real time
        var outputBuffer = new StringBuilder();

        // Create a persistent bash session
        var bash = Cli.Wrap("/bin/bash")
            .WithStandardInputPipe(PipeSource.Pipe())
            .WithStandardOutputPipe(PipeTarget.ToDelegate(line =>
            {
                // Write everything for debugging/logging
                Console.WriteLine($"[OUTPUT] {line}");

                // Also accumulate in buffer for parsing
                outputBuffer.AppendLine(line);
            }))
            .WithStandardErrorPipe(PipeTarget.ToDelegate(line =>
            {
                // Log errors
                Console.WriteLine($"[ERROR] {line}");
            }));

        var stdin = bash.StandardInput.PipeWriter;
        var bashTask = bash.ExecuteAsync();

        try
        {
            // Example 1: Change directory
            var cdExitCode = await RunCommandAndGetExitCodeAsync(stdin, outputBuffer, "cd /my/dir");
            if (cdExitCode != 0)
            {
                Console.WriteLine($"[INFO] cd failed with exit code {cdExitCode}. Aborting...");
                goto Cleanup;
            }

            // Example 2: Export an environment variable
            var exportExitCode = await RunCommandAndGetExitCodeAsync(stdin, outputBuffer, "export MY_VAR=some_value");
            if (exportExitCode != 0)
            {
                Console.WriteLine($"[INFO] export failed with exit code {exportExitCode}. Aborting...");
                goto Cleanup;
            }

            // Example 3: Start a process
            var processExitCode = await RunCommandAndGetExitCodeAsync(stdin, outputBuffer, "./start_process");
            Console.WriteLine($"[INFO] Process completed with exit code {processExitCode}.");
        }
        finally
        {
        Cleanup:
            // Ensure we exit the shell
            await stdin.WriteAsync("exit\n");
            await stdin.CompleteAsync();
        }

        // Wait for the bash session to end
        await bashTask;
    }

    /// <summary>
    /// Sends a command to the bash session, then echos the exit code, parses it,
    /// and returns the integer exit code to the caller.
    /// </summary>
    private static async Task<int> RunCommandAndGetExitCodeAsync(
        PipeWriter stdin,
        StringBuilder outputBuffer,
        string command)
    {
        // Clear out old data from the buffer
        outputBuffer.Clear();

        // 1) Send the command
        await stdin.WriteAsync($"{command}\n");
        Console.WriteLine($"[COMMAND SENT] {command}");

        // 2) Immediately echo $? along with a unique marker
        await stdin.WriteAsync($"echo \"{ExitCodeMarker}=$?\"\n");

        // 3) Wait for the exit code marker to appear in the output
        int exitCode = await WaitForExitCodeAsync(outputBuffer);

        return exitCode;
    }

    /// <summary>
    /// Periodically checks the outputBuffer for our exit code marker.
    /// Once found, parses and returns the integer exit code.
    /// </summary>
    private static async Task<int> WaitForExitCodeAsync(StringBuilder outputBuffer)
    {
        // We do a simple polling approach here, but you could make it
        // more sophisticated if needed (e.g., reading line by line in real time).
        while (true)
        {
            // Parse the buffer for our exit code marker
            var text = outputBuffer.ToString();
            var markerIndex = text.IndexOf(ExitCodeMarker);
            if (markerIndex >= 0)
            {
                // e.g., line might look like:  __EXITCODE__=0
                var lineStart = text.IndexOf(ExitCodeMarker);
                var lineEnd = text.IndexOf('\n', lineStart);

                // Extract the portion containing the marker and exit code
                string line;
                if (lineEnd > 0)
                    line = text.Substring(lineStart, lineEnd - lineStart);
                else
                    line = text.Substring(lineStart);

                // line should look like "__EXITCODE__=0" or something similar
                var parts = line.Split('=');
                if (parts.Length == 2 && int.TryParse(parts[1], out int code))
                {
                    return code;
                }
            }

            // Not found yet, or can't parse. Wait a bit and try again.
            await Task.Delay(100);
        }
    }
}
Explanation
-
Persistent Shell:
- We start a bash shell using
Cli.Wrap("/bin/bash"), and we capture its stdin, stdout, and stderr.
- We start a bash shell using
-
RunCommandAndGetExitCodeAsync:
- Sends the actual command (e.g.,
cd /my/dir) followed by anechostatement to print"$?"(the exit code) with a unique marker (like__EXITCODE__). - We then wait for that marker to appear in the aggregated output buffer.
- Sends the actual command (e.g.,
-
Parsing the Exit Code:
- When we see a line like
__EXITCODE__=0, we know the exit code is0. - We parse that integer and return it to the caller.
- When we see a line like
-
Reactive Flow:
- Each time we run a command, we do so synchronously in terms of logic:
- Send the command,
- Wait for its exit code,
- Decide what to do next (continue, abort, etc.).
- This simulates a more "conversational" or "interactive" approach rather than blindly sending all commands at once.
- Each time we run a command, we do so synchronously in terms of logic:
-
Polling vs. Event-Driven:
- In the above example, we do a small
while (true)loop withTask.Delay(100)to poll the buffer. - For small commands, this works fine. For more robust scenarios, you could implement a more event-driven approach where each line from stdout is checked in real time as soon as it arrives. But the principle—pushing a unique marker into the output and then scanning for it—remains the same.
- In the above example, we do a small
Key Features of the above approach (taken from a previous attempt that didn't retrieve the exitcode):
-
Dynamic Decision-Making:
- The
SendCommandAndWaitAsyncmethod sends a command and then waits for output before deciding the next action. - You can parse
outputBufferafter each command to make decisions (e.g., check exit codes or specific responses).
- The
-
Real-Time Feedback:
- Output is captured immediately and can be logged, processed, or used to trigger further actions.
-
Seamless Flow:
- Commands are executed only after verifying the outcome of the previous one, making the interaction feel more "conversational."
-
Flexibility:
- You can customize the waiting mechanism (
Task.Delay) or introduce a more sophisticated strategy, like waiting for specific keywords or end markers in the output.
- You can customize the waiting mechanism (
Example Interaction
Suppose you’re running the following commands:
cd /my/dir
export MY_VAR=some_value
./start_process
The program might produce:
[COMMAND SENT] cd /my/dir
[OUTPUT] 0
[COMMAND OUTPUT] 0
[COMMAND SENT] export MY_VAR=some_value
[OUTPUT]
[COMMAND OUTPUT]
[COMMAND SENT] ./start_process
[OUTPUT] Process started successfully
[COMMAND OUTPUT] Process started successfully
Considerations:
- Command Completion Signals:
- Some commands might take longer to execute (e.g.,
./start_process). You might need to enhance the waiting mechanism to look for specific output or end markers (e.g., "done").
- Some commands might take longer to execute (e.g.,
- Error Handling:
- Ensure you handle errors gracefully if commands fail or produce unexpected output.
- Performance:
- Avoid overly aggressive polling with
Task.Delay; look for meaningful signals in the output to avoid unnecessary delays.
- Avoid overly aggressive polling with
Summary
- Yes, you can run multiple commands in a persistent shell using
CLIWrapand still capture each individual command’s exit code. - You just need to manually insert
echo $?(or an equivalent marker-based approach) after each command to retrieve that exit code. - By parsing the marker from stdout, your C# code can determine which exit code belongs to which command in a more "conversational" workflow.
C# Calculate Hash of List<T>
Here's a quick method that will generate a hash from a List of objects:
public int GetHashCodeOfList<T>(IEnumerable<T> list)
{
    List<int> codes = new List<int>();

    foreach (T item in list)
    {
        codes.Add(item?.GetHashCode() ?? 0);
    }

    codes.Sort();

    int hash = 0;

    foreach (int code in codes)
    {
        unchecked
        {
            hash *= 251; // multiply by a prime number
            hash += code; // add next hash code
        }
    }

    return hash;
}
C# Check Two Lists<T> Are Equal
Quick method for check if two given lists of objects are equal:
static public bool AreListsEqual<T>(List<T> list1, List<T> list2)
{
    if (object.ReferenceEquals(list1, list2)) return true;
    return list1.Count == list2.Count && !list1.Except(list2).Any() && !list2.Except(list1).Any();
}
Named Async Locks
As application complexity grows, you will eventually need a scalable way to serialize (or "singulate" to not get confused with object serialization) queries and updates to resources.
For Example
You might have a document platform, that provides collaborative editing.
In which case, there may be multiple clients submitting changes, simultaneously.
And, these changes all have to be incorporated as a serialized/singulated list of individual changes to a document.
Since multiple such documents may be in-flux, the easiest way to perform changes, one at a time, to each is with asynchronous semaphore.
Below is how to manage changes to these documents, using a process-wide set of named, asynchronous locks.
Implementation
For our document editing use case, above, we will use this library: https://github.com/LeeWhite187/AsyncKeyedLock
NOTE: The above repo is actually a fork of the original, here: https://github.com/MarkCiliaVincenti/AsyncKeyedLock
Install AsyncKeyedLock from Nuget.
It's currently published as .NET Standard 2.0, so it's quite compatible across .NET versions.
Best way to use this library is to register it with DI, on startup, with this:
// Setup the global session update serializer, here...
{
    // We want the session serializer to allow one and only one thread/task to update
    //    a particular document (or other top-level entity) at a time...
    services.AddSingleton(sp =>
    {
        // Create an instance that allows only one thread/task in at a time...
        var asyncKeyedLocker1 = new AsyncKeyedLocker<string>(new AsyncKeyedLockOptions(maxCount: 1));
        // Return it as the singleton...
        return asyncKeyedLocker1;
    });
}
The above will register the key locker as a singleton, so it can maintain a list of named locks, across the process.
NOTE: We set the key type to 'string', so that we can name locks by hash string, Guid string, document name, or whatever unique entity identifier we want.
You can now inject it into services, like this:
public class DocumentServices
{
    /// <summary>
    /// This is the local reference to the process's session lock, that we will use to serialize updates to each document.
    /// </summary>
    private AsyncKeyedLock.AsyncKeyedLocker<string> _doclock;

    public DocumentServices(AsyncKeyedLocker<string> doclock)
    {
        this._doclock = doclock;
    }

    ...
}
The above will inject the locker singleton into our document service instance.
Now. Wherever your service makes changes to a particular document, you wrap that block of code with a using statement that retrieves the particular document's lock instance, like this:
public async Task<(int res, DocumentDTO_v1? data)> Update_Document(DocumentDTO_v1 dto)
{
    if (dto == null)
    {
        // Nothing given.
        return (-1, null);
    }
    if (dto.id == Guid.Empty)
    {
        // Empty Id.
        return (-1, null);
    }
    // From here down, we have a valid guid for an id.

    // Changes to the specific document, are serialized in the below async lock.
    using (await this._doclock.LockAsync(dto.id.ToString()))
    {
      ... DO ANY CHANGES TO THE DOCUMENT, SAFELY, HERE...
    }
    // Lock is released at end of the using statement, via the implicit Dispose()

    return (1, dto);
}
Good Article on Net Core With or Without IIS
Publishing and Running ASP.NET Core Applications with IIS - Rick Strahl's Web Log (west-wind.com)
NET Core Func Variables
Here are some use cases for a Func.
Func as Method Callback
If you want to have a lambda that you pass to a method, like a callback or completion handler, here is an example.
Declare the Func, like this:
Func<int, int, Task<int>> sigcallback = async (callbackifr, callbackrds) =>
{
    // The method call, below (Save_Message_toInflightQueue), executes this lambda as a callback, to give us access to the IFR records that were saved.

    // Add the given entry to the listing...
    pairs.Add((callbackifr, callbackrds));
    return 1;
};
The above declaration creates a function (as a variable) that accepts two integers as parameter and returns a Task<int>. This means the Func variable works just like a value-Task, when called.
You can then, pass the above Func variable to a method as a callback, like this:
// Here, we pass the callback into the method...
var res = await Save_Message(somevariable, sigcallback);
The called method has a body like this:
public async Task<int> Save_Message(object msg, Func<int, int, Task<int>> signaling_callback)
{
  if(signaling_callback != null)
  {
    // Pass in the current rds and IFR pair...
    var rescallback = await signaling_callback(r.Item2, r.Item1);
  }

  return (1, (rl.Select(m=>m.Item1).ToArray(), c));
}
C# Unit Tests with Async Task Signature
When writing unit tests, it’s good to standardize as much as possible.
This includes the method signature for each test cases, such as this:
//  Test_1_1_1  Describe the test...
[TestMethod]
public async Task Test_1_1_1()
{
  // Do some testing...
  ...
}
The above test case has a return of async Task.
This allows for the test case to execute both async and non-async code.
However, the compiler will throw a warning for any method that is marked async, but contains only synchronous code.
So, to workaround this, while keeping our standard, we need to suppress the warning.
And, the simplest way to do so, is to add a warning suppress directive to the csproj of every test project.
To do this, add the following to the main property group of every test project, like this:
  <PropertyGroup>
    <TargetFramework>net6.0</TargetFramework>
    <NoWarn>1998</NoWarn>
    ...
Process Logging Behavior
Here’s my current conventions for logging in application processes.
Logging features, here are implemented by the Logging class in OGA.Common.Lib.
Logging Phases
We use three distinct logging phases for an application, each with a distinct purpose.
-
Early Logging
-
Startup Logging
-
Normal Logging
Early Logging
Early logging is done during the process startup period when configuration is not yet loaded to determine what logging targets should be active.
As soon as practical, our starting process sets up logging to the console and a memory logger.
This allows us to capture those early diagnostic moments, before the process has been able to load enough configuration to know where to send log messages… like where the logging path is, what network log sink to use, etc…
In this logging phase, the default application logger instance is configured to send log messages to the console and to a memory logger.
All the logs collected by the memory logger will be played into the durable log store, in the next phase.
Startup Logging
This is the second logging phase of a running process.
This phase logs at a higher log level to capture log messages that may be useful to diagnose process startup issues.
It begins when the process has collected enough config information about logging targets and pathing, and has started logging to a durable log store.
This phase is temporary in nature, as it is only active for a short period at process startup… about 30 seconds.
After the startup logging timer expires, logging switches to the normal logging phase.
Normal Logging
This logging phase uses the regular logging level of the application, and sends logs to the durable log store.
This phase begins after the startup logging phase has ended, and the logging level switches to the normal process level.
Implementation
Here are details for logging setup, teardown and management in a .NET process.
Dependencies
Add reference to the following:
Once references added, below are the blocks of code to add to your Program.cs.
For easier implementation, these are already included in the ProgramBase.cs of OGA.Common.Lib.
So, updating your Program.cs to inherit from that ProgramBase, and calling its Consolidated_Main() will perform the below logging details.
Starting Early Logging
Kicking off early logging is straightforward to do.
It is currently done with this:
OGA.Common.Logging.Logging.Set_AppData_LogTarget("memory");
OGA.Common.Logging.Logging.Set_AppData_LogLevel(
            OGA.Common.Logging.Logging.Startup_Logging_Level.ToString());
if (OGA.Common.Logging.Logging.Start_Logging() < 0)
{
    Console.WriteLine("Failed to start logging.");
    return -1;
}
OGA.SharedKernel.Logging_Base.Logger_Ref?.Debug(
        "*********************************************************Initial Logging Started");
The above is part of the logic in Consolidated_Main.
It will set the log level to the startup level (Debug), and start logging to the memory target.
Startup Logging
Once the logic in Consolidated_Main has progressed enough, to determine process naming and retrieve enough configuration to know where to send logs, it will redirect logging to the normal logging targets, but at the startup log level.
This is done with the below calls:
OGA.Common.Logging.Logging.Set_AppData_LogTarget("file");
OGA.Common.Logging.Logging.Set_AppData_LogLevel(OGA.Common.Logging.Logging.Normal_Logging_Level.ToString());
if (OGA.Common.Logging.Logging.Start_Logging() < 0)
{
    // Failed to start logging.

    Console.WriteLine("Failed to start logging.");
    return -6;
}
// Tell the logger to arm its switchover delay, to normal logging...
OGA.Common.Logging.Logging.Enable_StartupLogSwitch();
OGA.SharedKernel.Logging_Base.Logger_Ref?.Debug(
        "*********************************************************Logging Started");
Normal Logging
The previous code block includes a call to enable startup logging switch:
OGA.Common.Logging.Logging.Enable_StartupLogSwitch();Including this in the startup logging code block, will automatically transition from logging from the startup log level into the normal process log level… after the startup delay has expired.
Characterized Process vs Uncharacterized Process
It’s not uncommon for a compiled process binary to have more than one purpose in life.
And, it’s possible that multiple copies of the same binary will run on a host for different reasons.
This can be the case when you might run multiple copies of the same collector binary, each with a different station assignment (added at the command line).
So. For processes that run multiple copies of the same binary for different purposes, it can be useful for the logger to distinguish log filenames of each assigned station or duty of the process binary.
This allows us to have independent log files, for each station or duty of a given process binary.
To make this work, our logging logic looks at the “Is_ServiceSpecificProcess” flag on OGA.SharedKernel.Process.App_Data_v2.
If this flag is set, the Start_Logging() method call will include the servicename in the log filename.
This Service_Name property is also set in the same struct of: OGA.SharedKernel.Process.App_Data_v2
To use this feature, apply whatever stationid or service context that you need to distinguish process logs to the Service_Name property and set the Is_ServiceSpecificProcess flag to true.
When done, your log file filenames will look like this:
<processname>-<servicename>_Log${date:format=yyyyMMdd}.log
Ex: DataCollector-Station123_Log20240311.log
Dotnet Dev on Linux
To create a new project at the current folder:
dotnet new console --framework net6.0 --use-program-mainTo run the app:
dotnet run
NET Core Error Responses
Here’s a decent mechanism for returning useful errors from a WEB API.
Aside: We have a standing test API (OGA.RESTAPI_Testing.Service) that will return examples of this, here: http://192.168.1.201:4250/swagger/index.html
We can compose an instance of the ProblemDetail class by doing this in an action method:
[HttpGet("Forbidden/withProblemDetail")]
public async Task<IActionResult> ForbiddenwithProblemDetail()
{
    // Create Problem Detail response, as an api-friendly error response for the caller...
    // See this article: <https://learn.microsoft.com/en-us/aspnet/core/web-api/handle-errors?view=aspnetcore-5.0#pd>
    return Problem(
        title: "Resource Access Not Permitted.",
        detail: $"Resource Access Not Permitted.",
        statusCode: StatusCodes.Status403Forbidden
    );
}
For cases where we want an Action’s Exception handler to return a ProblemDetail, we can do this:
[HttpGet("BadRequest/ProblemDetail")]
public async Task<IActionResult> BadRequestwithProblemDetail()
{
    try
    {
        throw new BusinessRuleBrokenException("Some business rules exception occurred.");
    }
    catch (OGA.SharedKernel.Exceptions.BusinessRuleBrokenException bre)
    {
        // Create Problem Detail response, as an api-friendly error response for the caller...
        // See this article: <https://learn.microsoft.com/en-us/aspnet/core/web-api/handle-errors?view=aspnetcore-5.0#pd>
        return Problem(
            title: "Business Rules Exception",
            detail: bre.Message,
            statusCode: StatusCodes.Status404NotFound
        );
    }
    catch(Exception ex)
    {
        return BadRequest(ex.Message);
    }
}
NET Core Test API
We have a standing REST API with various endpoints for simulating different method types, return errors, and such. It’s Swagger page is, here: http://192.168.1.201:4250/swagger/index.html
Six Ways to Multi-Thread
Six ways to initiate tasks on another thread in .NET
Return Multiple Values from Async Method
Async method cannot have Ref or an Out parameters. So, we cannot pass back data from them through typical syntax. This requires us to be a little creative.
One way around this CLR limitation is to use tuples.
Specifically, we can use an implicit tuple, that will give us named properties.
The following is an example of an async method that we want a success response, as well as, some data.
private async Task<(int ReturnStatus, List<string> ResultData)> TryLogin(OpenIdConnectRequest request)
{
    return (-3, new List<string>());
}
The above call returns a tuple that contains two values: a return status value and a list of results.
The list is what we would normally have passed back via an Out parameter.
But, the above method returns both properties by tuple. And, each property is named, unlike old-school tuple.
So, the above method can be used like this:
var foo = await TryLogin;
if(foo.ReturnStatus != 1)
{
  // Failed to login.
  return -1;
}
// If here, the login was successful.

// Get the result data...
var rd = foo.ResultData;
Strongly Typed Constant Parameters
You will eventually run into the need for a function to accept a restricted set of value for a parameter.
One way to solve this is with an enum.
But, enums can be cast and overrode, without concern.
So, here’s a more type-safe method.
This technique uses strongly-typed constants.
References
Here’s some referencing articles:
Here’s an article on how to store the smart enums, from the above article, using EF: Persisting the Type Safe Enum Pattern with EF 6
Ultimately, here’s a nuget package that might be an end-all for us, but it hasn’t been evaluated yet:
Local Implementation
Below, is how we are currently implementing strongly-typed constant parameters.
This class contains the constants and enough logic to make them work:
public class IFQ_MessageType
{
    public static IFQ_MessageType Chat_DeliveryAck {get;} = new IFQ_MessageType(0, "chat.deliveryack");
    public static IFQ_MessageType Chat_Invite {get;} = new IFQ_MessageType(1, "chat.invite.message");
    public static IFQ_MessageType Chat_InviteCancelled {get;} = new IFQ_MessageType(2, "chat.invitecancelled.message");

    public string Name { get; private set; }
    public int Value { get; private set; }

    static public bool Throw_IfNotFound { get; set; } = true;

    private IFQ_MessageType(int val, string name)
    {
        Value = val;
        Name = name;
    }

    public static IEnumerable<IFQ_MessageType> List()
    {
        // Alternately, use a dictionary keyed by value...
        return new[] { Chat_DeliveryAck, Chat_Invite, Chat_InviteCancelled };
    }

    public static IFQ_MessageType FromString(string messagetypestring)
    {
        var val = List().FirstOrDefault(r => String.Equals(r.Name, messagetypestring, StringComparison.OrdinalIgnoreCase));
        if (val == null && Throw_IfNotFound)
            throw new InvalidMessageTypeException(messagetypestring);
        return val;
    }

    public static IFQ_MessageType FromValue(int value)
    {
        var val = List().FirstOrDefault(r => r.Value == value);
        if (val == null && Throw_IfNotFound)
            throw new InvalidMessageTypeException(value.ToString());
        return val;
    }
}
The above class defines some constants, and their string and numeric values.
It contains FromString and FromValue methods for converting the primitive type back into the correct property.
If the FromString or FromValue cannot match its received value to a named property of the class, a null will be returned or an exception thrown (based on the state of: Throw_NotFound.
Here’s the not found exception to that can be used with the above class:
[Serializable]
class InvalidMessageTypeException : Exception
{
    public InvalidMessageTypeException() {  }

    public InvalidMessageTypeException(string name)
        : base(String.Format("Invalid MessageType: {0}", name))
    { }
}
Working Sample Usage
Here’s a working example.
The Handler class contains a method that accepts a strongly-typed parameter, and unwraps the inner value.
public class POCO
{
    public string Name1 { get; set; }
    public string Name2 { get; set; }
}

public class Handler
{
    public async Task<POCO> WrapPOCO(IFQ_MessageType role)
    {
        var p = new POCO();
        p.Name1 = role.Name;
        return p;
    }
}
And, we call the handler method, like this:
  var hr = new Handler();
  var res = await hr.WrapPOCO(IFQ_MessageType.Chat_InviteAccepted);
Consuming Services Inside Startup
During Startup.ConfigureServices
During application startup, the Startup.ConfigureServices method is called to register services and configuration with DI.
This method allows those services to be consumed across the application.
However. During the execution logic in ConfigureServices, there is no active service provider to pull from.
So, we are somewhat prevented from accessing registered elements, as we register others.
But, the IServiceCollection that we register services to (in ConfigureServices), can be “built” to provide a temporary service provider that gives us access to anything already registered.
Here’s an example of how to make a temporary service provider, from inside ConfigureServices:
public void ConfigureServices(IServiceCollection services)
{
    services.AddSingleton<IFooService, FooService>();

    // Build the intermediate service provider
    var sp = services.BuildServiceProvider();

    // This will succeed.
    var fooService = sp.GetService<IFooService>();
    // This will fail (return null), as IBarService hasn't been registered yet.
    var barService = sp.GetService<IBarService>();
}
The above example shows that we have registered a FooService.
And somewhere after that, we build a temporary service provider that can give us an instance of FooService, using the GetService call.
Limitations
Normally, this technique could be used to retrieve registered configuration data, from an IOptions instance.
That’s a fair use of this technique, as config doesn’t during startup.
However. We do need to remember that any singleton instances returned from a temporary service provider, like above, will NOT be the same instance that would be returned from the live service provider.
So. If we truly wanted to access singleton services with this technique, we would have to explicitly instantiate the singleton service, and register that instance with the IServiceCollection.
But in doing so, we already have an object reference of the service, and don’t require this technique.
So, this technique is only valuable for accessing transient or scoped service instances, or retrieving configuration, needed to setup services and other things.
During Startup.Configure
The Configure method gets called after ConfigureServices has registered everything with DI.
So, once the Configure method is executing, we can resolve a healthy service provider, if we need services or config during the Configure method.
We can get a service provider instance in a couple of ways.
One is, we can resolve it from IApplicationBuilder, like this:
public void Configure(IApplicationBuilder app)
{
    var serviceProvider = app.ApplicationServices;
    var hostingEnv = serviceProvider.GetService<IHostingEnvironment>();
}
The above example shows us resolving the root service provider, and using it to get an instance of IHostingEnvironment.
Another way to get a service provider in Configure, is to include the service provider in the method parameters.
Specifically, we can add any DI-registered services/config as a method parameter of Startup.Configure.
We can even add the root service provider, this way.
Here’s an example of directly accessing the service provider in Startup.Configure:
public void Configure(
    IApplicationBuilder application,
    IServiceProvider serviceProvider)
{
    // By type.
    var service1 = (MyService)serviceProvider.GetService(typeof(MyService));

    // Using extension method.
    var service2 = serviceProvider.GetService<MyService>();

    // ...
}
NET Core Background Services
NOTE: Refer to this page for how to register and consume a background service: Consuming NET Core Background Service with DI
General
Lots of the ceremony of a background service has been wrapped up and tested, in this class: BackgroundService_Base
NOTE: As of 20250504, the latest BackgroundService_Base type is in the MOVEELSEWHERE folder of OGA.Tasking.CommonShared_SP. Need to create a library just for it, to centralize the copies of its type.
The previous golden version was found in the MOVEELSEWHERE project of the Chat Message Service solution.
It provides the following features:
-
Can be registered as a HostedService. See: Consuming NET Core Background Service with DI
-
Capable of performing periodic action via looping override
-
Periodic service loop can be set to a fixed delay between loop iterations
-
Overrides for startup and shutdown, allowing setup and cleanup
Minimal Derived Service
A minimal derived backgroundservice class needs only a constructor, like below:
public class Derived_BackgroundService : BackgroundService_Base
{
    public Derived_BackgroundService(IServiceProvider serviceProvider) : base(serviceProvider)
    {
    }
}
The above example shows a simple constructor that does the following:
-
Accepts a service provider instance, required for a singleton service to access DI resources
-
Sets the local classname variable, for log messages
Setup and Teardown Overrides
Obviously, a background service that does real work must do include setup and teardown.
Setup Override
Override the DoStartupActivities, below, with any setup logic your service needs.
You don’t need to call the base method. Any preceding setup is performed before this override.
NOTE: This override must return '1', or the service fails to startup.
protected override int DoStartupActivities(CancellationToken token)
{
  // Do some startup magic, here...
  return 1;
}
Teardown Override
Override the DoShutdownActivities, below, with any teardown logic your service needs.
You don’t need to call the base method. Any mandatory teardown setup, is performed before and after this override.
This teardown method is called by the dispose method of the base class, to ensure everything gets shutdown.
protected override void DoShutdownActivities()
{
  // Do any cleanup, here...
  return;
}
Derived Dispose
If your derived service type has no need to dispose or release resources it owns, then you can rely on the Dispose methods of the background service base, and don’t have to include any Dispose overrides.
But. If your derived service class needs to release resources, you will have to follow a cascade Dispose, and override the protected Dispose method of the base service class.
BE AWARE: The BackgroundService class (from Microsoft) that our Background service base inherits from, has only a public Dispose method, and no protected virtual Dispose. This is NOT the sanctioned Dispose pattern that developers are accustomed to.
So, follow the Dispose guidelines in this article carefully, to ensure that the protected Dispose(true) method of the background service base actually gets called.
What this means, is our background service base class is attempting to correct for the pattern discrepancy, and cannot 100% follow follow the normal pattern of cascaded Dispose, because there is a lingering virtual public Dispose() of the base class, that can be mistakenly overridden.
However. Our background service base class does correct for this, by creating the normal Dispose implementation pattern for derived classes, so that any derived service types can also follow the cascaded Dispose pattern.
See this article for how to implement cascaded dispose in derived types: C# Disposed in Derived Types
Implementation
Getting back to what we were doing…
If your derived service class needs to release resources, in a Dispose, here are the required elements:
-
You will need to include your own private bool flag that your derived type is disposed.
This a normal requirement for any class that implements IDisposable, or derives from a class that does.
See this: C# Disposed in Derived Types -
You will need to override the protected virtual void Dispose(bool disposing) method of the background service base class. This is a requirement, so that your private is disposed flag can be checked and set when Dispose runs.
-
Your protected dispose override method body will need to call the base.dispose(disposing) method at the end of its logic (right before setting your disposed flag).
-
Your protected dispose override method body will need to set the disposed flag of your derived type.
This needs to be the last thing your protected Dispose method does.
NOTE: Your derived type will have its own is disposed flag, which is separate from the is disposed flag of the base class. This is on purpose, to ensure the base can successfully handle its own disposing needs, without being affected by any logic flaw of your code.
NOTE: Your derived type will NOT need to override the public Dispose() method, as this is ONLY by our background base service, to correct for the incorrect pattern usage by the Microsoft backgroundservice class.
Here are the pieces that your derived service type will need:
public class BackgroundService_Base : BackgroundService, IDisposable
{
    private bool _disposecalled = false;

    override protected void Dispose(bool disposing)
    {
        if (!this._disposecalled)
        {
            if (disposing)
            {
                // TODO: dispose managed state (managed objects)
            }

            // Free your additional resources...

            // Call the protected Dispose method of the base...
            base.Dispose(disposing);

            // Set your own is disposed flag...
            this._disposecalled = true;
        }
    }
}
NOTE: Our background service base has no unmanaged resources to release. So, it doesn’t have a destructor (finalizer) override.
But, if our derived type includes unmanaged resources that need to be released, it will require a finalizer override that can call the protected Dispose() method.
Here’s what that finalizer would look like:
    ~BackgroundService_Base()
    {
        // Do not change this code. Put cleanup code in 'Dispose(bool disposing)' method
        Dispose(disposing: false);
    }
Consuming NET Core Background Service with DI
To properly consumes a background service from a controller or another service, it must be registered with DI.
As well, since it’s a background service… it must be running… and probably a singleton.
NOTE: If you are looking for how to generate an instance of ServiceProvider, outside of NET Core runtime, like for a unit test, see this: Duplicating .NET Core DI
See this reference for Host Service vs Background Service: A Complete Guide to Hosted Service(s) in .NET 6 using C# 10
NOTE: If you are looking for how to access DI services, see this: HowTo Access DI Services
NOTE: A Background Service actually derives from IHostedService.
So, it is easiest to derive from BackgroundService and simply override methods as needed.
Without Dependencies
Here’s how to register a background service without any dependencies of its own…
public class Startup
{
	//rest of class
	public void ConfigureServices(IServiceCollection services)
	{
		//rest of method

        // Add the WSHost Manager Service...
        services.AddSingleton<WSHostMgr_Service>();
        services.AddSingleton<IHostedService>(svcprovider => svcprovider.GetService<WSHostMgr_Service>());
    }
}
NOTE: The above has two steps.
First, the class is registered as a singleton. This will cause the DI to return the same instance everytime we ask for it.
As well, the runtime will not actually create the singleton until it is first requested. But, we do that in the next line.
The next line registers the singleton instance as a hosted service.
This is done by getting the singleton instance from the service provider, and returning it in the lambda.
It is then registered as a hosted service, and its StartAsync and ExecuteAsync will be called when the host starts.
With Dependencies
Some background services require dependencies.
Here’s how to register it, if it has dependencies…
public class Startup
{
	//rest of class
	public void ConfigureServices(IServiceCollection services)
	{
		//rest of method

		services.AddSingleton<ILoggerService>(sp =>
		{
			var hostAppLifetime = sp.GetService<IHostApplicationLifetime>();
			return new DatabaseLoggerService(hostAppLifetime);
		});
		services.AddHostedService(sp => sp.GetService<ILoggerService>() as DatabaseLoggerService);
	}
}
NOTE: The above example includes a lambda, which will retrieve any dependencies the singleton requires, and instantiate it, explicitly.
Then, the singleton will be added as a Hosted Service.
NOTE: This is a two-step process. One step, registers the service to it is accessible with DI requests.
The second step, gives it to the IHost to start and stop it as a Hosted Service.
Passing Service Provider
Since hosted services are long-lived, it is sometimes easier for them to be responsible for their own scoped dependencies.
To allow for this, we can simply give the hosted service an instance of IServiceProvider in its constructor.
Below is an example of doing that…
public class Startup
{
	//rest of class
	public void ConfigureServices(IServiceCollection services)
	{
		//rest of method

        // Add a singleton to DI, so controllers can access it....
        services.AddSingleton<Diagnostic_ForwardingService>(sp =>
		{
		     return new Diagnostic_ForwardingService(sp);
		});
        // Add the service as a hosted service, but do it via DI...
		services.AddHostedService(sp => sp.GetService<Diagnostic_ForwardingService>() as Diagnostic_ForwardingService);
	}
}
The above example includes a lambda in the Add Singleton call that will explicitly create an instance of the service, including giving it the Service Provider instance.
Then, the service is retrieved from DI, and added as a Hosted Service.
Fail-Early Startup
Below is an example of registering a Hosted Service that includes some setup and starting it, before the IHost does, to ensure it fails quickly and controllably.
public class Startup
{
	//rest of class
	public void ConfigureServices(IServiceCollection services)
	{
		//rest of method

        services.AddSingleton<WSHostMgr_Service>();
        services.AddHostedService<WSHostMgr_Service>(svcprovider =>
        {
            // Get the singleton instance that we just registered...
            var svc = svcprovider.GetService<WSHostMgr_Service>();

            // NOTE: The singleton instance has not been started yet.
            // So, we can set it up, now.
            // Give it the delegate for client version evals...
            svc.DelVersionCompare = WSHost_AppVersionEvaluator.Determine_WSHostVersionRange_forClientVersion;
            // Tell it to startup...
            if(svc.StartupMgr() != 1)
            {
                OGA.SharedKernel.Logging_Base.Logger_Ref?.Error($"WSHostMgr_Service failed to startup.");
                Console.Error.WriteLine($"WSHostMgr_Service failed to startup.");
                throw new Exception("WSHostMgr_Service failed to start.");
            }
            // If here, the service has started.

            // Register the hosted service...
            return svc;
        });
    }
}
In the above example, the service is registered as a singleton.
Then, a lambda is used in the Add Hosted Service call, which will get the singleton from DI, do some setup of it, start it to ensure it works, and return it to the Add Hosted call.
C# Disposed in Derived Types
People make lots of references to Microsoft articles about how to properly handle Dispose in derived class types.
But, there is literally no article on the Microsoft that actually shows this use case.
So, here’s a collected method, based on a few references, testing, and honing from years observing subtle edge cases.
References
Here are references that was useful:
http://reedcopsey.com/2009/03/28/idisposable-part-1-releasing-unmanaged-resources/
http://reedcopsey.com/2009/03/30/idisposable-part-2-subclass-from-an-idisposable-class/
Dispose Simple Case
First, the simple case of a class that implements IDisposable.
Here’s what a minimal class will contain if implementing IDisposable:
    public class ServiceA : IDisposable
    {
        private bool _isdisposed = false;

        public ServiceA() { }

        // // TODO: override finalizer only if 'Dispose(bool disposing)' has code to free unmanaged resources
        // ~ServiceA()
        // {
        //     // Do not change this code. Put cleanup code in 'Dispose(bool disposing)' method
        //     Dispose(disposing: false);
        // }

        protected virtual void Dispose(bool disposing)
        {
            // Do dispose work if we have not already...
            if (!_isdisposed)
            {
                // First time through, or we failed to finish before.
                if (disposing)
                {
                    // TODO: dispose managed state (managed objects)
                }

                // Release unmanaged resources...
            }

            // Call the base dispose...
            base.Dispose(disposing);

            // Set our disposed flag...
            _isdisposed = true;
        }

        /// <summary>
        /// Public dispose method.
        /// </summary>
        public void Dispose()
        {
            // Do not change this code. Put cleanup code in 'Dispose(bool disposing)' method
            Dispose(disposing: true);

            GC.SuppressFinalize(this);
        }

        public void DoSomething()
        {
          // Throw an exception if we are already disposed...
          if(this._isdisposed)
            throw new ObjectDisposedException();
        }
    }
The above example follows the classic, off the shelf, IDisposable implementation.
It includes several things:
-
Derives from IDisposable
This allows runtime services, like a DI container, to know that instances of ServiceA must be disposed after use. -
Private is disposed flag
This is set in our protected Dispose method, and observed by our class logic, to prevent instance usage after disposal. -
Commented out Finalizer
The finalizer (destructor) of our ServiceA class is commented out, as it doesn’t currently have any unmanaged resources that need to be released during disposal.
If we do add logic to our protected Dispose method to release unmanaged resources, we simply uncomment the finalizer, so it will call our protected Dispose(false) method. -
Protected Dispose method
This is the protected Dispose method of our class.
We add logic to this method to release all of the managed and unmanaged resources that our type holds.
This method will only perform actions once, since it checks our _isdisposed flag on entry, and sets the flag on exit.
NOTE: This protected Dispose method is virtual, so it can be overridden in derived class types, to add additional disposal logic. -
Public Dispose Method
This is the public dispose method for our class and ALL derived types.
There is no need to modify this method, nor to derive from it.
All resource releasing and teardown logic should go in the protected Dispose method.
All derived types will call this same public Dispose method on the base class.
One exception to this rule, is that you may want to add some logging to the public Dispose method, so that you can have a diagnostic timestamp of when Dispose was called.
Deriving from IDisposable Types
The previous example is a simple class that implements IDisposable.
And, it works for lots of use cases.
But as we mentioned at the beginning of this article, the documentation for a proper cascade Dispose pattern is scarce.
Here’s how to handle Dispose in different scenarios of derived types.
Derived Type with Nothing to Release
There is a fallacy for the simple derived type, that you don’t require any additional Dispose handling or overrides. But, this is not true, without breaking encapsulation, and creating a state safety issue.
Most articles will indicate that this scenario (derived type with nothing to release) doesn’t require any additional dispose logic.
But, they forget that the Dispose pattern still requires for a class’s method to reject execution by throwing an ObjectDisposedException.
And, throwing this exception is not possible in a derived type, without access to the _isdisposed flag of the base class, which is private.
So, any methods in your derived type cannot see the state of that flag (of the base), and throw exceptions as required by the Dispose pattern.
Now. You could choose to simply make the _isdisposed flag of your base class as protected, to allow visibility, and fix this.
But, that creates other problems that your base class no longer has positive control over its own state, because that the state safety of the base class is in questions.
So, to properly derive from a disposable class type, and still be able to throw ObjectDisposedExceptions, you must as well, override the protected Dispose call, and set your own private _isdisposed flag.
What this means is that for derived types with nothing to release, must follow the same pattern as derived types with resources to release.
We will show it, next.
Derived Type with Stuff to Release
If your derived type includes resources that need released, or your derived type has a need to know when it’s been disposed, both of these scenarios will follow the pattern below.
This example is a class, ServiceB, that derives from a disposable type, ServiceA.
Here’s what that minimal derived type looks like:
    /// Derives from ServiceA, and chains the Dispose methods.
    public class ServiceB : ServiceA, IDisposable
    {
        // Has its own disposed flag...
        private bool _isdisposed = false;

        override protected void Dispose(bool disposing)
        {
            // Do dispose work if we have not already...
            if (!_isdisposed)
            {
                // First time through, or we failed to finish before.
                if (disposing)
                {
                    // TODO: dispose managed state (managed objects)
                }

                // Free any resources of our derived type...
            }

            // Call the dispose on the base class...
            base.Dispose(disposing);

            // Set our own is disposed flag...
            _isdisposed = true;
        }

        public void DoSomethingElse()
        {
          // Throw an exception if we are already disposed...
          if(this._isdisposed)
            throw new ObjectDisposedException();
        }
    }
The above implementation includes our own is disposed flag for the derived type.
And, it overrides the protected Dispose method, in order to check and set its own is disposed flag, and to release any resources that the derived type holds.
If your derived type includes unmanaged resources, you will need to add a finalizer (destructor) that calls Dispose(false)…. if your base class does not already include this.
And, the way that the dispose pattern is implemented, each class’s dispose logic will only run once, if its is disposed flag is already set.
So, there is no concern for double calls to Dispose when multiple finalizers are called for the same instance.
Duplicating .NET Core DI
NOTE: If you are looking for how to access DI services, see this: HowTo Access DI Services
Here are the steps to duplicating the .NET Dependency Injection process, to create a ServiceProvider instance. This is especially useful in unit testing, for classes and services that need the IServiceProvider.
Creating a ServiceProvider takes three steps:
-
Initiate the Service Collection
-
Register services
-
Build the Provider
Below is a method call that does the needed steps, and returns a IServiceProvider.
It provides a callback
private IServiceProvider Setup_DI()
{
    // Need a usable reference to the service provider...
    ServiceProvider? _serviceProvider = null;

    // Initiate the service collection...
    IServiceCollection services = new ServiceCollection();


    // Register any services and config to be available via DI...

    //services.Add(new ServiceDescriptor(typeof(InterfaceA), typeof(ClassA), ServiceLifetime.Singleton));
    //services.AddSingleton<InterfaceB, ClassB>();

    // Add a FAKE Object Security Service....
    services.AddScoped<OGA.Auth.OSS.IObjectSecurityService, ObjectSecurityService_Fake>();

    // Declare the remapping class that allows the user management service to look like a directory service, to the User Security Cache...
    // This service is consumed by the constructor of th User Context Caching service.
    services.AddSingleton<OGA.Auth.UserSecContext.IDirectoryService_for_UserSecurityCache_v2, DirectoryService_Adapter_for_USC_v2>();
    // And as well, register the directory service adapter, directly, as we require other methods of it, that are not in the interface...
    services.AddSingleton<DirectoryService_Adapter_for_USC_v2, DirectoryService_Adapter_for_USC_v2>();

    // Declare the User Security Context Caching service...
    // This service provides group membership and account status for the JWT middleware and Object Security Service.
    services.AddScoped<OGA.Auth.UserSecContext.USecContext_CachingAgent_v2>();


    // Create the ServiceProvider, so it can be used...
    _serviceProvider = services.BuildServiceProvider();


    // Return the provider...
    return _serviceProvider;
}
Unit Testing with IServiceProvider
When you create unit tests for class types that directly use DI to retrieve dependencies, you will need a way to give them a reference to a service provider (IServiceProvider).
This is transparently done by the runtime.
But, we have to mimic it for unit testing.
Here's how to make it happen.
ServiceProviderHelper
There's a class in OGA.Testing.Lib called, ServiceProviderHelper.
It includes a single call that will create and return a baseline service provider for you.
The baseline instance won't have anything in its DI registry, by default.
But, you can pass a callback to it, to register whatever your tests require.
To use it, you will need to compose a callback that registers any config and services that your test requires.
It will look something like this:
private void AddCustomServices(IServiceCollection services)
{
    // Firstly, register the root configuration instance with services, like the net core DI runtime does...
    services.AddScoped<IConfiguration>(_=> config);
    //services.AddScoped<IConfiguration, IConfigurationRoot>(_=> config);


    // Register the IOptions instance of our config...
    services.ConfigureWritable<BuildDataConfig>(cfgsection);


    // Register our mock service...
    // NOTE: We will let DI figure out constructor parms.
    services.AddSingleton<Service_Mock_A>();
    //services.Add(new ServiceDescriptor(typeof(InterfaceA), typeof(ClassA), ServiceLifetime.Singleton));

    // Register another service that also uses the same config...
    services.AddSingleton<Service_Mock_B>();
}
Then, you include in your unit test or test setup logic a call to Setup_DIProvider(), and give it the above callback.
Like this:
// Get a service provider with registered things for the test...
IServiceProvider sprov = ServiceProviderHelper.Setup_DIProvider(AddCustomServices);
Unit Testing Conventions
Suppress Async Warning Project-Wide
Since we have several calls to base classes for diagnostics and such that are async, it's a good idea to standardize on all Test methods be async.
The problem is that not every test method contains an awaited call. so, we get compiler warnings for them.
NOTE: This can be added to legacy csproj files, as well (non SDK-based).
To do this, you have to open the csproj file in a text editor, and paste the lines into the top propertygroup block.
To suppress these warnings, add this to the PropertyGroup of the csproj of your Test projects:
    <!-- NoWarn below suppresses CS1998 project-wide -->
    <!-- This suppresses the IDE warning that the async method lack await. -->
    <!-- We default all test methods to async, so the timing and dependency calls are the consistent. -->
    <NoWarn>$(NoWarn);CS1998</NoWarn>
The csproj would look like this:
<Project Sdk="Microsoft.NET.Sdk">

  <PropertyGroup>
    <TargetFramework>net6.0</TargetFramework>
    <ImplicitUsings>enable</ImplicitUsings>
    <Nullable>enable</Nullable>

    <IsPackable>false</IsPackable>
    <IsTestProject>true</IsTestProject>

    <!-- NoWarn below suppresses CS1998 project-wide -->
    <!-- This suppresses the IDE warning that the async method lack await. -->
    <!-- We default all test methods to async, so the timing and dependency calls are the consistent. -->
    <NoWarn>$(NoWarn);CS1998</NoWarn>
  </PropertyGroup>

  ...
</Project>
VS IDE Suppress Compiler Warnings Project Wide
There are some cases where it is necessary to suppress IDE compiler warnings that apply to the entire project.
This can be warnings that occur several times across the source files.
Or, it can be for a compiler warning that the project’s framework target is out of support.
This latter case is currently a problem for any VS solution that is maintaining older framework targets, such as for NET5.0 which is out of support (as of 2022, I think).
Anyway. To suppress a compiler warning for an unsupported framework target, or to suppress many occurrences of the same error, edit your project file by adding a NoWarn entry to the PropertyGroup that lists the Target Framework.
For example, the following project file fragment suppresses compiler warnings for NET5 being out of support:
<Project Sdk="Microsoft.NET.Sdk">

  <PropertyGroup>
    <TargetFramework>net5.0</TargetFramework>
    <!-- NoWarn below suppresses NETSDK1138 project-wide -->
    <!-- This suppresses the IDE warning that NET5.0 is out of support. -->
    <NoWarn>$(NoWarn);NETSDK1138</NoWarn>

    ...

  <PropertyGroup>

...
</Project>
In the above example, the NoWarn entry suppresses compiler warning “NETSDK1138“, project-wide.
See this reference for some warnings for obsolete features of NET5: Obsolete features in .NET 5+ - .NET
See this reference for the specific compiler warning that Net5 is out of support: NETSDK1138: The target framework is out of support - .NET CLI
#nullable Warning
If the compiler is giving you warnings about nullable reference types, then you may need to enable nullables in the csproj file.
This can happen when you declare a public class property, like this:
public TaskConfigBase? ConfigBase { get; set; }Since the above property is nullable (has the '?'), the compiler needs to know that it is allowed.
You can suppress the warning for the property, but you likely have it in other places.
As well, you can suppress it for the class's file, but likely have the same thing in others.
The best way to deal with it is to allow nullable across the project.
To do this, add this entry to the PropertyGroup of your csproj file, like this:
<Project Sdk="Microsoft.NET.Sdk">

  <PropertyGroup>
    <TargetFramework>net6.0</TargetFramework>

    <Nullable>enable</Nullable>
  </PropertyGroup>

  ...
</Project>
.NET Framework Unit Testing Issues
Since we have some libraries that still output to NET Framework targets, some workarounds are required because of some design choices that have been made in the MSTest library and Test Explorer.
MSTest Project Styles (SDK vs Non-SDK)
NOTE: This only applies to projects that build for NET Framework (NET Core, Standard, and NET are all SDK-style).
Regardless of which csproj style (SDK or non-SDK) a project uses, a corresponding MSTest project must always adhere to the csproj style that is native for that build target.
This issue really comes into effect for MSTest projects that compile for NET Framework.
If an MSTest project that targets a NET Framework version is using the newer SDK-style csproj layout, any tests it contains will be ignored during discovery, and will not execute (remaining blue in Test Explorer).
For clarity, here’s a list of what csproj styles must be used for what different build targets:
| Compile Target | CSProj Style |
|
NET Framework 4.5.2 |
non-SDK style |
|
NET Framework 4.8 |
non-SDK style |
|
NET 5 |
SDK style |
|
NET 6 |
SDK style |
|
NET 7 |
SDK style |
The positive side of this restriction is that, even though an MSTest framework project (targeting NET Framework) must be non-SDK style, the underlying project under test (referenced by the unit test project) can be either style.
So, we are still allowed to use the SDK-style csproj layout for a NET Framework project.
This is good, since we’ve standardized on using all SDK-style csproj files for older NET Framework libraries and applications.
Coverlet.Collector Usage
This library is only compatible with test projects (csproj files) that use the SDK style.
So, don’t add it to any MSTest projects that target NET Framework.
Choosing Latest MSTest Framework Version
This issue applies to solutions that contain unit testing for multiple NET targets.
Specifically for solutions that include NET Framework targets that are not compatible with newer MSTest framework library versions.
Problem
When the Test Explorer runs in a VS solution, it will look for the latest version of the MSTest framework, as the library version to call.
This causes problems for any solutions that contain test projects that have different versions of the MSTest framework.
Currently, this causes trouble for libraries that target NET4.5.2, as the MSTest framework versions for this target are older than those for NET4.8, 5, 6, and 7.
Here are MSTest framework versions for NET4.5.2:
-
Microsoft.NET.Test.Sdk - v17.3.3
-
MSTest.TestAdapter - 2.2.10
-
MSTest.TestFramework - 2.2.10
Likewise, here are the MSTest framework used by test projects for NET 4.8, NET5, 6, and 7:
-
Microsoft.NET.Test.Sdk - v17.6.2
-
MSTest.TestAdapter - 3.0.4
-
MSTest.TestFramework - 3.0.4
Since the Text Explorer ONLY calls the latest found MSTest framework library version (after scanning all test projects in a solution), any tests for a NET4.5.2 library become incompatible, and their tests remain undiscovered, never execute, and remain blue.
Workaround
The workaround for this is to create a separate solution that only includes the NET4.5.2 MSTest project.
Simply include, in that unit test project, an external dependency to the assembly under test, by adding a Reference and browsing to the bin/debug of the project under test and choosing its project output dll (or exe).
Once this is done, you can run the unit tests on the NET4.5.2 library as normal.
It just has to be done in this isolated solution.
NOTE: If your unit test includes any SharedProject references, you can add them as an “Existing Project” by pointing back to where they are in the main library solution.
An example of this being done is in the OGA.TCP.Lib project, where it includes build target for NET4.5.2, which requires the above testing isolation, workaround, and some SharedProject references in the unit test project.
Unit Testing for an Exception
Sometimes, a unit test needs to ensure a particular exception type occurs.
Here’s how to check that a particular exception and message occurs.
The catch is that, when executing code inside a unit test framework, such as MSUnit, any exception thrown by code is wrapped in an outer exception by the unit framework.
So, the desired exception must be unwrapped, for interrogation.
The following is a method of ensuring a particular exception type occurs, with a particular message:
try
{
    // Execute the code that will return the exception...
    var pl = NETCore_GenericRepository_Base.QueryHelpers.PaginatedList<GenericRepositoryEF_Tests.TestClass>
                .CreateAsync(query, 1, 0).Result;

    Assert.Fail("An exception should have been thrown.");
}
catch (Exception e)
{
    // Since we are running inside unit testing, our exception type will be an inner exception of the exception we receive.

    // Get the inner exception...
    var ee = e.InnerException;

    // Check its type...
    var etn = ee.GetType().Name;
    if (etn != "BusinessRuleBrokenException")
        Assert.Fail(string.Format("Unexpected exception of type {0} caught: {1}",
                    e.GetType(), e.Message));

    // Check the exception message...
    if(ee.Message != "pageSize invalid. Must be positive.")
        Assert.Fail("Incorrect exception messag.");
}
Unit Test Cheat Sheet
Here’s a list of elements for unit testing in Visual Studio using MSTest.
Documentation for Visual Studio Testing is here: GitHub - microsoft/vstest-docs: Documentation for the Visual Studio Test Platform.
Necessary Packages
The following packages are necessary for unit testing using Visual Studio’s built in MSTest framework:
-
MSTest.TestFramework
-
MSTest.TestAdapter
-
Microsoft.NET.Test.Sdk
-
coverlet.collector
MSTest.TestFramework - is the test library itself. This includes all the classes, attributes, of the testing framework.
MSTest.TestAdapter - is the library that Visual Studio uses to discover and execute tests in your code. Every test suite you use (MSTest, NUnit, etc…) needs a testadapter so Visual Studio can access and execute tests.
Microsoft.NET.Test.Sdk - is the specific sdk for the framework under test.
coverlet.collector - is the test coverage library that is loaded in a generic test project. This can be replaced with another if needed.
Reference Project Test Structure
The library, OGA.Testing.Lib includes a project called, TestTemplate.
This project contains two template classes that provide a common template for all testing projects.
See this article: https://oga.atlassian.net/wiki/spaces/~311198967/pages/191365133/C+Unit+Test+Template+Classes
See this article if you are testing NET Framework versions: .NET Framework Unit Testing Issues
Test Context Access
As the testing framework runs your tests, it tracks progress and results in a TestContext instance.
This object is passed into a test class in a few places, so that your testing logic has access to it.
The TestContext is passed to a test class initializer method (decorated with [ClassInitialize]), so the class initializer has any test info needed for setup.
The TestContext is passed to a test class cleanup method (decorated with [ClassCleanup]), so the class cleanup logic has any test info needed during cleanup.
However. The TestContext given to the test class initializer is not updated during testing. So, it cannot be directly cached by the test class.
Instead. The MSTest framework will look for the following property signature in each test class, and push the current TestContext into it before each test:
[TestClass]
public class YourUnitTests
{
  public TestContext TestContext { get; set; }

  [ClassInitialize]
  public static void TestClassSetup(TestContext context)
  {
    // Copy the given test context instance into our local property...
    // This ensures that all logic in our test class, including class setup, has a consistent reference for test context data.
    TestContext = context;
  }
}
NOTE: The above unit test class contains a property called, TestContext.
This property is set by reflection, by the testing framework before each test, to ensure the test setup method and test logic has access to any context information it needs.
If you have tests that need access to testing context data, include the property, shown above, in your test class.
As well. The class setup method, above, also sets the class’s local testcontext property with what they are given, to ensure that all testing logic has a consistent reference to TestContext data.
See the bottom of this article for details: https://github.com/microsoft/testfx/issues/255
Generic Test Structure
Below is a comprehensive test class structure, including optional method calls for common setup and teardown logic.
NOTE: This is for illustration of the available test life-cycle methods. It is NOT how we are currently performing tests with MSTEST.
using Microsoft.VisualStudio.TestTools.UnitTesting;

namespace MSTestUnitTests
{
  // A class that contains MSTest unit tests. (Required)
  [TestClass]
  public class YourUnitTests
  {
    /// <summary>
    /// This property is automatically populated by the MSTest framework, each time a test starts.
    /// This is how each test is able to access test context properties, such as the test name, during execution.
    /// Each test can access the current testing context, through this property.
    /// See the bottom of this GH issue article for the explanation: https://github.com/microsoft/testfx/issues/255
    /// Also. See this Confluence article for how to setup a unit test:
    ///     https://oga.atlassian.net/wiki/spaces/~311198967/pages/edit-v2/41418763
    /// </summary>
    public TestContext TestContext { get; set; }

    /// <summary>
    /// This method is called before any test class initializers.
    /// It is meant to setup any assembly-wide config, logging, etc.
    /// </summary>
    [AssemblyInitialize]
    public static void AssemblyInit(TestContext context)
    {
      // Executes once before the test run. (Optional)
    }

    /// <summary>
    /// This method is called after all testing and test class cleanup methods have completed.
    /// It is meant to teardown any assembly-wide config, logging, etc.
    /// </summary>
    [AssemblyCleanup]
    public static void AssemblyCleanup()
    {
      // Executes once after the test run. (Optional)
    }

    [ClassInitialize]
    public static void TestFixtureSetup(TestContext context)
    {
      // Executes once for the test class. (Optional)
    }

    /// Called before the first test is run.
    [ClassCleanup]
    public static void TestFixtureTearDown()
    {
      // Runs once after all tests in this class are executed. (Optional)
      // Not guaranteed that it executes instantly after all tests from the class.
    }

    // Called before each test.
    [TestInitialize]
    public void Setup()
    {
      // Runs before each test. (Optional)
    }

    /// Called after each test.
    [TestCleanup]
    public void TearDown()
    {
      // Runs after each test. (Optional)
    }

    // Mark that this is a unit test method. (Required)
    [TestMethod]
    public void YouTestMethod()
    {
      // Your test code goes here.
    }

    [Ignore]
    [TestMethod]
    public void YouTestMethod()
    {
      // Your test code goes here.
    }
  }
}
Necessary Elements
Here are the necessary elements for a test:
-
Tests must be separated into test methods that verify or challenge one aspect of functionality.
-
Each test method needs to be a public instance signature with no arguments, like:
public void TestSomething() {...} -
The test method must be decorated with the
TestMethodattribute -
Test methods must be contained in a class, decorated with the
TestClassattribute
Optional Elements
To reduce the extra fluff and ceremony bulk in test methods, several optional calls can be created to perform setup and teardown at the test level, class level, and assembly/project scope.
Below is a list of these setup and teardown method calls allowed by the framework.
Test Setup and Teardown
These methods bracket each test method, and are called before and after each test in a test class.
These are public void methods with no arguments, and decorated as follows:
    [TestInitialize]
    public void Setup()
    {
      // Runs before each test. (Optional)
    }

    [TestCleanup]
    public void TearDown()
    {
      // Runs after each test. (Optional)
    }
Class Setup and Teardown
These methods bracket all test methods in a single test class, and are called before any test is started in a test class, and after all tests in a test class are complete.
These are static public void methods, with the following signatures and attributes:
    [ClassInitialize]
    static public void TestFixtureSetup(TestContext context)
    {
      // Executes once for the test class. (Optional)
    }

    [ClassCleanup]
    static public void TestFixtureTearDown()
    {
      // Runs once after all tests in this class are executed. (Optional)
      // Not guaranteed that it executes instantly after all tests from the class.
    }
Assembly Setup and Teardown
If you have any project-wide setup and teardown logic that must run before all test methods and class test setup, or must run after all test methods have executed and all class teardown is complete, create an independent class, like the example below, and put this assembly-wide setup and teardown logic in it:
NOTE: The assembly-wide test setup and teardown methods must be: in a class marked TestClass, and have the same signature as the below methods. Missing any of these requirements, will cause the Test framework to not execute your assembly-wide setup/teardown methods.
NOTE: Also. Reflection is used to locate the assembly-wide setup/teardown methods, which has not always been good at drilling through base classes. So, be sure to explicitly include the methods in your project, and do not rely on inheritance. Use the explicit methods in your project to, in turn, call any assembly-wide setup that you leverage in base classes they inherit from.
    [AssemblyInitialize]
    public static void AssemblyInit(TestContext context)
    {
      // Executes once before the test run. (Optional)
    }

    [AssemblyCleanup]
    public static void AssemblyCleanup()
    {
      // Executes once after the test run. (Optional)
    }
Disabled Tests
Marking a Test Method with the [Ignore] attribute, will track it in the test catalog, but it will not execute.
    [Ignore]
    [TestMethod]
    public void YouTestMethod()
    {
      // Your test code goes here.
    }
Execution Flow
This is the order of setup/teardown and test method execution:
AssemblyInitialize - executes before all tests in a project.
    ClassInitialize - executes before all tests in a class.
        TestInitialize - executes before each test
            TestMethod_One
        TestCleanup - executes after each test
        … other tests…
    ClassCleanup - executes after all tests in a class have completed.
    … other test classes…
AssemblyCleanup - executes after all tests have completed.
Test Assertions
In the Microsoft test framework, these are the assertions that are possible:
Assert.Fail("Some failure result message."); // Used as a statement of failure wherever it occurs.
Assert.AreEqual(28, _actualFuel); // Tests whether the specified values are equal.
Assert.AreNotEqual(28, _actualFuel); // Tests whether the specified values are unequal. Same as AreEqual for numeric values.
Assert.AreSame(_expectedRocket, _actualRocket); // Tests whether the specified objects both refer to the same object
Assert.AreNotSame(_expectedRocket, _actualRocket); // Tests whether the specified objects refer to different objects
Assert.IsTrue(_isThereEnoughFuel); // Tests whether the specified condition is true
Assert.IsFalse(_isThereEnoughFuel); // Tests whether the specified condition is false
Assert.IsNull(_actualRocket); // Tests whether the specified object is null
Assert.IsNotNull(_actualRocket); // Tests whether the specified object is non-null
Assert.IsInstanceOfType(_actualRocket, typeof(Falcon9Rocket)); // Tests whether the specified object is an instance of the expected type
Assert.IsNotInstanceOfType(_actualRocket, typeof(Falcon9Rocket)); // Tests whether the specified object is not an instance of type
StringAssert.Contains(_expectedBellatrixTitle, "Bellatrix"); // Tests whether the specified string contains the specified substring
StringAssert.StartsWith(_expectedBellatrixTitle, "Bellatrix"); // Tests whether the specified string begins with the specified substring
StringAssert.Matches("(281)388-0388", @"(?d{3})?-? *d{3}-? *-?d{4}"); // Tests whether the specified string matches a regular expression
StringAssert.DoesNotMatch("281)388-0388", @"(?d{3})?-? *d{3}-? *-?d{4}"); // Tests whether the specified string does not match a regular expression
CollectionAssert.AreEqual(_expectedRockets, _actualRockets); // Tests whether the specified collections have the same elements in the same order and quantity.
CollectionAssert.AreNotEqual(_expectedRockets, _actualRockets); // Tests whether the specified collections does not have the same elements or the elements are in a different order and quantity.
CollectionAssert.AreEquivalent(_expectedRockets, _actualRockets); // Tests whether two collections contain the same elements.
CollectionAssert.AreNotEquivalent(_expectedRockets, _actualRockets); // Tests whether two collections contain different elements.
CollectionAssert.AllItemsAreInstancesOfType(_expectedRockets, _actualRockets); // Tests whether all elements in the specified collection are instances of the expected type
CollectionAssert.AllItemsAreNotNull(_expectedRockets); // Tests whether all items in the specified collection are non-null
CollectionAssert.AllItemsAreUnique(_expectedRockets); // Tests whether all items in the specified collection are unique
CollectionAssert.Contains(_actualRockets, falcon9); // Tests whether the specified collection contains the specified element
CollectionAssert.DoesNotContain(_actualRockets, falcon9); // Tests whether the specified collection does not contain the specified element
CollectionAssert.IsSubsetOf(_expectedRockets, _actualRockets); // Tests whether one collection is a subset of another collection
CollectionAssert.IsNotSubsetOf(_expectedRockets, _actualRockets); // Tests whether one collection is not a subset of another collection
Assert.ThrowsException<ArgumentNullException>(() => new Regex(null)); // Tests whether the code specified by delegate throws exact given exception of type T
Test Parallelization
Normally, tests are executed sequentially, one class at a time, and one method at at time. However, you can allow for multiple tests to be performed in parallel, by defining it at the assembly level, with the following attribute:
[assembly: Parallelize(Workers = 0, Scope = ExecutionScope.MethodLevel)]Setting the ExecutionScope to MethodLevel allows the test runner to execute all tests in parallel.
Setting the ExecutionScope to ClassLevel allows the test runner to execute test classes in parallel, but test methods within a class are serialized.
Omitting this optional attribute, defaults to no all sequential test execution.
C# Unit Test Template Classes
If you are using MSTest as your testing framework, and want to leverage the test functionality from OGA.Testing.Lib, here are the minimal classes and structure you will need.
For a cheat-sheet on MSTest framework usage, see this: Unit Test Cheat Sheet
Dependencies
Aside from the libraries that are automatically included in an MSTest project, these will be required:
Assembly Test Class
The template assembly test class provides common methods like logging.
Create a similar class in your test project, so that logging is automatically enabled.
The latest class definition is here: TestTemplate_Assembly.cs
Here’s the pasted class content:
[TestClass]
public class TestTemplate_Assembly : OGA.Testing.Lib.TestAssembly_Base
{
    #region Test Assembly Setup / Teardown

    /// <summary>
    /// This initializer calls the base assembly initializer.
    /// </summary>
    /// <param name="context"></param>
    [AssemblyInitialize]
    static public void TestAssembly_Initialize(TestContext context)
    {
        TestAssemblyBase_Initialize(context);
    }

    /// <summary>
    /// This cleanup method calls the base assembly cleanup.
    /// </summary>
    [AssemblyCleanup]
    static public void TestAssembly_Cleanup()
    {
        TestAssemblyBase_Cleanup();
    }

    #endregion
}
It’s simple enough, to just copy the above class as your test project’s assembly test class.
Each Test Class
Each top-level test class in your project will require a few elements, in order to access common function.
This is because the MSTest framework doesn’t readily recognize test attributes in base classes.
So, that means several methods must be included in your top-level test class.
The below template test class shows what elements are needed in each of your top-level test classes.
For each test class you create, ensure it includes the methods and properties of the below class template:
The latest class definition is here: TestTemplate_Tests.cs
/// <summary>
/// Base template for unit tests.
/// Provides an example for usage of OGA.Testing.Lib, when making a unit test.
/// NOTE: There is a good bit of ceremony required in a top-level test class.
///       This is because the MSTest framework doesn't handle derived test classes well.
/// NOTE: For proper logging, be sure to include a test class that derives from TestAssembly_Base,
///       or make sure its setup and cleanup methods are called.
/// </summary>
[TestCategory(Test_Types.Unit_Tests)]
[TestClass]
public class TestTemplate_Tests : Test_Base_abstract
{
    #region Setup

    /// <summary>
    /// This will perform any test setup before the first class tests start.
    /// This exists, because MSTest won't call the class setup method in a base class.
    /// Be sure this method exists in your top-level test class,
    ///     and that it calls the corresponding test class setup method of the base.
    /// </summary>
    [ClassInitialize]
    static public void TestClass_Setup(TestContext context)
    {
        TestClassBase_Setup(context);
    }
    /// <summary>
    /// This will cleanup resources after all class tests have completed.
    /// This exists, because MSTest won't call the class cleanup method in a base class.
    /// Be sure this method exists in your top-level test class,
    ///    and that it calls the corresponding test class cleanup method of the base.
    /// </summary>
    [ClassCleanup]
    static public void TestClass_Cleanup()
    {
        TestClassBase_Cleanup();
    }

    /// <summary>
    /// Called before each test runs.
    /// Be sure this method exists in your top-level test class, and that it calls the corresponding test setup method of the base.
    /// </summary>
    [TestInitialize]
    override public void Setup()
    {
        //// Push the TestContext instance that we received at the start of the current test,
        ////    into the common property of the test base class...
        //Test_Base.TestContext = TestContext;

        base.Setup();

        // Runs before each test. (Optional)
    }

    /// <summary>
    /// Called after each test runs.
    /// Be sure this method exists in your top-level test class,
    ///    and that it calls the corresponding test cleanup method of the base.
    /// </summary>
    [TestCleanup]
    override public void TearDown()
    {
        // Runs after each test. (Optional)

        base.TearDown();
    }

    #endregion


    #region Test Methods

    [TestMethod]
    public async Task Test_1_1_1()
    {
        OGA.SharedKernel.Logging_Base.Logger_Ref?.Debug(
            $"{TestContext.ManagedType}:{TestContext.TestName} - " +
            "Test started.");

        if (1 != 1)
            Assert.Fail("Wrong Value");
    }

    #endregion
}
It’s simple enough to copy the properties and methods from the above class, into each of your top-level test classes.
Xamarin
.NET iOS Runtime Limitations
Here’s some notes on the limitations imposed by IOS for Xamarin and MAUI applications.
These apply to both Xamarin and MAUI apps written for iOS.
Basically, the iOS kernel prevents any application from generating dynamic code at runtime.
So, any usage of JIT or other dynamic code generation will cause a runtime error in iOS.
For this, all code must be statically compiled ahead of time (AOT).
This may pose a challenge during development, because the Mono runtimes support some functionality, that may work on Windows or Android.
But, it may very well cause errors in iOS because all code is static compiled by the Xamarin.IOS compiler.
Here’s the list of disallowed dynamic code generation:
-
The System.Reflection.Emit is not available.
-
No support for System.Runtime.Remoting.
-
No support for creating types dynamically (no Type.GetType ("MyType`1")), although looking up existing types (Type.GetType ("System.String") for example, works just fine).
-
Reverse callbacks must be registered with the runtime at compile time.
The above are explained here: https://learn.microsoft.com/en-us/previous-versions/xamarin/ios/internals/limitations
How to Evaluate AOT Compatibility
This article includes steps to use Roslyn and AOT tooling to inspect your code and produce warnings if it’s not AOT compatible: https://devblogs.microsoft.com/dotnet/creating-aot-compatible-libraries/
PostgreSQL DotNet DataType Mapping
Here’s a list of .NET datatypes, and how best to store each one.
|
.NET Datatype |
PostGreSQL DataType |
|---|---|
|
datetime (UTC) |
timestamp without time zone |
|
Guid |
uuid |
|
float |
real |
|
double |
double precision |
|
bool |
boolean |
|
decimal |
numeric |
|
string (unlimited size) |
text COLLATE pg_catalog."default" |
|
string (limited but unfixed) |
character varying(50) COLLATE pg_catalog."default" |
|
int32 |
integer |
|
int64 |
bigint |
|
DMClassName (string) |
character varying(50) COLLATE pg_catalog."default" |
|
DMClassVer (int) |
integer NOT NULL |
|
Id (Guid) |
uuid NOT NULL |
|
Id (int) |
integer NOT NULL |
|
Phone Number (string) |
character varying(20) COLLATE pg_catalog."default" |
|
Company (string) |
character varying(100) COLLATE pg_catalog."default" |
|
IconName (string) |
character varying(50) COLLATE pg_catalog."default" |
Missing AspNetCore Nuget Packages
There are several aspects of an ASP Net Core web API that cannot be placed in a class library without a little extra care. This is because Microsoft decided to remove “many of the core assemblies” from nuget packages for the ASPNetCore, when Net Core 3.0 was published, and has not been restored as of NET 6.0.
See this reference for why: Use ASP.NET Core APIs in a class library
So, if you run into a situation where you are trying to create, for example, a Controller class in a class library project, you will not find any Nuget package for the ControllerBase class (in the Microsoft.ASPNetCore.MVC) namespace.
To rectify this, you must manually add a framework reference to the project.cs file that points to “Microsoft.AspNetCore.App”.
This is what the project.cs file would look like with the framework reference added:
<Project Sdk="Microsoft.NET.Sdk">

  <PropertyGroup>
    <TargetFramework>net6.0</TargetFramework>
  </PropertyGroup>

  <ItemGroup>
    <FrameworkReference Include="Microsoft.AspNetCore.App" />
  </ItemGroup>

</Project>
This will need to be done for Controller classes that derive from the base, as well as, references to the IWebHostEnvironment environment.
Ubuntu: How to Kill DotNet Runtime
Sometimes, a a dotnet runtime closes without releasing a listening port.
This will prevent it from restarting, because the port is already in use.
While running the dotnet run if you stop the server using ctr + z then it Ctrl+z sends the SIGTSTP (Signal Tty SToP) signal to the foreground job but don't actually stop the running kestrel server, so you have to mannualy end the process of the kestrel server.
SOLLUTION Only use ctr + c to stop the kestrel server, actually its even displayed on the shell while you run dotnet run.
To manually kill the kestrel server, use this command to get the running process that is listening on port 5000:
sudo lsof -iTCP -sTCP:LISTEN -P | grep :5000Then, kill the process with:
sudo kill -9 PID
HowTo Run DotNet Core App as Standalone
How to startup a net core application and specify the listening IP address and port:
exename.exe run --urls "http://192.168.1.110:6000"Here's an alternate for starting a service that exists as a dll:
dotnet OGA.HostControl.Service.dll --urls http://192.168.1.110:6000If the process requires more than one listening url, do this:
dotnet OGA.HostControl.Service.dll --urls http://192.168.1.110:6000;http://172.17.0.1:4180
Cancellation Token as Method Parameter
When writing a method that accepts a cancellation token, the method will need to deal with a passed null token.
To do so, the method should accept the token parameter like this:
public async Task<int> DoSomething(CancellationToken ct = default(CancellationToken))
{
  ...
}
.NET Process Boilerplate
Exploring standardized boilerplate for a variety of process types.
Here's a known list of process types:
- Windows Form running as a short-lived client application
- Long-running Windows Service.
- Long-running Task Tray app.
- Short-lived admin task.
- Camunda worker service.
General Process Actions
- Startup Debug Hooking
- Hookup Unhandled Exception Handler
- Name the current thread
- Assembly and Dependency Identification
- Load Global App Data (app name, appid, runtimeid, installid, version, etc)
- Memory Logging Setup
- Argument Collection
- OS Verification Check
- Configuration Service
- Locate HCS Instance
- Secrets Service
- Logging Service
- Telemetry Service
- Status Publishing Service
Startup Debug Hooks
Top of Program:main, we include an optional debug spin-wait.
This is triggered by a command-line argument to debug the process.
If activated, the process will wait for a debugger to connect, so early startup activities can be diagnosed.
See this page for implementation details: DotNet Startup Remote Debugging Hook
Secrets Service
- Initial Process Secret - SPIRE-given secret, used to retrieve client token for secrets access.
- Secrets - pulled from central secrets store
Configuration Service
Logging Service
Manages logging for the process:
- Performs logging setup for the process
- Sets up the NLog instance (or, whichever is used)
- Retrieves any static config of where to store or ship logs.
- Folder Locations - for log files and local configuration
Telemetry Service
Publishes action spans and metrics to a central collector.
Status Publishing Service
For publishing when a process starts, ends, errors, and periodically while running.
This service is responsible for publishing process metadata, such as:
- App Name
- AppId, RuntimeId, InstallationId
- Exe name
- Exe version and build number
- Start Time
- Machine Host
- Environment
- All dependencies and versions
- Source Repository URL and Rev
- Status: starting, running, shutting down
- Where logs are stored
Updating Controls from Non-GUI Thread
Here are a couple methods for how to update form controls from a non-GUI thread.
Explicit Setter Method
The following is an example method that can be called by non-GUI thread.
It first checks if running on the GUI thread.
If not, it will invoke a delegate (onto the GUI thread) that calls the same method.
If on the GUI thread, execution drops to the method bottom that does the update, on the GUI thread.
private void Append_Update_Status(string msg)
{
    if (this.InvokeRequired)
    {
        this.Invoke((MethodInvoker)delegate
        {
            Append_Update_Status(msg);
        });

        return;
    }

    this.txtUpdateStatus.Text = this.txtUpdateStatus.Text + msg + "" + "\r\n";
}
Generic Property Helper
Here's a helper class that you can leverage, to update any Control property from a non-GUI thread.
It will perform the Invoke work for you.
private delegate void SetControlPropertyThreadSafeDelegate(Control control,
                                                            string propertyName,
                                                            object propertyValue);

public static void SetControlPropertyThreadSafe(Control control,
                                                string propertyName,
                                                object propertyValue)
{
    // See if we are not on the GUI thread.
    if (control.InvokeRequired)
    {
        // Passa message to the GUI thread to update the control.
        control.Invoke(new SetControlPropertyThreadSafeDelegate(SetControlPropertyThreadSafe),
                        new object[] { control, propertyName, propertyValue });
    }
    else
    {
        // We are on the GUI thread.

        // Update the control.
        control.GetType().InvokeMember(propertyName,
                                        System.Reflection.BindingFlags.SetProperty,
                                        null,
                                        control,
                                        new object[] { propertyValue });
    }
}
You can call it, like this:
static public void Update_Form_Status(string msg)
{
  FormHelpers.SetControlPropertyThreadSafe(formcontrol, nameof(Control.PropertyName), msg);
}
VS Project Conditional Constants
When developing cross-platform libraries, you will have the need to enable and disable different parts of your source code based on what statements or functions work on each platform.
For example: Processes are queried differently in Windows than linux.
And, command line interaction is different, as well.
But, we still want to have the same method signatures and calls, for each platform, so that our libraries can be used in both operating systems, with minimal friction.
The easiest way to do this, is to add preprocessor directives (#if).
Here's an example of a declaration that is OS-dependent:
#if Windows
        static private System.Threading.Mutex _processmutex;
#elif Linux
        FileStream? _processmutex;
#endif
When compiled for Windows, the above declares a Mutex as the process mutex.
But, when compiled for Linux, the above declares a FileStream instance as the process mutex.
The compiler achieves the conditional compilation based on recognizing the constants 'Windows' or 'Linux'.
These constants are set, based on, if the project is set to compile as: DebugWin or DebugLinux.
We use a special PropertyGroups, each with a condition that recognizes the compiler output, and defines the required constants.
The property groups look like this:
  <PropertyGroup Condition="$([System.String]::Copy($(Configuration)).EndsWith('Win'))">
    <DefineConstants>$(DefineConstants);Windows;NET6</DefineConstants>
  </PropertyGroup>

  <PropertyGroup Condition="$([System.String]::Copy($(Configuration)).EndsWith('Linux'))">
    <DefineConstants>$(DefineConstants);Linux;NET6</DefineConstants>
  </PropertyGroup>

  <PropertyGroup Condition="$([System.String]::Copy($(Configuration)).EndsWith('OSX'))">
    <DefineConstants>$(DefineConstants);OSX;NET6</DefineConstants>
  </PropertyGroup>
To correctly enable one of these, you need to update your project configurations from the default: Debug;Release.
To the new:
- DebugWin
- DebugLinux
- ReleaseWin
- ReleaseLinux
This can be done by setting the Configurations property in the main PropertyGroup of your project, like this:
<Configurations>DebugWin;ReleaseWin;DebugLinux;ReleaseLinux</Configurations>Once done, selecting a configuration that ends in 'Win', will compile the Windows sections of source.
And, selecting a configuration that ends in 'Linux', will compile the Linux sections of source.
.NET Core In-Memory Cache
Here is a working method for using the In-Memory cache.
For a thread-safe cache update, see the example at the bottom.
Assimilate this into a working project:
In-Memory Caching in ASP.NET Core - Code Maze
Understanding & Implementing Caching in ASP.NET Core | Mitchel Sellers
Distributed caching in ASP.NET Core | Microsoft Learn
Response Caching Middleware in ASP.NET Core | Microsoft Learn
Cache in-memory in ASP.NET Core | Microsoft Learn
In-Use Example
Here’s an implementation of the Memory Cache, as it serves a lookup for user group memberships.
NOTE: This example is not thread-safe for writes. See the bottom of this page for an example with thread-safe cache updates.
public string[] GetGroups_for_UserID(string userid)
{
    // Formulate a cache key for the user context...
    // We prepend the type of entry in the key, to ensure no overlap occurs with other cache entry types.
    string usecckey = "usec:" + userid;

    // First, check the cache for a hit...
    if (this._cache.TryGetValue(usecckey, out string[] data))
    {
        // We got a cache hit.
        // Will use that.
    }
    else
    {
        // Not in the cache.
        // We will look it up, and cache it for later.

        // Lookup the groups for the user...
        data = SomeRESTCLientCalltoLookupUSerSecContext(userid);

        // And, store it in the cache...
        var ceo = MOVETHISELSEWHERE.CachingOptions.Get_MemCacheOptions();
        this._cache.Set(usecckey, data, ceo);
    }

    // Return the group data we collected...
    return data;
}
The above method sits in a service that accepts a memory cache instance in its constructor, like this:
public class UserSecurityService : IUserSecurityService
{
    IMemoryCache _cache;

    public UserSecurityService(IMemoryCache cache)
    {
        this._cache = cache;
    }
As well, each cache entry add requires a set of options.
These are configured as such:
static public MemoryCacheEntryOptions Get_MemCacheOptions()
{
    var ceo = new MemoryCacheEntryOptions()
        .SetSlidingExpiration(TimeSpan.FromSeconds(60))
        .SetAbsoluteExpiration(TimeSpan.FromSeconds(3600))
        .SetPriority(CacheItemPriority.Normal)
        .SetSize(1024);

    return ceo;
}
NOTE: The above call is an easily static method that can be used anywhere, that a default cache policy needs.
And last, using the memory cache in a top-level binary does require DI registration of the memory class.
Here’s an example of how to add the memory cache to DI services:
// Since we do leverage Memory Cache in Security Directory and UserContext lookups,
//    we need to ensure the caching service is available...
// This includes services such as: DirectoryService_Adapter_for_USC and cUserSecurityService.
// And, we add it here, in case memory cache was not included in the choice of API level (above).
services.AddMemoryCache();
Call that in your startup.cs
Thread Safe Cache Updates
If your implementation requires thread-safe cache updates, as most real-world implementations do, then follow this variation of the GetGroups_for_UserID method example:
Here’s the source article that explains the reasons for the double check: Async-Lock Mechanism on Asynchronous Programing
public string[] GetGroups_for_UserID(string userid)
{
    // Formulate a cache key for the user context...
    // We prepend the type of entry in the key, to ensure no overlap occurs with other cache entry types.
    string usecckey = "usec:" + userid;

    // First, check the cache for a hit...
    // See this for memory cache implementation notes:
    //  https://oga.atlassian.net/wiki/spaces/~311198967/pages/93159425/NET+Core+In-Memory+Cache
    if (!this._cache.TryGetValue(usecckey, out string[] data))
    {
        // Key was not found in the cache.
        // We will enter an update lock, and check again, to ensure we are the only thread updating the entry.
        // The reason we do this check-lock-check again flow, is two-fold:
        //  For a Cache-Hit: The outer check doesn't impose a lock, and remains very fast.
        //  For a Cache-Miss: The outer check falls into our sync lock that will ensure that one-and-only-one thread gets to perform a true cache check and update.

        // Enter a sync lock before checking again...
        lock (this._updatelock)
        {
            // Inside the sync lock.

            // Check to see if still a cache miss...
            if (!this._cache.TryGetValue(usecckey, out data))
            {
                // Still a cache miss.
                // And, we are the only thread that can see that, and update it.
                // So, we will attempt to update the cache.

                // We will look it up, and cache it for later.

                // Lookup the groups for the user...

                // Populate a test set of groups...
                data = new string[] { "admin" };

                // And, store it in the cache...
                var ceo = MOVETHISELSEWHERE.CachingOptions.Get_ShortDuration_MemCacheOptions();
                this._cache.Set(usecckey, data, ceo);
            }
            else
            {
                // Got a cache-hit from inside the lock.
                // This means, another thread was inside this lock block, filling the cache, while we saw the first cache-miss.
                // And, that other thread (that filled the cache) left the sync lock block before we got in to check again.
                // So, we don't may not need to populate the cache.

                // We will let the logic flow fall out, below...
            }
        }
        // Bottom of the update lock.
    }
    else
    {
        // We got a cache hit.
        // We will return that value...
    }

    // Return the group data we collected...
    return data;
}
NOTE: The above example does a cache check, twice.
This is for performance reasons.
The first check is has no lock penalty, and if a cache-hit, moves as quickly as possible.
However. If a cache-miss was seen, the thread enters the update lock block, where it must do a second check for a cache miss.
This second cache check, being done from inside the sync lock, ensures that the cache is not being populated while being verified as a cache-miss.
Once confirmed (with the second check), the real data is requested, and pushed into the cache.
Then, the logic flow falls to the bottom to return the value.
C# Lambdas
Here are quick examples of how to create anonymous lambdas in C# method blocks.
With Delegate Definition
When the lambda needs to be based on a delegate type, here are examples.
This lambda implements a delegate type, accepting an int and returning a composite:
// Declare the delegate type...
public delegate (int res, string data)? dGetKey(string kid);

public void Example()
{
    // Declare the lambda implementation...
    dGetKey callback = (k) =>
    {
        // Do stuff...
        // Return its signature...
        return (1, null);
    };

    // You can invoke it, like this...
    var result = callback("myKeyId");
}
And, this delegate type has no return:
// Declare the delegate type...
public delegate dGetKey(string kid);

public void Example()
{
    // Declare the lambda implementation...
    dGetKey callback = (k) =>
    {
        // Do stuff...
    };

    // You can invoke it, like this...
    callback("myKeyId");
}
Without a Delegate Definition
When you don't have a defining delegate type, here is how you can create anonymous lambdas.
This lambda accepts an int, and returns a composite (int and string):
Func<string, (int res, string? data)> krcb = (k) =>
{
    return (1, null);
};
This lambda accepts a string, with no return (action vs func):
Action<string> testaction = (k) =>
{
  // Do stuff...
};
.NET How to Create and Publish Nuget Package
Taken from here:
Here is more content on additional properties for a nuget package:
docs.microsoft.com-nuget/docs/reference/msbuild-targets.md at main · NuGet/docs.microsoft.com-nuget
TODO: Add in details for nuget symbol packages from here:
Documentation - MyGet - Hosting your NuGet, npm, Bower, Maven, PHP Composer, Vsix, Python, and Ruby Gems packages
And, here:
How to publish NuGet symbol packages using the new symbol package format '.snupkg'
HOWTO Steps
There are a couple steps to publish a nuget package:
-
Set Package Properties
-
Build Project
-
Update Release Notes
-
Create Nuget Package
-
Push to Nuget Feed
Package Properties
Open the csproj file and set at least the following lines:
<PackageId>AppLogger</PackageId>
<Version>1.0.0</Version>
<Authors>your_name</Authors>
<Company>your_company</Company>
Open the project properties in Visual Studio, and set the following:
-
Make sure the Package ID (
PackageId) is unique across your Nuget repository. -
Set the Package Version (Version) as needed.
-
Set the Package Version in the csproj file…
Make sure the Package Version (Version) changes each time the package is pushed.
This is done by incrementing the build number parameter in the Package Version string.
Use Package Version strings like this: <major.<minor>.<patch>-build<buildnumber>
Ex.: 1.0.0-build2. -
Set the project’s Assembly Version to reflect the Package Version: 1.0.2.0
-
Set the Authors field.
-
Set the Product field.
-
Set the Company field.
-
Set the Desription field.
-
Set the Target Framework field.
Here’s a sample of the csproj file with the normal fields set for a nuget package:
<PropertyGroup>
  <TargetFramework>net5.0</TargetFramework>
  <PackageId>OGA_SharedKernel</PackageId>
  <Authors>Lee White</Authors>
  <Product>OGA Libraries</Product>
  <Version>1.0.0</Version>
  <GeneratePackageOnBuild>true</GeneratePackageOnBuild>
  <Description>Base Exceptions, attributes, config and process globals, and a few other elements that are used by all projects.</Description>
  <Company>OGA</Company>
</PropertyGroup>
Build Project
Build the project in release mode to enable optimizations.
Update Release Notes
This step is straightforward.
Update the RELEASE-NOTES.txt file for the project. This should be located in the VS solution, just outside the project, like here:
If the release notes file cannot be located for the project, see if one is defined for the project.
Right-click the project file and selecting “Edit Project File”.
Look for a section like this:
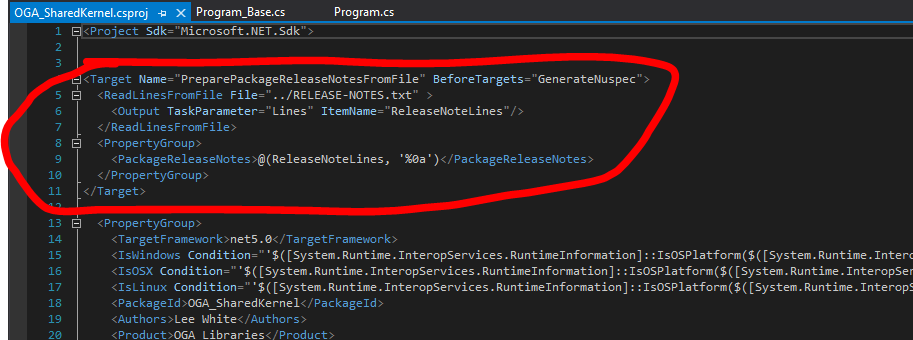
If this section exists, the “ReadLinesFromFile parameter tells where the Release Notes are located.
Locate the release notes file, update its content for the new version, and move to step 4.
If this section is missing, no release notes are setup yet.
Go here, How To Add Release Notes to Nuget Package, to create release note content for the version, and move to step 4.
Create Nuget Pakage
Run the Pack command, from the CLI, to create the nuget package (Visual Studio 2019 will do this during build):
dotnet pack
Push to Nuget Feed
Push the package to the nuget server using the CLI:
dotnet nuget push -s https://buildtools.ogsofttech.com:8079/v3/index.json "P:\Projects\NETCore SoftwareLibraries\NETCore SoftwareLibraries\OGA_SharedKernel\bin\Debug\OGA_SharedKernel.1.0.0-build3.nupkg"Push the symbol package to the nuget server using the CLI:
dotnet nuget push -s https://buildtools.ogsofttech.com:8079/v3/index.json "P:\Projects\NETCore SoftwareLibraries\NETCore SoftwareLibraries\OGA_SharedKernel\bin\Debug\OGA_SharedKernel.1.0.0-build3.snupkg"How To Add Release Notes to Nuget Package
These are the steps needed to include release notes in a Nuget package.
These are taken from this article:
Writing a NuGet package release notes in an outside of a .csproj file.
Same article here:
Writing a NuGet package release notes in an outside of a .csproj file.
Release Notes are kept in the VS solution with the project, but are not stored inside the project.
A target block is added to the csproj file so that MSBuild can include the release notes content into the nuget package.
How To
-
Create a text file in the VS Solution, called:
RELEASE-NOTES.txt, or something more specific, if more than one release notes file is needed. -
Place the release notes file outside the project node, but still in the VS Solution, such as this:
3. Add content to the release notes file, to annotate each version in descending order, like this:
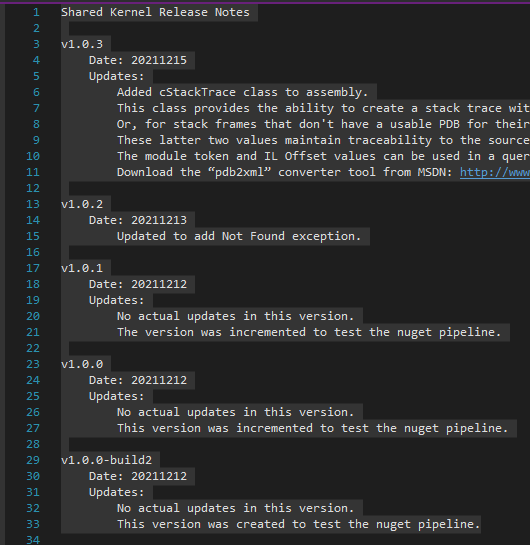
4. Add a comment in the Assembly Release Notes field, to point other developers to use the Release Notes.txt file.
This can be done by writing a comment in the PackageReleaseNotes MSBuild property, via the Project property editor GUI, or editing the csproj file.
We do this first, before we add the MSBuild target to the csproj file, to ensure the release notes property is set.
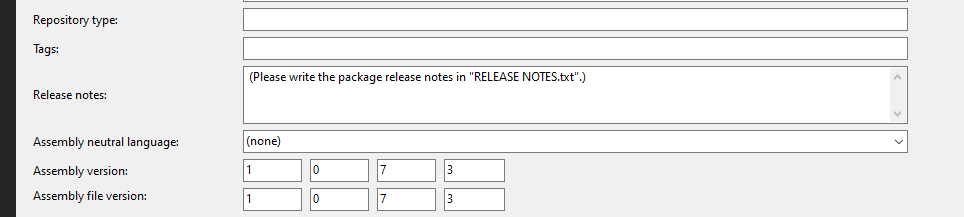
5. Now, we need to create a MSBuild Target (like the below screenshot) in the csproj file so that MSBuild can pick up the release notes before the nuget package is built.
This action needs to be executed before the “GenerateNuspec” target is executed.
At the before executing of the “GenerateNuspec” target is a good entry point to prepare the package release notes.
This target reads the release notes file contents by “ReadLinesFromFile” MSBuild standard task, and outputs the contents into a MSBuild items which is named, ReleaseNoteLines.
Finally, MSBuild will build the PackageReleaseNotes MSBuild property from the ReleaseNoteLines MSBuild items that contain the contents of the release notes file.
By the way, MSBuild joins the items with a “;” separate by default.
In this case, we want to make PackageReleaseNotes MSBuild property with multi-lines, therefore we write the reference of ReleaseNoteLines MSBuild itens with “LF” (Line-Feed) separate explicitly, like this:
@(ReleaseNoteLines, '%0a')
('%0a' means LF code in an MSBuild script file.)
Here’s what the MSBuild target looks like:
<Target Name="PreparePackageReleaseNotesFromFile" BeforeTargets="GenerateNuspec">
 <ReadLinesFromFile File="../RELEASE-NOTES.txt" >
 <Output TaskParameter="Lines" ItemName="ReleaseNoteLines"/>
 </ReadLinesFromFile>
 <PropertyGroup>
 <PackageReleaseNotes>@(ReleaseNoteLines, '%0a')</PackageReleaseNotes>
 </PropertyGroup>
</Target>
This build target needs to be pasted into the csproj file, like this:

6. Build the project, and push the nuget package to a repository to confirm it contains release notes.
Nuget Build and Publish Scripts for Multiple Targets
Here’s a set of basic command line steps to run, to generate a nuget package for a library or an executable.
NOTE: These statements are for projects that target multiple runtimes. So, they can be simplified for a single runtime or single target framework.
For a Library
To build, package, and publish a library, a variant of these statements is needed:
// Build the library...
dotnet build "./NETCore_Common_NET6.csproj" -c DebugLinux --runtime linux-x64 --no-self-contained
dotnet build "./NETCore_Common_NET6.csproj" -c DebugWin --runtime win-x64 --no-self-contained

// Create the nupkg with pdb included...
nuget.exe pack <nuspecfilepath>.nuspec -IncludeReferencedProjects -OutputDirectory ./Publish -Verbosity detailed"

// Publish the nupkg with pdb included...
dotnet nuget push -s https://buildtools.ogsofttech.com:8079/v3/index.json <nupkg path>

// Create the nupkg and symbol package...
nuget.exe pack <nuspecfilepath>.nuspec -IncludeReferencedProjects -Symbols -SymbolPackageFormat snupkg -OutputDirectory ./Publish -Verbosity detailed

// Publish the symbol package...
dotnet nuget push -s https://buildtools.ogsofttech.com:8079/v3/index.json <symbol package path>
For an Application
To build an executable, these statements will build and publish the application binaries:
// Build the main assembly for windows and linux...
dotnet build "./NETCore_Common_NET6.csproj" -c DebugLinux --runtime linux-x64 --no-self-contained
dotnet build "./NETCore_Common_NET6.csproj" -c DebugWin --runtime win-x64 --no-self-contained

// Publish the main assembly for both Windows and Linux...
dotnet publish "./NETCore_Common_NET6.csproj" -c DebugWin -o bin/publish/debug/win-x64 /p:DefineConstants=Windows --runtime win-x64 --no-self-contained
dotnet publish "./NETCore_Common_NET6.csproj" -c DebugLinux -o bin/publish/debug/linux-x64 /p:DefineConstants=Linux --runtime linux-x64 --no-self-contained
Create Nuget for Multiple Targets or Architectures
Creating nuget packages that contain libraries for multiple frameworks or runtimes, requires some non-trivial effort.
So, this page explains the steps required.
Some of this was taken from here: Non-Trivial Multi-Targeting with .NET
Project Setup
For multiple runtimes, add a Configurations line to the csproj file, like this:
  <PropertyGroup>
    <TargetFramework>net6.0</TargetFramework>
    <Configurations>DebugWin;ReleaseWin;DebugLinux;ReleaseLinux</Configurations>
The above are simple names for the build configurations for Debug and Release of both Windows and Linux runtimes.
Then, add these property groups, like this:
  <PropertyGroup Condition="$(Configuration.EndsWith('Win'))">
    <DefineConstants>$(DefineConstants);Windows</DefineConstants>
  </PropertyGroup>

  <PropertyGroup Condition="$(Configuration.EndsWith('Linux'))">
    <DefineConstants>$(DefineConstants);Linux</DefineConstants>
  </PropertyGroup>

  <PropertyGroup Condition="$(Configuration.EndsWith('OSX'))">
    <DefineConstants>$(DefineConstants);OSX</DefineConstants>
  </PropertyGroup>
The above conditions map a configuration name to constants that can be used as a pre-processor directive, to conditionally build code.
You can use these constants (Windows, Linux, OSX) to selectively build code and classes, like the following:
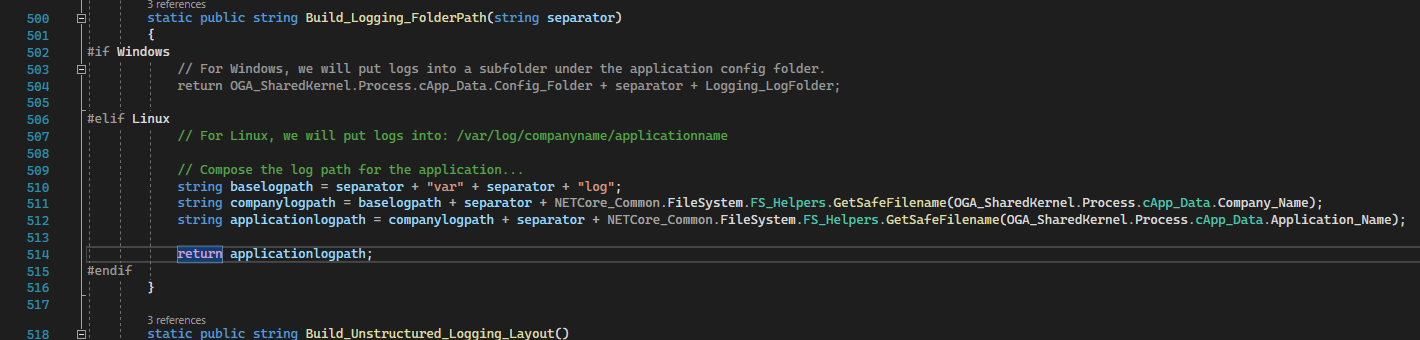
NOTE: The Windows section is grayed out, indicating that the Linux section is the configured build:
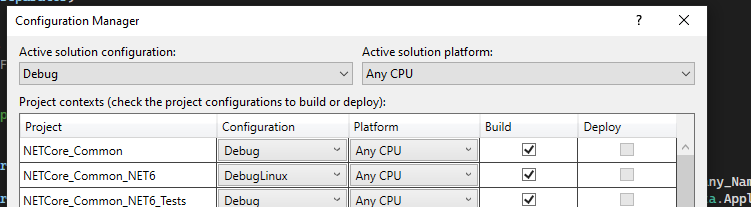
These elements allow you to now use configuration names (DebugLinux, DebugWin, etc.) to selectively compile blocks of code for a particular runtime target.
NOTE: These configuration names will be specified during command line builds, along with matching runtime selections, so the library can be compiled for a particular OS.
Nuspec Generation
Here’s some additional instruction on how to create a library nuget package with multiple framework targets or multiple architectures (linux, windows, osx).
In the project folder of the solution (where the csproj) lives, create a nuspec file with the same name as the project, like this:
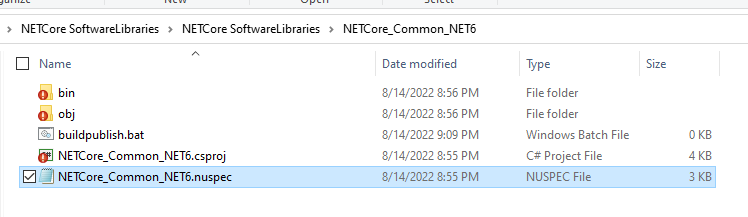
In the nuspec file, there are three major sections to fill out:
-
Metadata
-
Dependencies
-
Files
Metadata
Fill out this section with the Package ID, Title, Version, Authors, Description, etc… like the following:
<?xml version="1.0" encoding="utf-8"?>
<package >
  <metadata>
    <id>NETCore_Common_NET6</id>
    <title>NETCore Common Libraries</title>
    <version>1.4.6</version>
    <authors>Lee White</authors>
    <owners>Lee White</owners>
    <requireLicenseAcceptance>false</requireLicenseAcceptance>
    <description>Common functional elements, such as logging, config, process interrogation, etc...</description>
    <releaseNotes>(Please write the package release notes in "NETCore_Common-RELEASE_NOTES.txt".)</releaseNotes>
    <copyright>$copyright$</copyright>
Make sure the ID is unique, for the nuget repository, as this identifies the package for all.
Make sure the version follows the semantic conventions, and always increments on each push to the nuget repository.
Dependencies
Set the dependencies of the project based on the target framework, assembly references, and package references it has. Like this:
    <dependencies>
      <group targetFramework="net6.0">
        <dependency id="Microsoft.Extensions.Configuration" version="6.0.1" exclude="Build,Analyzers" />
        <dependency id="Microsoft.Extensions.Hosting.WindowsServices" version="6.0.0" exclude="Build,Analyzers" />
        <dependency id="Mono.Posix.NETStandard" version="1.0.0" exclude="Build,Analyzers" />
        <dependency id="NLog.Web.AspNetCore" version="5.0.0" exclude="Build,Analyzers" />
        <dependency id="Newtonsoft.Json" version="13.0.1" exclude="Build,Analyzers" />
        <dependency id="OGA_SharedKernel_NET6" version="1.1.1" exclude="Build,Analyzers" />
        <dependency id="System.IO.FileSystem" version="4.3.0" exclude="Build,Analyzers" />
        <dependency id="System.IO.FileSystem.AccessControl" version="5.0.0" exclude="Build,Analyzers" />
        <dependency id="System.Management" version="6.0.0" exclude="Build,Analyzers" />
        <dependency id="System.Net.NetworkInformation" version="4.3.0" exclude="Build,Analyzers" />
        <dependency id="System.Security.Principal.Windows" version="5.0.0" exclude="Build,Analyzers" />
      </group>
    </dependencies>
  </metadata>
Quick and Dirty Dependency Collection
To ensure, your nuspec file has the correct dependency listing needed, you can run the dotnet pack statement to generate a nupkg, and check its nuspec contents.
To do this, open a command line, and run the dotnet build for the library.
dotnet build "./NETCore_Common_NET6.csproj" -c DebugWin --runtime win-x64 --no-self-contained
Then, run the dotnet pack command for the library, to generate a nuget package file that you can extract the file set from. Like this:dotnet pack "./NETCore_Common_NET6.csproj" -c DebugWin
Locate the nupkg file that was generated, and open it with 7zip. Open the nuspec file inside the package, and copy out the dependency list from the bottom of it. Then, paste that into your nuspec file.
Files
The file section is in three pieces. And, filling it out requires knowing of any target framework or runtime needs.
The big catch here is that the documentation for this is rather sparse and doesn’t really describe a couple of key aspects about how it works.
The trick is to understand three important folders in the NuGet package and how they’re used when the package is installed under .NET Framework vs .NET Core.
Here is the basic structure of the file target section:
-
/lib/{tfm}
-
/ref/{tfm}
-
/runtimes/{rid}/lib/{tfm}
In these paths:
-
{tfm} stands for TargetFramework and should match the names in the csproj file eg: net461 and netcoreapp2.0
-
{rid} is the runtime identifier and can be any identifier from the runtime graph. See this blog post by Nate McMaster for a good explanation of this. For our purposes we just need win and osx for our two target operating systems.
Here’s how these folders should be used:
-
The /lib folder should be used for assemblies that for a particular framework, are the same on all run-times.
-
The /ref and /runtimes folder should be used when a particular .NET Core framework has different implementations for different run-times.
-
The /ref folder should contain any assemblies that define the API for the package and will be added as references to the target project.
Think of these as compile time references. -
The assemblies in the /ref folder don’t need to contain implementations of the API (they could all just throw not-implemented exceptions).
You normally populate entries in this folder by grabbing one of the run-time implementations and declare that as the API. -
The /runtimes folder should contain the implementation assemblies for each .NET Core run-time. These files will be used when running or deploying the project.
-
The /runtimes folder can also contain additional assemblies that are required at runtime but don’t need to be visible to the client project at compile time.
-
Adding assemblies to the /runtimes folder won’t cause them to be added as a reference to the target project.
You must have an associated assembly in the /ref folder.
For example, here’s a simple file section for a library with a single target framework (net6.0) and runtime (any):
<file src=".\bin\DebugWin\net6.0\win-x64\NETCore_Common_NET6.dll" target="lib/net6.0" />
<file src=".\bin\DebugWin\net6.0\win-x64\NETCore_Common_NET6.pdb" target="lib/net6.0" />
If your library has multiple target runtimes (like linux, windows, osx, etc, x86, x64, etc…), use the /ref and /reference folders, like this:
    <file src=".\bin\DebugWin\net6.0\win-x64\NETCore_Common_NET6.dll" target="ref\net6.0" />
    <file src=".\bin\DebugWin\net6.0\win-x64\NETCore_Common_NET6.dll" target="runtimes\win-x64\lib\net6.0" />
    <file src=".\bin\DebugWin\net6.0\win-x64\NETCore_Common_NET6.pdb" target="runtimes\win-x64\lib\net6.0" />
    <file src=".\bin\DebugLinux\net6.0\linux-x64\NETCore_Common_NET6.dll" target="runtimes\linux-x64\lib\net6.0" />
    <file src=".\bin\DebugLinux\net6.0\linux-x64\NETCore_Common_NET6.pdb" target="runtimes\linux-x64\lib\net6.0" />
Couple things to note on the above example:
The library (Net Core Common) is targeting x64 on Windows and Linux, and is for the same target framework (net6.0).
The library dll gets listed in the /ref folder, as a compile time reference.
The library pdb gets listed alongside its dll, so the symbol packages can be generated.
And, separate runtime folders are under /runtimes, for each of the target runtimes (windows and linux).
All libraries are from the project’s /bin/Debug folder, so they can include PDB files for debugging. This can be changed by referencing files from the ReleaseWin and ReleaseLinux folders.
But doing so, will prevent access to symbols and debugging. As well, file names and line numbering will not be directly accessible in logging.
Build, Package, Publish
With the above project settings and nuspec file created, you can now perform a series of command line builds (for each runtime and target).
Then, those can be packaged into a single nupkg file that can be pushed to a repository and consumed by others.
Here’s a local article with template scripts that can be used: Nuget Build and Publish Scripts for Multiple Targets
For example…
The NetCore Common Software Library can be built, packaged, and published with the following commands.
Open the command line to the project folder, and do the following:
Build the Linux and Windows libraries in Debug mode:
dotnet build "./NETCore_Common_NET6.csproj" -c DebugLinux --runtime linux-x64 --no-self-contained
dotnet build "./NETCore_Common_NET6.csproj" -c DebugWin --runtime win-x64 --no-self-contained
If successful, the output of the above builds can be packaged with either of the following:
Separate Symbol File
The following will create a nupkg with the dll and xml files in it.
And, a separate symbol pacakge (snupkg) with the pdb files in it.
What makes that happen is the switches '-symbols -SymbolPackageFormat snupkg'.
nuget.exe pack ./<nuspecfilename>.nuspec -IncludeReferencedProjects -symbols -SymbolPackageFormat snupkg -OutputDirectory bin -Verbosity detailedNuPkg with Pdb Files
If you are wanting a nupkg file that includes both pdb and dll files, use this variation.
The following will create a nupkg with both dll and pdb files in it.
It will NOT generate a separate symbol package file.
nuget.exe pack ./<nuspecfilename>.nuspec -IncludeReferencedProjects -OutputDirectory bin -Verbosity detailedPublishing to Nuget Repo
The above command should have generated a nupkg file, as well as a symbol file.
The nupkg can be published to the nuget server with:
dotnet nuget push -s https://buildtools.ogsofttech.com:8079/v3/index.json "P:\Projects\NETCore SoftwareLibraries\NETCore SoftwareLibraries\NETCore_Common_NET6\bin\NETCore_Common_NET6.1.4.6.nupkg"And, the snupkg file can be published to the nuget repo with this (just changing the file extension):
dotnet nuget push -s https://buildtools.ogsofttech.com:8079/v3/index.json "P:\Projects\NETCore SoftwareLibraries\NETCore SoftwareLibraries\NETCore_Common_NET6\bin\NETCore_Common_NET6.1.4.6.snupkg"If that completed, you can confirm the version is available for consumption at this link:
https://buildtools.ogsofttech.com:8079/packages/netcore_common_net6/1.4.6
Nuget Package Reference
Here’s the golden reference for all things Nuget:
docs.microsoft.com-nuget/docs at main · NuGet/docs.microsoft.com-nuget
How to publish NuGet symbol packages using the new symbol package format '.snupkg'
Non-Trivial Multi-Targeting with .NET
Multi-targeting for NuGet Packages
Code Signing References
Here are pages associated with signing .NET binaries (exe and dll) and installers:
HowTo: Create a New Cloud Service or Library
Current as of: 20250126
This list will be revised as more steps get automated.
This is a working list of manual steps that cover the genesis to deployment of a new cloud service, library, or app.
It includes steps to define, document, create, configure, automatically build and version, and deployment of a new cloud service.
Lots of the grunt work for this process is already automated. But, this list covers the remaining manual steps, that span documentation, service tracking, build config, GitHub, repositories for binaries and containers, and deployment.
General
Services are built from source using an automated build process on a dedicated build server. Because of this, some regularity in naming and library consumption is necessary. As well, the automated build process leverages some conventions for proper binary storage and containerization.
Deployment scripting is a bit more flexible in its internal naming, but still requires that upstream binaries and containers are regularly named.
The following is a list of required elements for a service, and include embedded tasks that must be performed to satisfy each one.
Service Naming
Each service requires a unique name. This name will exist in the source code, check out folder name, github repo path, binary name, artifact storage, docker container name, folder paths in deployment, API calls, etc.
And, each of these pieces has subtly different restrictions, to be discussed below.
So, it is critical that we follow a regular convention of service naming, for both easy identification and for low-friction deployment.
Task #1: Give the service a name that fits the convention of: <app>.<servicename>.<category>
For example:
The Email Notification Service (of the Bliss Cloud architecture) would be named:
Bliss.EmailNotification.Service
The User Presence Service would be similarly named:
Bliss.UserPresence.Service
See below for a description of each component of a service name.
App Name
Currently, the app is named: “Bliss”
Service Name
The service name should be a non-hyphenated, title-case, string.
Underscores are acceptable. But, all services to date, are named with title-case and no underscores.
Category
This string can be “Lib” for libraries that may be used across services and client applications.
Or, for services that function as
-
Service - for services that provide a definite function to a connecting client
-
API - for endpoints hosts that are really ingress brokers for other services.
-
Host - for services that provide web content without an API, such as a static content host.
-
Lib - for libraries that may be used across services and client applications
Service Name Casing
Since Windows is case-agnostic, we won’t encounter any casing problems during development testing.
However, linux is case sensitive.
And as well, Docker is case sensitive for its container names (requiring all lower-case).
So, there will be some casing differences to adhere to, depending on where the service name is applied.
For example:
The linux filesystem path for the config folder, log folder, and binary folder, will be all lower-case.
As well, the service name in a docker container will be all lower-case, because Docker requires this.
Currently, the build server scripting and deployment scripting all handle the casing nuances for us, as long as we adhere to the above naming convention.
Service Endpoint
Public facing services have their own base api endpoint for public access.
The service endpoint is the base string, after the url origin, that defines what service should handle the url.
For example, the email notification service has a service endpoint of:
/api/apiv1/EmailService_v1Base Endpoint
Every service endpoint begins with a base endpoint string like this:
/api/apiv<version>/Base String
This base string (for all service endpoints) starts with “api”. Starting with “api” ensures that a top-level load-balancer and reverse proxy can easily differentiate web page requests from service requests, while providing a single origin for all client traffic.
And, being able to use a single top-level load balancer and reverse proxy for all client traffic prevents us from having any CORS requirements on web pages and services. This is a good thing.
API Version
Second, the base endpoint includes a “version” identifier. This version is in place for future needs, in case we must at some point, fork an entire section of API surface area to a different reverse proxy.
This may be necessary for handling legacy API calls with a dedicated set of legacy services and proxies, that can be easily distinguished.
Until this functionality is required, all APIs will use version “1”.
Meaning, all base endpoints will be: “/api/apiv1/”
Service Base Endpoint
The endpoint for each service includes a short-hand name of the service and a version of the service’s API.
This ensure we can quickly distinguish traffic to a particular version of a service, by its string name.
For example, the Email Notification Service has a short-hand name of, “EmailService”.
And, it is at version 1. So, it’s composite service base endpoint (including the base string) becomes:
/api/apiv1/EmailService_v1
NOTE: We prepended the endpoint with the base endpoint from earlier.
NOTE: Unless specifically needed, set the External Route to be the same as the Local Route. This simplifies the proxy middleware functionality by not requiring header modifications and redirect handling for API calls. And, this also ensures that API testing can be done with simple origin changes.
Proxy Routing WorkSheet
The Proxy Routing sheet in the Bliss API workbook contains the master list of routes and private-side ports.
Task #2: Create a new record in the Proxy Routing worksheet of Bliss API workbook. Include the composed service base endpoint from earlier.
Include the required data for the new service:
-
External Route - defined as the Service Base Endpoint
-
Service Name - service name
-
Local Route - defined as the Service Base Endpoint
-
Local Port - assign a unique port for the service binary to listen on.
Services Worksheet
Task #3: Update the services page with entries for where the service will run in each environment.
An entry will be needed in dev and prod. Add an entry for cloud dev in case we need to deploy it.
Service Configuration
Task #4: Update the Secure Share project in VSC.
-
First, add a folder for the new service.
-
Inside the service folder, create or copy the configuration files of each deployment type into the service folder.
-
Edit the appsettings.json file of each deployment to reflect the service name in the config and log folder strings.
-
Edit the config.json file of each deployment to reflect the needed connection config and other elements the service requires.
Task #5: Check in the changes to GitHub.
Task #6: Update Config Data on BuildServer
Update the secure share working copy on the build server in either of the following ways:
a. Open a Putty session to the build server, and navigate to the /mnt/secshare folder. Pull in the latest changes, so the build server has configuration for the new server.
NOTE: The secure share working folder is permission protected. So, you must use:
sudo git pullb. Execute the RunDeck job: Refresh Secure Share Checkout
GitHub Project
The source code for all services is stored in Github.
Each service gets its own repository, so that versioning and change tracking is simplified.
Task #7: Create a new github repository for the service. Make sure to use the service name from earlier.
Make the repository private, and include a readme.md file.
Working Folder
Task #8: Create a folder on the development machine. Give it a folder name of the service, appended with “gh” so we know its versioned in GitHub.
Task #9: Clone the services GitHub repository to the working folder.
This will create a location where the visual studio solution and service files can be stored.
VS Solution
Task #10: Create a VS solution for the service, in the working folder.
This solution needs the following:
-
Project Type to be a ASP Net Core Web API
-
Solution name to be the service name
-
Folder set to the github working folder created earlier
-
NET version to Net 5 - this will be changed to 6 after generation
-
Uncheck Configure for Https (most services are behind a proxy that terminates SSL for us)
-
Check Enable OpenAPI support (used for dev, but disabled in software)
Task #11: Copy the Jenkinsfile file from another service, into the solution folder (where the .sln is). No changes are required to this file. It is used by Jenkins and the automated build server.
NOTE: We no longer include a nuget.config file in the solution folder of the service. We, instead, use the nuget.config file in the user’s profile.
Task #12: Check that the Symbols server is used in the solution. This is confirmed by opening Tools/Settings/Debugging/Symbols, and confirming that the local symbol server is checked, like this:
Also, check that debugging is configured to traverse source of 3rd-party code and that Source Link Support is enabled. This is done by unchecking “Enable Just My Code” and checking “Enable Source Link Support“, like below:
Service BoilerPlate
There are several standardized things for a service.
Task #13: After creation, update the project to be a Net 6 target.
Task #14: Edit the project.cs file, and copy over the property data from another service, so it includes the specific runtime targets and conditional compilation needs.
Task #14A: Add build properties to pull in pdb and xml files into the build output.
CopyDebugSymbolFilesFromPackages will tell the compiler to include any debug symbol (pdb) files from nuget packages.
CopyDocumentationFilesFromPackages tells the compiler to include any documentation (xml) files from nuget packages.
Below is the stanza to include in the base PropertyGroup of the csproj file.
<PropertyGroup>
    ...
    <CopyDebugSymbolFilesFromPackages>true</CopyDebugSymbolFilesFromPackages>
    <CopyDocumentationFilesFromPackages>true</CopyDocumentationFilesFromPackages>
</PropertyGroup>
Task #15: Update the Program.cs and Startup.cs files to include the flow from an existing service.
Task #16: Add standard library dependencies to the project, via nuget.
This can quickly be done by copying the package references directly from an existing project.cs file.
NOTE: If copying the package references, directly, you may need to delete the bin and obj folders, and do a Clean and Rebuild, so that Roslyn will update its database and clear most of the errors.
Task #17: Add boilerplate functionality for:
NOTE: The following controllers and functionality have been incorporate into the OGA.WebAPI_Base project.
Referencing this nuget package will automatically include the following elements.
-
Default controllers
-
Directory access
-
Helpers
-
RabbitMQ implementation
Task #18: Create a config.json file that reflect the connections the service requires.
Task #19: Update appsettings.json to reflect the config path and log folder.
Task #20: Create a folder path on the dev machine that mimics the config and log folder in appsettings.json.
This is needed for the service to run on the dev machine without throwing any errors because it cannot create logs.
NOTE: Be sure that the “Users” group has write access to the application config folder and subfolders. The service will generate an error if it cannot write to this.
Task #21: Remove the weather controller and weather class that come with the base API project.
Task #22: Update application data in Program.cs. Specifically, set the application name and process name to reflect the service name. And create a new Guid for the application_id.
These properties are located in Program.cs, here:
NOTE: It is not necessary to update the ver property.
This is edited by automated build scripting.
Task #23: Make it a habit of creating a folder within the project that is named for the service. And, place all service-specific elements inside that. This would include classes for controllers, models, service, queue, etc.
Doing this allows us to easily distinguish boilerplate from service-specific elements.
Task #24: Since we have no desire to use IIS for hosting services, change the debug dropdown from IIS Express to the service’s name. This will let us develop and troubleshoot the service as it runs under localhost.
Besides, IIS Express requires that VS be started with admin rights, to properly work. And doing so, would change the permissions on folders and files the service may touch during development. So, we bypass IIS Express to keep dev tasking simplified.
Task #25: Clear any errors, and run the empty service, to ensure it compiles and executes.
NOTE: Add a breakpoint in the catch block of Program.Main, so that we can check if any errors occur.
If it successfully compiles and runs, the Swagger OpenAPI page will display, and include the boilerplate API calls.
Initial Source Checkin
Task #26: Tell TortoiseGIT to ignore any .vs, obj, and bin folders.
To do this, open File Explorer, and navigate to the project’s folder.
Right-click on the .vs folder and add it to the ignore list.
Do the same for all obj and bin folders within project folders.
As well, add any Publish or Testing folders (in the solution folde) to the ignore list.
Task #27: Check the baseline source code into the github repository.
Task #28: Once checked in, open the repo in a browser and create the first repository tag with a version as: “1.0.0”. This will set the baseline for automated versioning of the service.
This action sets the baseline version of the service. But, this baseline version tag does not trigger any automated builds in Jenkins. So, we must make a change and tag that with semver and conventional checkins.
Task #29: Perform some non-functional change to the checked out service code. This can be as simple as editing the readme.md file.
Task #30: Check in the working folder to GitHub, being sure to include a check-in comment with a semver statement that will trigger automatic versioning. Like this:
Non-functional change made to service source, to trigger an initial automatic versioning during intial service build.

+semver: minor
This action will give the downstream Jenkins scripting the github comment marker it needs to see, to determine the next version of the service that will be built. In our case, the first version.
Service Building
Task #31: Open Jenkins, and navigate to the Services list. Create a new service build job.
It is probably best to copy an existing job, and edit all properties for the new service.
Be sure to update any service specific fields in the job.
Task #32: Trigger a service build to see if everything works as expected.
If the Jenkins pipeline is successful, the service has been compiled for Windows and Linux, and the binaries are stored in Artifactory.
This can be checked by opening Artifactory, and checking for the service binaries, here:
http://192.168.1.208:8082/ui/packages
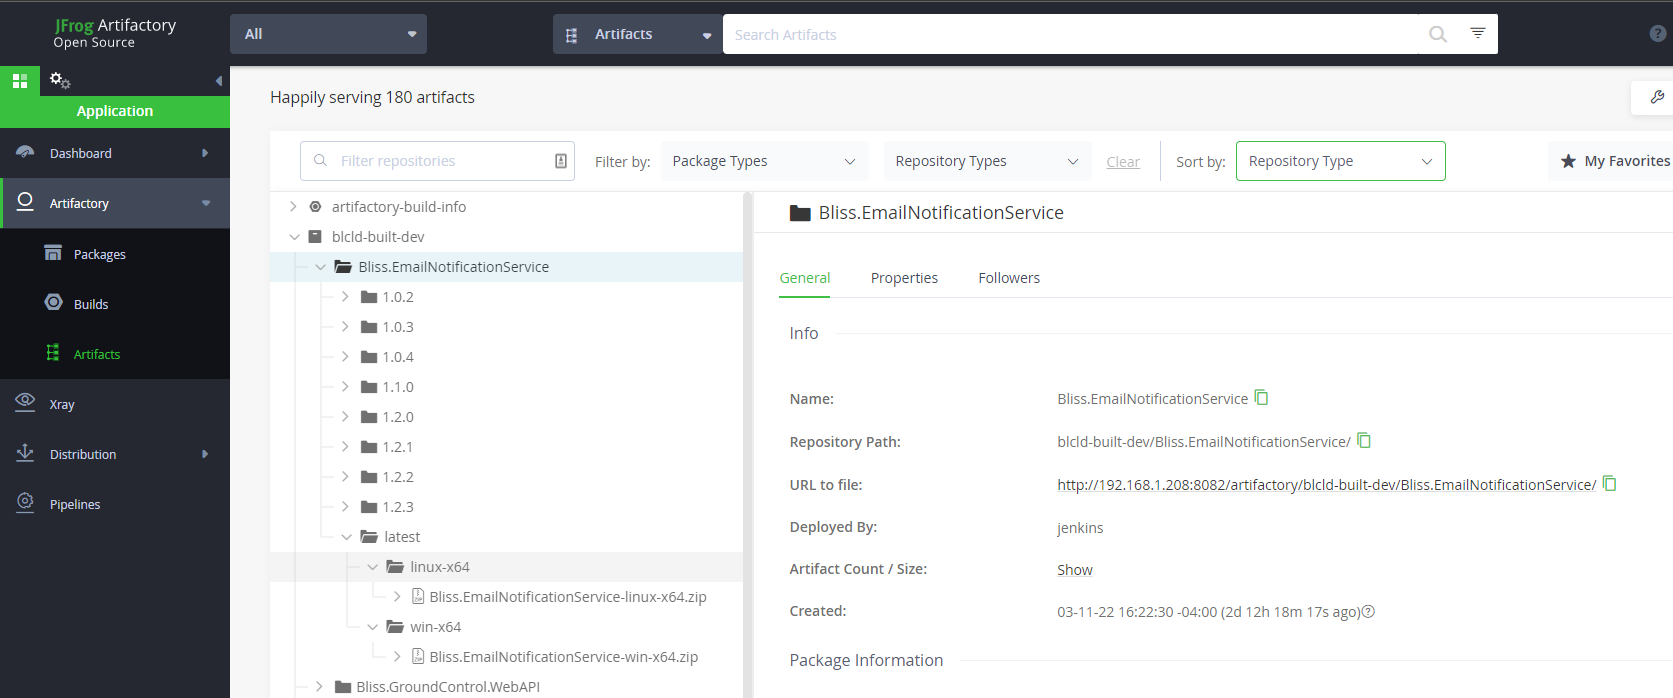
Service Containerization
Task #33: Open Jenkins, and navigate to the Containers list. Create new service containerization jobs for each environment.
It is probably best to copy existing jobs, and edit all properties for the new service.
Be sure to update any service specific fields in the job.
If the Jenkins pipelines are successful, docker containers for the service should be created and stored in the container registry.
This can be checked by opening the docker registry, and checking for the containers, here:
Deployment Configuration
For the service to get deployed to a cluster, it must have an Ansible role, and that role assigned to hosts.
Task #34: Open the Bliss.Infrastructure project in VSC, and add a role for the new service. This can be done by copying an existing service, renaming the folder, and editing its content.
In the vars/main.yml file, set the service’s proper name and local port.
The rest of the role’s files can remain the same.
Task #35: Determine on what hosts the service will run, and update the Services worksheet of the Bliss API workbook. Once this is determined, edit the corresponding the host yml files, here:
Using the same example service, we’ve configured the email notification service to be deployed to dev-host3, like this:
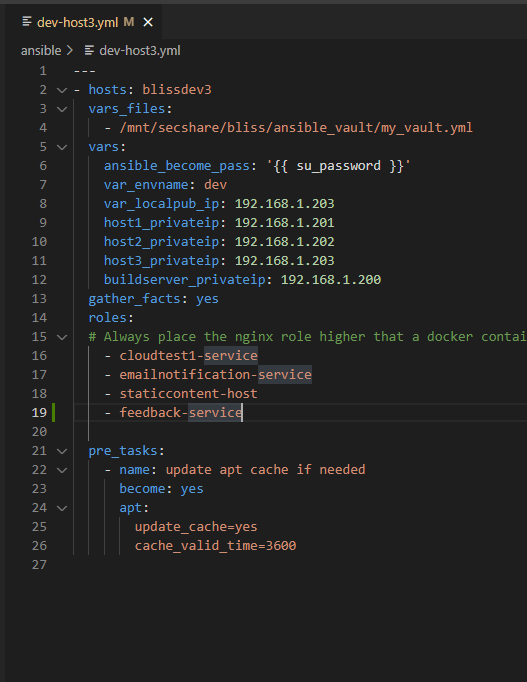
NOTE: The service name in the host file must match the folder name of the role that deploys the service.
Task #36: Open the nginx config file for each cluster, where the service will be hosted (likely dev and prod).
And, edit the yml file to insert an entry for the new service. This can be done by copying an existing service entry.
NOTE: Be sure to set the correct host address variable for which host will run the service. This variable may have a different name between clusters.
NOTE: Be sure to set the location and proxy path to match the endpoints defined in the External Route and Local Route fields of the Proxy Routing worksheet.
NOTE: Be sure to set the correct listening port for the service. This was also defined in the Proxy Routing worksheet.
Task #37: Once the new service role, host yml files, and nginx configurations are updated, check in the Bliss.Infrastructure to Github.
Task #38: Open a Putty session to the build server, and update its ansible files with a git pull on this folder:
/mnt/bliss_infrastructure/bliss_infrastructureThis will allow the ansible scripting on the build server to now, deploy our server to the appropriate hosts.
Deployment
Since the service does not really do anything yet, it will cause no harm to deploy it to the dev cluster.
Task #39: To do so, open a Putty session to the build server, and navigate to the ansible folder inside the Bliss.Infrastructure check out folder.
Then, run the appropriate ansible script to deploy changes to the dev host, like this:
ansible-playbook dev-host1.yml --ask-vault-passNOTE: If the service has public-facing API calls, it will be necessary to as well, run the ansible script for the host that runs the reverse proxy.
Automation Setup
Once the service can be successfully deployed, we can enable webhook on its repository. This allows other automation to track changes and automate builds and testing.
Task #40: Enable a webhook for the repository, so that build services will know when changes are made.
NOTE: This is done at the repository level if under a personal account. And, done at the organization level if the repo is under an organization.
NOTE: If you’re adding the project to an existing org-level github account, then the webhook is likely already setup.
For a personal repository, open the Github page for the repository, and clich the gear (Settings).
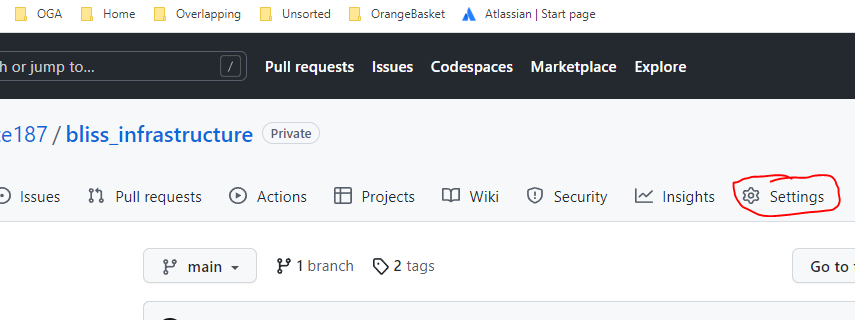
On the Settings left menu, click Webhooks…
Click the Add Webhook button.

Set the Payload URL to our common GitHub Callback URL: https://blissdev.ogsofttech.com/githubwebhook/payload
Set the Content Type to JSON and assign a secret key.
It should look like this:
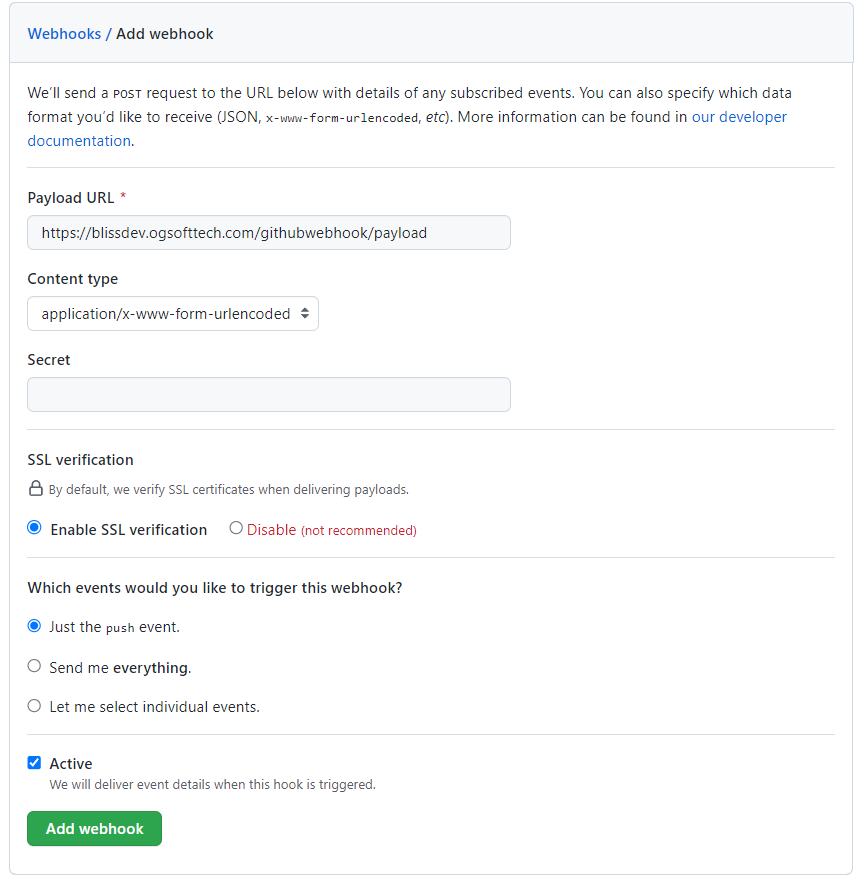
Click Add Webhook to start sending callbacks for changes to the repository.
You can verify the callback is working by clicking on the newly created webhook, clicking the Recent Deliveries tab, and clicking the ping event (looks like this)…
Clicking the event (in blue), will show the raw request and response, allowing you to confirm that a 200 was returned from the build service callback handler.
And, the raw request is available for troubleshooting if a 200 was not returned.
Repository Monitoring Entry
In order for Jenkins to build the project based on webhook feedback, we need to register the service/library/app with the Repository Monitoring Service.
Details of this are here: Repository Monitoring Service (RMS) Notes
But, the gist is, that we make a POST call to the RMS, that creates a new package record.
It lists the package name and type, Github repository url, Jenkins job, etc.
Task #41: Register the package with the RMS, so it can be tracked and automated builds can occur. We duplicate the instructions from the above link, below.
Compose a json should look like this:
{
  "eventTimeUTC": "2023-11-20T22:16:30.651Z",
  "eventId": "3fa85f64-5717-4562-b3fc-2c963f66afa6",
  "source": "",
  "eventType": "",
  "softwarePackage_Name": "OGA.WebUI.SharedKernel",
  "softwareType": "software.library",
  "jenkins_Job_Name": "Build-OGA.WebUI.SharedKernel",
  "jenkins_Job_FullPath": "oga-jobs/Libraries/Build-OGA.WebUI.SharedKernel",
  "repository_EventRepoName": "ogauto/OGA.WebUI.Dev"
}
Populate the above json payload with specifics for the package. And, be sure to set a unique eventId and time.
Send a POST to the RMS URL, here:
http://192.168.1.201:4181/api/apiv1/SoftwareProject_v1/Project
Give it the json payload composed from the above example.
Documentation
Task #42: Update the Cloud Architecture design spec with the new service.
Task #43: Update the Cloud Architecture drawing in Lucid Chart for the new service, any message queues, and other interactions it has.
Testing
Once built, containerized, and deployed, you should be able to hit one of the default endpoints of the new service, in the dev cluster. Try this one:
http:<dev host IP>:<port>/NOTE: This is just a composed URL of the base route for the service, we created earlier. The boilerplate controllers in each service includes a controller action that listens on the index (base route), and will reply with some info about the service, like this:

If you can read this, the service is running.
It will report its host and listening port, as well as, the service name and version.
REST Calls
Every service REST call should be listed in the REST Calls worksheet of the Bliss API workbook.
RabbitMQ Message Queues
Any RabbitMQ queues that a service consumes or produces, needs to be listed in the Queues sheet of the Bliss API workbook.
Visual Studio 2022 Offline Installation
Here are steps to install Visual Studio 2022 in an offline environment.
It involved creating a layout fileset, which is what the installer runs from.
This is created by a bootstrap executable, below.
Layout Download
From a machine with internet access, download the installer bootstrapper from here:
Place the bootstrapper in a folder, where your layout will be.
Open an elevated terminal, and run this, to download the initial offline set:
"vs_professional.exe" --LayOut "C:\Programs\VisualStudio2022\VS2022_OfflineInstall\layout" --lang en-USNOTE: This downloads all packages for that version.
Once that is downloaded, you will need to add packages for legacy NET Framework support.
Use this:
"vs_professional.exe" --LayOut "C:\Programs\VisualStudio2022\VS2022_OfflineInstall\layout" ^
  --add Microsoft.Net.Component.4.6.2.TargetingPack ^
  --add Microsoft.Net.Component.4.7.2.TargetingPack ^
  --add Microsoft.Net.Component.4.8.TargetingPack ^
  --add Microsoft.Net.Component.4.8.SDK ^
  --add Microsoft.Net.Component.4.8.1.TargetingPack ^
  --add Microsoft.Net.Component.4.8.1.SDK ^
  --lang en-US
This will attempt to add packages for NET Framework 4.5.2:
"vs_professional.exe" --LayOut "C:\Programs\VisualStudio2022\VS2022_OfflineInstall\layout" ^
  --add Microsoft.Net.Component.4.5.2.TargetingPack ^
  --lang en-US
Copy to Target
Copy the downloaded bootstrapper and layout fileset to the target machine.
Install Certificates
On the offline machine, navigate to the certificates folder: Certificates → install
Install the .cer files from the layout\Certificates folder into Trusted Root and Trusted Publishers on the offline machine.
Install WebView2 Runtime
The installer UI requires WebView2 Runtime.
Download the Evergreen Standalone installer for x64 on a connected machine.
Copy it to the offline machine, and run it once on the offline box before launching VS setup.
Run Installer
Run the bootstrapper command, to start the offline installer UI:
"vs_professional.exe" --noWebGetting Correct Scheme, Host, Port Behind a Proxy
When running an API behind a reverse proxy, such as NGINX, the service will not, by default, see the scheme and port of the incoming call. By default, the API service will see the scheme and port of the direct call to it, which will likely be http and some internal port (5000 maybe).
This is often because the reverse proxy is terminating SSL, and forwarding http requests to your API.
The problem with this, is that your API has no way to correctly compose Urls for redirection, because it doesn't know the scheme and port.
To ensure that your API can see the correct scheme, host, and port, you need to do the following things.
NOTE: If your API service can be called from more than one NGINX server block, each with a different server_name, see this page for how to create a URIService instance from the forwarded info this page provides:
URI Service Behind a Hostname Separated NGINX
NGINX Config
In the server block of your reverse proxy, verify you have the following three directives:
# These forward the scheme type (http or https), hostname, and listening port.
# These are used by the service, when generating redirect urls.
proxy_set_header X-Forwarded-Proto $scheme;
# NOTE: This line, explicitly, includes the port in the host string.
proxy_set_header Host $host:$server_port;
proxy_set_header X-Forwarded-Port $server_port;
Startup.cs
The dotnet service doesn't accept the forwarded headers, by default. So, we need to configure it to accept them.
This is done in the Russian doll logic of your Startup:Configure() routine.
Locate the Configure() of your Startup.cs, and find the UseRouting(); line.
Add the following block after UseRouting():
// Setup Header Forwarding, to accept headers from NGINX, for scheme, host, and port...
// This is needed if we are running behind a reverse proxy, and our service includes logic that composes redirecting URLs.
{
    // Accept the forwarded headers (scheme, host, port) from NGINX.
    // We do this, because we are running behind a reverse proxy, and don't directly know the scheme and port.
    // So, we have NGINX forward these to us.
    // And, this statement accepts them.
    // See this page for details: https://wiki.galaxydump.com/link/476

    // Create the options instance...
    var options = new ForwardedHeadersOptions();
    options.ForwardedHeaders = ForwardedHeaders.XForwardedProto |
                           ForwardedHeaders.XForwardedHost |
                           ForwardedHeaders.XForwardedFor;
    // These next four lines exist because, by default, ForwardedHeadersOptions.KnownProxies only allow proxy IP to be 127.0.0.1.
    // So, that prevents a reverse proxy from passing the headers we require.
    // You can restrict this to a specific IP of reverse proxy, but we leave it open, here.
    options.KnownNetworks.Clear();
    options.KnownProxies.Clear();
    options.KnownProxies.Add(IPAddress.Any);
    options.KnownNetworks.Add(new IPNetwork(IPAddress.Any, 0));
    // Apply our options...
    app.UseForwardedHeaders(options);
}
Usage
Once you have NGINX forwarding the correct scheme, host, and port, and your Startup.cs is accepting it, you can access them like this:
HttpRequest request = httpContext!.Request;

// Retrieve the scheme that was forwarded by NGINX...
// This is set by the following directive in NGINX:
//  proxy_set_header X-Forwarded-Proto $scheme;
var scheme = request.Scheme;
// Retrieve the host that was forwarded by NGINX...
// This is set by the following directive in NGINX:
//  proxy_set_header Host $host;
var hostname = request.Host.Host;
// Retrieve the port that was forwarded by NGINX...
// This is set by the following directive in NGINX:
//  proxy_set_header X-Forwarded-Port $server_port;
var port = request.Host.Port;
A further example of usage, is to correctly compose a base URI from what NGINX told us about the request.
The following will retrieve the scheme, host, and port.
And, it will compose a base URI that matches what NGINX saw from the original call.
HttpRequest request = httpContext!.Request;

// Retrieve the scheme that was forwarded by NGINX...
// This is set by the following directive in NGINX:
//  proxy_set_header X-Forwarded-Proto $scheme;
var scheme = request.Scheme;
// Retrieve the host that was forwarded by NGINX...
// This is set by the following directive in NGINX:
//  proxy_set_header Host $host;
var hostname = request.Host.Host;
// Retrieve the port that was forwarded by NGINX...
// This is set by the following directive in NGINX:
//  proxy_set_header X-Forwarded-Port $server_port;
var port = request.Host.Port;

// In case the port was not set, we will accept defaults, based on scheme...
if (request.Host.Port.HasValue)
    port = request.Host.Port.Value;
else
{
    if (scheme == "http")
        port = 80;
    else if (scheme == "https")
        port = 443;
}

bool nondefaultport = false;
if(scheme == "http" && port != 80)
    nondefaultport = true;
if(scheme == "https" && port != 443)
    nondefaultport = true;

// Compose the base url string...
string baseUri = scheme + "://" + hostname;
// If the port is not default, add it explicitly...
if(nondefaultport)
    baseUri = baseUri + ":" + port.ToString();

// Create the uri service from the above base url string...
var svc = new UriService(baseUri);
The above can be passed to a URIService instance, so it can help compose redirects and pagination.
// Create the uri service from the above base url string...
var svc = new UriService(baseUri);
URIService Behind Hostname Separated NGINX Server Blocks
If you have an API service that is called by multiple server blocks of an NGINX proxy, and the server_name is different between each one, then your NGINX is using hostname separation to identify what origin is used.
When this happens, the origin (scheme, host, and port) passed from NGINX to your API service will not have the correct origin data, for composing URLs that redirect to other endpoints in the API.
So, a singleton registered URIService instance, which is commonly setup in Startup.cs, cannot be used.
To derive a proper URIService instance, you will have to create it on-the-fly, or cache a set of singletons that are keyed by origin string.
The method you choose may depend on usage.
NOTE: This implementation depends on the NGINX proxy forwarding schema, host, and port to your service, and your service explicitly accepting these forwarded headers.
See this page for how to implement that: Getting Correct Scheme, Host, Port Behind a Proxy
But, below is a helper class that will correctly create an instance of URIService from a given request.
using Microsoft.AspNetCore.Http;
using OGA.InfraBase.Services;
using System;
using System.Text;

namespace OGA.Groundplane.Service
{
    static public class Helpers
    {
        /// <summary>
        /// Returns a URI Service instance that is correctly assigned to the origin hostname of the given request.
        /// We use this, because our service can be called from multiple subdomains,
        ///  and the default URI Service only works with one, as it is a singleton.
        /// </summary>
        /// <param name="httpContext"></param>
        /// <returns></returns>
        static public UriService Get_URIService(HttpContext httpContext)
        {
            HttpRequest request = httpContext!.Request;

            // Dump headers to log...
            if(OGA.SharedKernel.Logging_Base.Logger_Ref?.IsDebugEnabled ?? false)
            {
                var b = new StringBuilder();
                foreach (var header in request.Headers)
                    b.AppendLine($"{header.Key}: {header.Value}");
                OGA.SharedKernel.Logging_Base.Logger_Ref?.Debug(
                    $"Current request headers are:\n" + b.ToString());
            }

            // Retrieve the scheme that was forwarded by NGINX...
            // This is set by the following directive in NGINX:
            //  proxy_set_header X-Forwarded-Proto $scheme;
            var scheme = request.Scheme;
            // Retrieve the host that was forwarded by NGINX...
            // This is set by the following directive in NGINX:
            //  proxy_set_header Host $host;
            var hostname = request.Host.Host;
            // Retrieve the port that was forwarded by NGINX...
            // This is set by the following directive in NGINX:
            //  proxy_set_header X-Forwarded-Port $server_port;
            var port = request.Host.Port;

            OGA.SharedKernel.Logging_Base.Logger_Ref?.Debug(
                $"Current request has scheme ({scheme}), host ({hostname}), port ({(port ?? -1)})");

            // In case the port was not set, we will accept defaults, based on scheme...
            if (request.Host.Port.HasValue)
                port = request.Host.Port.Value;
            else
            {
                if (scheme == "http")
                    port = 80;
                else if (scheme == "https")
                    port = 443;
            }

            bool nondefaultport = false;
            if(scheme == "http" && port != 80)
                nondefaultport = true;
            if(scheme == "https" && port != 443)
                nondefaultport = true;

            OGA.SharedKernel.Logging_Base.Logger_Ref?.Debug(
                $"Building URI Service from these: scheme ({scheme}), host ({request.Host.ToUriComponent()}).");

            // Compose the base url string...
            string baseUri = scheme + "://" + hostname;
            // If the port is not default, add it explicitly...
            if(nondefaultport)
                baseUri = baseUri + ":" + port.ToString();

            // Create the uri service from the above base url string...
            var svc = new UriService(baseUri);

            OGA.SharedKernel.Logging_Base.Logger_Ref?.Debug(
                "Current URIService baseURL is:" + svc.Compose_Url_to_Route("").ToString());

            return svc;
        }
    }
}
Mocking a DBContext for Testing
The easiest means to mock a data context for testing, is to use an in-memory database.
An in-memory database is known by its string-name within a process. Each data context accessing the database instance must use its name, via options.
See this page for EF Logging implementation: EF: Logging
A few things are needed to mockup a dbcontext for testing:
-
Entity class or classes
-
Data Context class with DbSet for each entity class
-
String name of the database
-
Data Context builder options for an in-memory database
-
Creating a Context Instance
-
Entity Class
At least one entity class. This can be any simple entity class with an Id property, such as the following:
public class TestClass
{
    public int Id { get; set; }

    public string Val1 { get; set; }

    public int Val2 { get; set; }
}
2. Data Context
The data context class requires a DbSet for each test class. This can be as simple as the following:
public class TestDbContext : DbContext
{
    public TestDbContext([NotNullAttribute] DbContextOptions options) : base(options)
    // public cDBDContext_Base() : base()
    {
    }
    public TestDbContext() : base()
    {
    }

    protected override void OnModelCreating(ModelBuilder modelBuilder)
    {
        //base.OnModelCreating(modelBuilder);
    }

    public override int SaveChanges()
    {
        return base.SaveChanges();
    }

    public DbSet<TestClass> TestData { get; set; }
}
3. Database Name
This is the string-name of the database.
Any context using this name will reach the same in-memory database.
4. Data Context Builder Options
The following is a simple builder options for creating a data context to an in-memory database of a given name:
        var options = new DbContextOptionsBuilder<GenericRepositoryEF_Tests.TestDbContext>()
            .UseInMemoryDatabase(databaseName: stringdatabasename)
            .Options;
5. Creating a data context instance
The following is a method to create a data context instance and populate it with test data:
      string dbname = "testdatabase";

      // Create an options instance to give us a connection to the named in-memory database.
      var options = new DbContextOptionsBuilder<GenericRepositoryEF_Tests.TestDbContext>()
           .UseInMemoryDatabase(databaseName: dbname)
           .Options;

        // Insert seed data into the database using one instance of the context...
        using (var context = new GenericRepositoryEF_Tests.TestDbContext(options))
        {
            // Populate the list...
            for(int x = 0; x < 1000; x++)
            {
                GenericRepositoryEF_Tests.TestClass tc = new TestClass();
                tc.Val1 = x.ToString();
                tc.Val2 = x;

                context.TestData.Add(tc);
            }

            context.SaveChanges();
        }
6. Any subsequent context instance with the same database string name, will have access to the seeded data above.
Meaning, a second data context, created with the same options, can access the seed data, generated by the above code:
        // Create an options instance to give us a connection to the named in-memory database.
        var options1 = new DbContextOptionsBuilder<GenericRepositoryEF_Tests.TestDbContext>()
             .UseInMemoryDatabase(databaseName: "testdatabase")
             .Options;

        // Use a clean instance of the context to access data...
        using (var context = new GenericRepositoryEF_Tests.TestDbContext(options1))
        {
            // Now, do a simple query for some portion of the list...
            var query = from b in context.TestData
                        //where b.Val2 > 1000
                        select b;

            var res = query.ToList();
        }
Net Core DI Truths
References:
Here’s a list of behaviors of the NET Core DI registry:
-
All dynamic access to services (from DI) are requested through a service provider.
This is what people call a service locator. For example:var foosvc = _serviceprovider.GetService<Foo>(); -
Every service provider instance is created from a service scope.
Meaning, every service provider instance has a service scope. -
A service provider is, itself, a scoped service.
-
A service scope determines the lifetime of the generated service provider.
Specifically, the service scope determines when the service provider will get disposed. -
A unique service scope is created for each web request.
This means, any retrieved services in the call stack of a web request, share the same scope.
And, they will all get disposed when the web request closes. -
A scoped service that is used in more than one place, while in the same service scope will be the same instance of that service. A data context is a good example of this.
-
Services that are registered as singleton, are held by the root-container.
This gives singleton services a service scope of the root-container, which that lasts for the duration of the app’s runtime. -
The root-container service scope gets disposed when the application runtime shuts down.
This means, that created singleton instances are also disposed when the application runtime shuts down. -
Service types that are registered as scoped services, will be disposed with the service scope gets disposed.
An exception to this would be, DI-registered services that lack the IDisposable interface.
This is discussed below. -
Any transient service that we retrieve from a service provider will have the same scope as the provider. Specifically, when the provider’s service scope is disposed, all transient services will be disposed.
An exception to this would be, DI-registered services that lack the IDisposable interface.
This is discussed below. -
The instance of a service provider given to an API controller, scoped/transient service, will not only have the same scope as the parent. But, it will be the same instance of service provider.
-
Since ever service provider reference is to the same provider instance, for a given service scope, any accessed scoped service will be the same instance, across the service scope.
-
By contrast, every transient service that is retrieved from a service provider, even within the same scope, will be a unique instance of the transient service.
-
A singleton service that is retrieved from a service provider, will always be provided by the root-container, regardless of the service provider’s scope.
The runtime DI registry ensures this by all service providers having a reference to their parent scope factory, which holds the root-scope provider and service descriptors of all singletons.
Non-Disposed Service (Exception Noted Above)
We noted an exception, above, where a DI-registered service may live beyond the service scope of the provider that gave it to us. This can occur if the service’s class type lacks the IDisposable interface.
Just like designing any class type, we need to decide if the class type requires disposal (through IDisposable).
And, adding IDisposable to a type, allows the service scope to automatically dispose of it after use.
However. If we choose for a service type to not implement IDisposable, and we register it as transient or scoped, it could live beyond the service scope that provided its instance.
This may not be a problem, if a service doesn’t require disposal. So, it might not be a real issue.
But, there could be interesting logging side-effects if the non-disposed service is used beyond its scoped parent.
For example: Passing a non-disposable, transient-registered service, like a message broker client, from an API controller, down to a spawned async task would mean, the passed broker client could be used beyond the duration and scope of the web request, and there would be no disposed exception to indicate the issue.
IServiceProvider vs IServiceScopeFactory
References: Net Core DI Truths
Internet’s Claim of Anti-Patterns
Contrary to what the internet says about service locator usage as anti-pattern, there will always be the need for logic to dynamically access services from DI.
This is because the NET Core runtime only provides automatic DI service injection for web requests.
For all other use cases of logic that we may build (some listed below), we as developers, are responsible for our own dynamic service access and scoping.
This is especially true for singleton services.
For any singleton service that accesses datastores or use scoped/transient services, the NET Core runtime will throw an exception, when DI attempts to construct a singleton service that needs a scoped or transient service in its constructor.
So this use case alone, creates a reasonable need for logic to dynamically accessing services through a service provider.
Here’s a list of possible scenarios that need dynamic service access and disposal scoping:
-
Event Handling of IO or socket data that is stored in a database
-
Handling of received messages from a message broker that will be forwarded using a transient service
-
A web request that spawns an async task to do post-processing after the web request returns.
-
Singleton service that uses scoped or transient services
Basically, the above list is known examples of logic that executes outside of the lifetime of web requests.
And in any of the above scenarios, the logic may have a legitimate need to dynamically access services.
This is because the logic executing in each of the above scenarios, exists for its own lifetime.
So, passing service instances to the logic of these scenarios would hold those services captive, or be at risk of being disposed before usage.
Or, they may be explicitly disallowed by the runtime (for the case of singletons that use scoped/transient services).
Provider or Factory - Which to Pass?
The question becomes: Do we pass in an IServiceProvider or an IServiceScopeFactory?
The difference between these two is subtle, as they function very similar to each other.
And, showing their difference (the shortcoming of one, requiring the usage of the other) requires a specially crafted test that, like the use cases above, accesses DI-registered services in an asynchronous task/thread.
Short Answer
If you can reason that a service or an async task will remain active beyond the lifetime of whatever parent logic called it, then you need to pass in a service scope factory.
Or. If you can reason that a service will be ready for disposal or an async task will complete its logic before its parent logic, then the service scope of the parent logic may be safe to pass along.
Long Answer
If you have logic that satisfies all of the following, you should pass it an IServiceScopeFactory instance:
-
The logic runs asynchronously to its calling parent (being a separate thread or an async task)
-
The logic will live beyond the lifetime of its calling parent
-
The logic will dynamically access DI services
If you have logic that satisfies the above requirements, then that logic or service needs to access DI through its own service scope.
And, the only way to safely provide a service scope is to pass a reference to the IServiceScopeFactory instance.
And since the IServiceScopeFactory instance is a runtime singleton and is registered with the app’s DI, a reference to it can be retrieved from any IServiceProvider instance that your parent logic has access to.
Like this:
var scopeFactory = _serviceProvider.GetService<IServiceScopeFactory>();Example
Here’s a good example of an async task that will live beyond the service scope of its parent logic.
Say, we have a web request that spawns an async task, and, that task is meant to continue after the web request has returned, then the service scope the web request is under, can likely end up being disposed before the spawned async task finishes.
Here’s an example of one:
[HttpGet("/Echo/{word}")]
public IActionResult EchoAndLog([FromServices] IServiceProvider serviceProvider)
{
    var ipAddress = HttpContext.Connection.RemoteIpAddress;
    // No need to wait for logging, just fire and forget
    Task.Run(async () =>
    {
        await Task.Delay(1000);
        using (var scope = serviceProvider.CreateScope())
        {
            var context = scope.ServiceProvider.GetRequiredService<LogDbContext>();
            var log = new ActivityLog
            {
                IpAddress = ipAddress,
                Endpoint = "Echo",
                Parameter = word
            };

            context.Add(log);
            await context.SaveChangesAsync();
        }
    });
    return Ok(word);
}
The above is a rough example of an API endpoint that will trigger an async task to perform some action.
The web request may very well, return an Ok status to the caller before the async task has finished its work.
In which case, the _serviceprovider reference will likely be disposed during the async processing. And, any used services inside the async task that are IDisposable, will as well, become disposed.
So, the async task will be the victim of a System.ObjectDisposedException.
Service Scoped Factory Usage
To prevent the above exception from happening, we need to recognize that an IServiceProvider instance passed into a controller, service, or method (from the DI container), where that controller, service, or method has been registered as transient or scoped, the IServiceProvider will have the same scope as the object it is passed into.
Meaning, when the web request (that needed controller, service, or method) returns, the service provider gets disposed.
And, we need to instead pass in a IServiceScopeFactory, instead of IServiceProvider.
Here’s the above example, passing in the service scope factory, so the async task can create its own scope and service provider. Both of which, will be under disposal control by the using statements in the async task.
[HttpGet("/Echo/{word}")]
public IActionResult EchoAndLog([FromServices] IServiceScopeFactory serviceScopeFactory)
{
    var ipAddress = HttpContext.Connection.RemoteIpAddress;

    // No need to wait for logging, just fire and forget
    Task.Run(async () =>
    {
        await Task.Delay(1000);
        using (var scope = serviceScopeFactory.CreateScope())
        {
            var context = scope.ServiceProvider.GetRequiredService<LogDbContext>();
            var log = new ActivityLog
            {
                IpAddress = ipAddress,
                Endpoint = "Echo",
                Parameter = word
            };

            context.Add(log);
            await context.SaveChangesAsync();
        }
    });
    return Ok(word);
}
The above example is a slight revision from the previous one, where we’ve instead passed in the service scope factory singleton.
This allows the action endpoint to spawn an async task, and give it the service scope factory, so it can create scopes and services as it requires, and control their lifetime as necessary.
How to Create IOptions Instance
It’s pretty standard for classes to require configuration in their constructors in the IOptions form.
But, this doesn’t make testing very easy.
Here’s a workaround for pushing an IOptions instance into a class constructor, that needs config.
This example is for a class, ValueController, which has a constructor that requires an instnace of: IOptions<AppSettings>
var settings = Options.Create(new AppSettings { SettingOne = "ValueOne" });
var obj = new ValueController(settings);
The first like creates a new instance of AppSettings (you can inject your own if it already exists), and wraps it into an IOptions class. This latter class instance is passed on to the constructor as if the config came from DI.
This method was taken from here: Looking for a way to initialize IOptions<T> manually?
HowTo Access DI Services
NOTE: If you are looking for how to generate an instance of ServiceProvider, outside of NET Core runtime, like for a unit test, see this: Duplicating .NET Core DI
Here’s a good reference on how DI scoping works: The dangers and gotchas of using scoped services in IConfigureOptions
See this for resolving services during startup: Consuming Services Inside Startup
Any service added in ConfigureServices via startup.cs or program.cs, can be access multiple ways.
Controller Constructor
Injected into the constructor of a controller, and used by an action:
public class HomeController : Controller
{
    private INotificationHelper helper = null;

    public HomeController(INotificationHelper helper)
    {
        this.helper = helper;
    }

    public IActionResult Index()
    {
        helper.Notify();

        return View();
    }
}
Controller Action
Injected into an action (if only a few actions of a controller need the service):
public IActionResult Index([FromServices]INotificationHelper helper)
{
    helper.Notify();
    return View();
}
Unknown Service Needs
If many services are needed by a controller, or it is unknown which services will be required,
the service provider can be injected instead:
public class HomeController : Controller
{
    private IServiceProvider provider = null;

    public HomeController(IServiceProvider provider)
    {
        this.provider = provider;
    }

    public IActionResult Index()
    {
        INotificationHelper helper = (INotificationHelper)
        provider.GetService(typeof(INotificationHelper));

        helper.Notify();

        return View();
    }
}
From an Http Context
Any service can be used where an HTTP context is available:
NOTE: Be sure to test that the returned service instance is NOT null before use.
public IActionResult Index()
{
    INotificationHelper helper = (INotificationHelper) HttpContext.RequestServices.GetService(typeof(INotificationHelper));

    return View();
}
Services from New Scope
Here’s a method of how to create a service or data context from a new scope.
This can be useful if spawning an asynchronous database operation from a web controller, that must run independently (fire-and-forget).
Such a scenario would normally trigger a disposed exception because the data context would get disposed with the rest of the resources in the web call (because they went out of scope).
This method creates a new scope, from a service provider.
static private void Accept_UserDevice_TokenData(IServiceScopeFactory svcscopefactory, DeviceToken_DTO tokendata, string corelationid)
{
      // Run all this inside its own thread...
      _ = Task.Run(() =>
      {
          ClientToken_v1 ct = null;

          IServiceScope newscope = null;
          try
          {
              // Create the service scope in a try-finally, so it will get automatically disposed...
              newscope = svcscopefactory.CreateScope();

              Bliss.Notifications.DataContexts.DataContext dbctx = null;
              try
              {
                  // Create the data context inside a try-finally, so it can be automatically disposed...
                  dbctx = newscope.ServiceProvider.GetRequiredService<Bliss.Notifications.DataContexts.DataContext>();

                  try
                  {
                      // Do something with the newly scoped context...
                      var tks = dbctx.ClientTokens_v1.Where(m => m.UserId == tokendata.UserId && m.DeviceId == tokendata.DeviceId);
                  }
                  catch (Exception e)
                  {
                      OGA_SharedKernel.Logging_Base.Logger_Ref?.Info("Failed to store new client push token.");
                  }
              }
              finally
              {
                  dbctx?.Dispose();
              }
          }
          catch(Exception e)
          {
              int x = 0;
          }
          finally
          {
              newscope?.Dispose();
          }
      });
}
And, here’s an article on how to create a static factory for creating a service provider instance, anywhere: https://doc.xuwenliang.com/docs/dotnet/1611
Here’s how to get a service scope, anywhere.
The trick is that everything is stored in the IHost instance.
Expose a reference of the host instance in Program.cs.
Then, reference that wherever a scope and services are required, like this:
var scope = Program.host_ref.Services.CreateScope();

var svcprovider = scope.ServiceProvider;

// Get a database setup instance we can work with...
var datasvc = svcprovider.GetService<IDBInitianizationService>();
if (datasvc == null)
{
    // No database setup service was created.
    // Check setup for startup order...

    NETCore_Common.Logging.Logging.Logger_Ref?.Error(
        "Program:Is_Database_UptoDate - Database setup service was not found. Check Setup.cs to ensure service is registerd.");

    return -1;
}
// Have a user service reference.
HowTo Make .Net Desktop App DPI Aware
For a better desktop UI experience, it is necessary to have access to the current screen size and pixel density of the display (DPI), so that an application controls and text fonts can be adjusted as needed for good layout and presentation.
Here is a list of steps necessary to make a desktop application be dpi aware.
- Add DLL Import to Program
The following lines need to be added to the Program.cs of the Windows app.
[System.Runtime.InteropServices.DllImport("user32.dll")] private static extern bool SetProcessDPIAware(); - Make each form DPI aware
Add the following to each form’s constructor:
this.AutoScaleMode = AutoScaleMode.Font; this.AutoScaleDimensions = new System.Drawing.SizeF(6F, 13F); -
Call DPI Aware Method
Add this method call before starting the main form:
if (Environment.OSVersion.Version.Major >= 6) SetProcessDPIAware(); -
Update App.config
The following needs to be added to the app.config file to make it DPI aware:
NOTE: The necessary section is highlighted in yellow.
<?xml version="1.0" encoding="utf-8"?>
<configuration>
    <startup>
        <supportedRuntime version="v4.0" sku=".NETFramework,Version=v4.7"/>
    </startup>
  <System.Windows.Forms.ApplicationConfigurationSection>
    <add key="DpiAwareness" value="PerMonitorV2"/>
    <add key="EnableWindowsFormsHighDpiAutoResizing" value="false"/>
  </System.Windows.Forms.ApplicationConfigurationSection>
</configuration>
Unit Tests with PostgreSQL Backends
In order to easily stand up a Postgres database for unit and integration testing, we need a class that can encapsulate the effort, to an easy call surface.
Below we have a helper class that will manage the life-cycle of a test database, in PostgreSQL.
Given an admin user account and a set of table definitions to create, it will generate a test user, test database, and create the tables within it.
When done, it will handle removal of the test user and database.
Usage
Here are steps to perform, so that an instance of DbInstanceHelper_PostGres, will manage the life-cycle of a test database and test user.
Create an instance of the helper class, DbInstanceHelper_PostGres.
And, give it the Central Config name of the test postgres instance and test admin account:
var dbh = new DbInstanceHelper_PostGres();
dbh.Cfg_CentralConfig_DbCred_NameString = "PostGresTestAdmin";
For it to do useful work, we need to give it at least one table definition, that it will create in the test database:
// Create the test tabke...
string tablename = "tbl_Icons";
var tch = new TableDefinition(tablename, "postgres");

// Give it a pk...
var res1 = tch.Add_Pk_Column("Id", OGA.Postgres.DAL.Model.ePkColTypes.uuid);
if (res1 != 1)
    Assert.Fail("Wrong Value");

// Add a name column...
var res2 = tch.Add_String_Column("IconName", 50, true);
if (res2 != 1)
    Assert.Fail("Wrong Value");

// Add some other columns...
var res3 = tch.Add_Numeric_Column("Height", OGA.Postgres.DAL.Model.eNumericColTypes.integer, true);
if (res3 != 1)
    Assert.Fail("Wrong Value");

var res4 = tch.Add_Numeric_Column("Width", OGA.Postgres.DAL.Model.eNumericColTypes.integer, true);
if (res4 != 1)
    Assert.Fail("Wrong Value");

var res5 = tch.Add_String_Column("Path", 255, true);
if (res5 != 1)
    Assert.Fail("Wrong Value");
Pass the table definition to the helper:
var resadd = dbh.Add_TableDef(tch);
if (resadd != 1)
    Assert.Fail("Wrong Value");
NOTE: Add_TableDef() can be called a number of times, if your test database needs to have multiple tables.
Once you've populated the helper with the list of desired tables, tell it to create the database/user/tables, with this:
var rescreate = dbh.Standup_Database();
if (rescreate != 1)
    Assert.Fail("Wrong Value");
On success, the helper contains properties, where you can read back, the created database name, test user's name and password.
You can use these in your unit and integration tests, to interact with the created tables as the created test user.
NOTE: Retain a reference to the helper, so that you can leverage it to cleanup the test database and test user.
When Finished
At the end of your unit tests, make a call to the helper's Teardown_Database() call.
dbh.Teardown_Database();This will delete the test database, and the test user.
And of course, be sure to dispose the helper instance, to cleanup its references, with this:
dbh?.Dispose();NOTE: For unit tests that may end, early, wrap your tests in a try-finally, to ensure the helper's dispose method gets called.
Here's a simple try-finally that creates the helper, uses it, and ensures its disposal:
DbInstanceHelper_PostGres dbh = null;
try
{
    // Create the instance...
    var dbh = new DbInstanceHelper_PostGres();
    dbh.Cfg_CentralConfig_DbCred_NameString = "PostGresTestAdmin";

    // Create a single table definition...
    TableDefinition tch = null;
    {
      ...
    }

    // Add the table def to the helper, so it can be created...
    var res = dbh.Add_TableDef(tch);

    // Tell the helper to create the database and tables...
    var rescreate = dbh.Standup_Database();
    if (rescreate != 1)
        Assert.Fail("Wrong Value");

// The test database is live, here and can be used in unit testing.

    // Now, teardown the database...
    dbh.Teardown_Database();
}
finally
{
    dbh?.Dispose();
}
Helper Class
Here's the current version of the helper class, DbInstanceHelper_PostGres:
NOTE: It depends on OGA.Postgres.DAL and OGA.SharedKernel.Lib.
namespace MOVEELSEWHERE_SP.Helpers
{
/// <summary>
/// Used to manage lifecycle of a test database and associated test user.
/// It is purposely generic in construction.
/// See this page for usage: https://wiki.galaxydump.com/link/491
/// </summary>
public class DbInstanceHelper_PostGres : IDisposable
{
#region Private Fields
static private string _classname = nameof(Postgres_Tools);
static private volatile int _instancecounter;
private bool disposedValue;
private cPostGresDbConfig dbcfg;
private Postgres_Tools _dbtool;
private List<TableDefinition> _tables;
#endregion
#region Public Properties
public int InstanceId { get; private set; }
/// <summary>
/// Exposes the username associated with the created test database.
/// This will autopopulate with a test username when the database is created.
/// </summary>
public string TestUsername { get; private set; }
/// <summary>
/// Exposes the password for the test user.
/// This will autopopulate when the database is created.
/// </summary>
public string TestUserPassword { get; private set; }
/// <summary>
/// Exposes the datbase name for the created test database.
/// This will autopopulate with a test name when the database is created.
/// </summary>
public string TestDbName { get; private set; }
/// <summary>
/// Hostname of database server.
/// Populated here, so a datacontext config instance can be composed without an independent call to central config.
/// </summary>
public string Hostname { get; private set; }
/// <summary>
/// Set this to the name of the database creds to retrieve from central config.
/// The creds required will be a user account with adequate privileges to create users and databases.
/// By default, the cred name is set to: 'PostGresTestAdmin'.
/// </summary>
public string Cfg_CentralConfig_DbCred_NameString { get; set; } = "PostGresTestAdmin";
#endregion
#region ctor / dtor
public DbInstanceHelper_PostGres()
{
// Create the database and username...
this.TestDbName = ValueGenerators.GenerateTestDbName();
this.TestUsername = ValueGenerators.GenerateTestUserName();
this.TestUserPassword = ValueGenerators.GeneratePassword();
this._tables = new List<TableDefinition>();
dbcfg = null;
}
protected virtual void Dispose(bool disposing)
{
if (!disposedValue)
{
if (disposing)
{
// TODO: dispose managed state (managed objects)
this._dbtool.Dispose();
dbcfg = null;
}
// TODO: free unmanaged resources (unmanaged objects) and override finalizer
// TODO: set large fields to null
disposedValue = true;
}
}
// // TODO: override finalizer only if 'Dispose(bool disposing)' has code to free unmanaged resources
// ~DbInstanceHelper_PostGres()
// {
// // Do not change this code. Put cleanup code in 'Dispose(bool disposing)' method
// Dispose(disposing: false);
// }
public void Dispose()
{
// Do not change this code. Put cleanup code in 'Dispose(bool disposing)' method
Dispose(disposing: true);
GC.SuppressFinalize(this);
}
#endregion
#region Public Methods
/// <summary>
/// Call this to include a table to the test database schema.
/// NOTE: This must be called before calling the standup method.
/// </summary>
/// <param name="tdef"></param>
/// <returns></returns>
public int Add_TableDef(TableDefinition tdef)
{
if (disposedValue)
{
// Already disposed.
OGA.SharedKernel.Logging_Base.Logger_Ref?.Error(
$"{_classname}:{this.InstanceId.ToString()}:{nameof(Add_TableDef)} - " +
$"Instance already disposed. Cannot use.");
return -20;
}
if(tdef == null)
{
OGA.SharedKernel.Logging_Base.Logger_Ref?.Error(
$"{_classname}:{this.InstanceId.ToString()}:{nameof(Add_TableDef)} - " +
$"Given table definition not defined. Cannot use.");
return -1;
}
if(string.IsNullOrEmpty(tdef.tablename.Trim()))
{
OGA.SharedKernel.Logging_Base.Logger_Ref?.Error(
$"{_classname}:{this.InstanceId.ToString()}:{nameof(Add_TableDef)} - " +
$"Given table has empty name. Cannot use.");
return -2;
}
// Check if the table is already defined...
var ct = this._tables.FirstOrDefault(t => (t.tablename ?? "") == (tdef.tablename ?? ""));
if(ct != null)
{
// Table already exists.
OGA.SharedKernel.Logging_Base.Logger_Ref?.Error(
$"{_classname}:{this.InstanceId.ToString()}:{nameof(Add_TableDef)} - " +
$"Given table already exists. Cannot use.");
return -3;
}
// Add the table to the pending list...
this._tables.Add(tdef);
return 1;
}
/// <summary>
/// This method will:
/// Verify the test admin creds work,
/// Create a user account that will own the test database,
/// Set the user's password,
/// Create the test database,
/// Set the database owner to the created user,
/// Create the set of tables, passed to Add_TableDef.
/// Returns 1 for success.
/// Returns -1 if the database already exists.
/// -2 for access errors.
/// </summary>
/// <returns></returns>
public int Standup_Database()
{
bool success = false;
if (disposedValue)
{
// Already disposed.
OGA.SharedKernel.Logging_Base.Logger_Ref?.Error(
$"{_classname}:{this.InstanceId.ToString()}:{nameof(Standup_Database)} - " +
$"Instance already disposed. Cannot use.");
return -20;
}
// Wrap this in a try-finally, so we can teardown database and user on failure.
try
{
// Setup the database tool instance...
// This will retrieve the admin creds and setup the db tool instance that we will for management.
var res1 = this.SetupDbTool();
if (res1 != 1)
{
OGA.SharedKernel.Logging_Base.Logger_Ref?.Error(
$"{_classname}:{this.InstanceId.ToString()}:{nameof(Standup_Database)} - " +
$"Failed to setup database management tool.");
return -1;
}
// Verify connectivity...
var resconn = this._dbtool.TestConnection();
if(resconn != 1)
{
// Failed to connect.
OGA.SharedKernel.Logging_Base.Logger_Ref?.Error(
$"{_classname}:{this.InstanceId.ToString()}:{nameof(Standup_Database)} - " +
$"Failed to connect with database engine.");
return -2;
}
// Check if the test user exists...
var resuserexists = this._dbtool.Does_Login_Exist(this.TestUsername);
if (resuserexists < 0)
{
// Failed to connect.
OGA.SharedKernel.Logging_Base.Logger_Ref?.Error(
$"{_classname}:{this.InstanceId.ToString()}:{nameof(Standup_Database)} - " +
$"Failed to connect with database engine.");
return -2;
}
else if(resuserexists == 1)
{
// Username already exists.
// We will use it below.
}
// User doesn't exist.
// Create the test user...
var resadduser = this._dbtool.CreateUser(this.TestUsername);
if(resadduser != 1)
{
OGA.SharedKernel.Logging_Base.Logger_Ref?.Error(
$"{_classname}:{this.InstanceId.ToString()}:{nameof(Standup_Database)} - " +
$"Failed to create test username.");
return -3;
}
// Make sure the user's password is known...
var rescp = this._dbtool.ChangeUserPassword(this.TestUsername, this.TestUserPassword);
if(rescp != 1)
{
OGA.SharedKernel.Logging_Base.Logger_Ref?.Error(
$"{_classname}:{this.InstanceId.ToString()}:{nameof(Standup_Database)} - " +
$"Failed to set test user's password.");
return -4;
}
// Check if the given database exists...
var respres = this._dbtool.Is_Database_Present(this.TestDbName);
if(respres < 0)
{
// Failed to connect.
OGA.SharedKernel.Logging_Base.Logger_Ref?.Error(
$"{_classname}:{this.InstanceId.ToString()}:{nameof(Standup_Database)} - " +
$"Failed to connect to database engine.");
return -5;
}
if(respres == 1)
{
// Database already exists.
OGA.SharedKernel.Logging_Base.Logger_Ref?.Error(
$"{_classname}:{this.InstanceId.ToString()}:{nameof(Standup_Database)} - " +
$"Database already exists. Won't standup again.");
return -6;
}
// Database doesn't exist.
// We will create it below.
// Create the database...
var rescreate = this._dbtool.Create_Database(this.TestDbName);
if(rescreate != 1)
{
OGA.SharedKernel.Logging_Base.Logger_Ref?.Error(
$"{_classname}:{this.InstanceId.ToString()}:{nameof(Standup_Database)} - " +
$"Failed to create database.");
return -7;
}
// Set the owner...
var resowner = this._dbtool.ChangeDatabaseOwner(this.TestDbName, this.TestUsername);
if(resowner != 1)
{
OGA.SharedKernel.Logging_Base.Logger_Ref?.Error(
$"{_classname}:{this.InstanceId.ToString()}:{nameof(Standup_Database)} - " +
$"Failed to set database owner.");
return -8;
}
// Before we add tables, we must switch our connection to the created database.
// Swap our connection to the created database...
{
this._dbtool.Dispose();
System.Threading.Thread.Sleep(500);
this._dbtool = new Postgres_Tools();
this._dbtool.Username = this.dbcfg.User;
this._dbtool.Hostname = this.dbcfg.Host;
this._dbtool.Password = this.dbcfg.Password;
// Use the test database as our connection target...
this._dbtool.Database = this.TestDbName;
// Verify we can connect to the test database...
var restdb = this._dbtool.TestConnection();
if(restdb != 1)
{
OGA.SharedKernel.Logging_Base.Logger_Ref?.Error(
$"{_classname}:{this.InstanceId.ToString()}:{nameof(Standup_Database)} - " +
$"Failed to change client connection to test database.");
return -9;
}
}
// Add each table...
foreach(var t in this._tables)
{
// Add the current table...
var resta = this._dbtool.Create_Table(t);
if(resta != 1)
{
OGA.SharedKernel.Logging_Base.Logger_Ref?.Error(
$"{_classname}:{this.InstanceId.ToString()}:{nameof(Standup_Database)} - " +
$"Failed to create table in database.");
return -10;
}
}
// Swap our connection back to the postgres database...
// This will be needed when we teardown the test database.
{
this._dbtool.Dispose();
System.Threading.Thread.Sleep(500);
this._dbtool = new Postgres_Tools();
this._dbtool.Username = this.dbcfg.User;
this._dbtool.Hostname = this.dbcfg.Host;
this._dbtool.Password = this.dbcfg.Password;
this._dbtool.Database = this.dbcfg.Database;
// Verify we can connect to the test database...
var restdb = this._dbtool.TestConnection();
if(restdb != 1)
{
OGA.SharedKernel.Logging_Base.Logger_Ref?.Error(
$"{_classname}:{this.InstanceId.ToString()}:{nameof(Standup_Database)} - " +
$"Failed to change client connection to postgres database.");
return -11;
}
}
OGA.SharedKernel.Logging_Base.Logger_Ref?.Info(
$"{_classname}:{this.InstanceId.ToString()}:{nameof(Standup_Database)} - " +
$"Database stood up, with test user as owner.");
// Set the success flag...
success = true;
return 1;
}
catch(Exception e)
{
OGA.SharedKernel.Logging_Base.Logger_Ref?.Error(e,
$"{_classname}:{this.InstanceId.ToString()}:{nameof(Standup_Database)} - " +
$"Exception caught while standing up test database.");
return -12;
}
finally
{
// See if the above steps passed or not...
if(!success)
{
// Failed to stand up everything required.
// Teardown the database and user...
this.Teardown_Database();
}
}
}
/// <summary>
/// Drops the test database, test user, and such.
/// NOTE: You still have to call Dispose() to get rid of the tool management instance.
/// </summary>
public void Teardown_Database()
{
if (disposedValue)
{
// Already disposed.
OGA.SharedKernel.Logging_Base.Logger_Ref?.Error(
$"{_classname}:{this.InstanceId.ToString()}:{nameof(Teardown_Database)} - " +
$"Instance already disposed. Cannot use.");
}
try
{
if(this._dbtool == null)
{
// Tool not set.
OGA.SharedKernel.Logging_Base.Logger_Ref?.Error(
$"{_classname}:{this.InstanceId.ToString()}:{nameof(Teardown_Database)} - " +
$"Database management tool is null.");
return;
}
// Check that the database exists...
var res1 = this._dbtool.Is_Database_Present(this.TestDbName);
if(res1 == 0)
{
OGA.SharedKernel.Logging_Base.Logger_Ref?.Info(
$"{_classname}:{this.InstanceId.ToString()}:{nameof(Teardown_Database)} - " +
$"Database doesn't exist.");
}
else if(res1 == 1)
{
// Database exists.
// We will drop it.
var res2 = this._dbtool.Drop_Database(this.TestDbName, true);
if(res2 != 1)
{
// Failed to delete.
OGA.SharedKernel.Logging_Base.Logger_Ref?.Error(
$"{_classname}:{this.InstanceId.ToString()}:{nameof(Teardown_Database)} - " +
$"Failed to drop test database.");
}
}
else
{
// Access error.
OGA.SharedKernel.Logging_Base.Logger_Ref?.Error(
$"{_classname}:{this.InstanceId.ToString()}:{nameof(Teardown_Database)} - " +
$"Access error while checking for test database.");
}
// Drop the test user...
var res3 = this._dbtool.DeleteUser(this.TestUsername);
if(res3 != 1)
{
OGA.SharedKernel.Logging_Base.Logger_Ref?.Error(
$"{_classname}:{this.InstanceId.ToString()}:{nameof(Teardown_Database)} - " +
$"Error occurred while deleting test user.");
}
}
catch(Exception e)
{
OGA.SharedKernel.Logging_Base.Logger_Ref?.Error(e,
$"{_classname}:{this.InstanceId.ToString()}:{nameof(Teardown_Database)} - " +
$"Exception caught while tearing down test database.");
}
}
#endregion
#region Private Methods
/// <summary>
/// This will retrieve test admin creds and create the management tool instance.
/// </summary>
/// <returns></returns>
private int SetupDbTool()
{
try
{
// Retrieve database admin user creds...
var rescreds = GetTestDatabaseUserCreds();
if (rescreds != 1 || this.dbcfg == null)
return -1;
// Create the database tool...
_dbtool = new Postgres_Tools();
_dbtool.Username = this.dbcfg.User;
_dbtool.Hostname = this.dbcfg.Host;
_dbtool.Password = this.dbcfg.Password;
_dbtool.Database = this.dbcfg.Database;
this.Hostname = this.dbcfg.Host;
return 1;
}
catch(Exception e)
{
OGA.SharedKernel.Logging_Base.Logger_Ref?.Error(e,
$"{_classname}:{this.InstanceId.ToString()}:{nameof(SetupDbTool)} - " +
$"Exception caught while setting up database management tool.");
return -2;
}
}
private int GetTestDatabaseUserCreds()
{
if (string.IsNullOrWhiteSpace(this.Cfg_CentralConfig_DbCred_NameString))
return -1;
var res = MOVEELSEWHERE_SP.Helpers.CentralConfig.Get_Config_from_CentralConfig(this.Cfg_CentralConfig_DbCred_NameString, out var config);
if (res != 1)
return -1;
var cfg = Newtonsoft.Json.JsonConvert.DeserializeObject<cPostGresDbConfig>(config);
if(cfg == null)
return -1;
this.dbcfg = cfg;
return 1;
}
#endregion
}
}EF - DataContext Attributes
When creating a provider-scoped data context (one for a specific backend), you need to decorate the type with a DataContextAttribute.
This allows application code, to easily identify the provider-specific data contexts, to use for a particular backend choice.
And, it allows other code to identify the provider and associated configuration of each type, and whatever other properties we may need to include at a later time.
NOTE: There is no need to add the attribute to a base db context type, or an app domain context type (one with DbSets).
This only applies to the provider-specific data context types.
Attribute Strings
Here are the standard provider choice strings:
| Backend | Provider Name | ShortName |
| PostgreSQL | PostGreSQL | postgres |
| SQL Server | SQLServer | sqlserver |
| In Memory | InMemory | inmem |
| SQLite | SQLite | sqlite |
Examples
Here's an example of how to decorate a Postgres data context:
[DataContext("PostGreSQL", "postgres", "PostGresDatabase")]
public class Postgres_TestDbContext : TestDbContext
{
}
Here's an example of how to decorate a SQL Server data context:
[DataContext("SQLServer", "sqlserver", "sqlserverDatabase")]
public class SQLServer_TestDbContext : TestDbContext
{
}
Here's an example of how to decorate a SQLite data context:
[DataContext("SQLite", "sqlite", "SQLiteDatabase")]
public class SQLite_TestDbContext : TestDbContext
{
}
Here's an example of how to decorate a Postgres data context:
[DataContext("InMemory", "inmem", "InMemoryDatabase")]
public class InMem_TestDbContext : TestDbContext
{
}
EF - Backend vs .NET Datatypes
Here's a list of what datatypes that Entity Framework uses to store .NET datatypes in a couple different database engines.
| .NET Datatype | SQL Server | PostgreSQL | SQLite | Comments |
| bool | bit | boolean | INTEGER | |
| byte | tinyint |
smallint (Postgres lack tinyint) |
INTEGER | |
| short | smallint | smallint | INTEGER | |
| int (32-bit) | int | integer | INTEGER | |
| long (64-bit) | bigint | bigint | INTEGER | |
| decimal | decimal(18,2) |
numeric(18,2) Adjustable for domain |
REAL | |
| float | real | real | REAL | |
| double | float | double precision | REAL | |
| Guid | uniqueidentifier | uuid | TEXT | |
| string | nvarchar(max) | text | TEXT | |
| char | nchar(1) | char(1) | TEXT | |
| byte[] | varbinary(max) | bytea | BLOB | |
| DateTime | datetime2 | timestamp without time zone |
TEXT Use ISO-8601 text for SQLite |
|
| DateTimeOffset | datetimeoffset | timestamp with time zone | TEXT | |
| TimeSpan | time | interval | TEXT | |
|
JsonDocument / Dictionary<string, object> |
nvarchar(max) SQL Server has no native JSON type; EF stores as text. |
jsonb Native JSON support |
TEXT | |
| object |
sql_variant Only if configured manually |
jsonb Native JSON support |
TEXT |
Using Visual Studio with Git
Visual Studio brings in lots of files and folders that don't belong in a checked in repository.
Here's a good gitignore file for Visual Studio projects:
# This works in Visual Studio projects
#   to ignore most VS generated output.
# NOTE: It does not work for VSCode.

# Ignore Build results...
**/[Bb]in/*
**/[Oo]bj/*
**/[Ll]og/*
**/[Ll]ogs/*
**/[Tt]emp/*
**/[Tt]mp/*

# Ignore Visual Studio specific...
**/.vs/*
*.user
*.suo
*.userosscache
*.sln.docstates

# Ignore publish folders...
[Pp]ublish/
For Existing Project
Changes to a Gitignore doesn't untrack files that have already been committed.
So. If you are retrofitting a gitignore to an existing project, you may need to follow this sequence, to ensure that files are properly ignored and committed.
Update your GitIgnore
Update the .gitignore file in your working copy with the above content.
Untrack All Files
Open a Powershell terminal, and navigate to the root of your working copy.
You may have to quote the folder path, for Powershell to recognize it.
Run this powershell from the checkout root, to untrack all files in Git:
# Remove all tracked bin, obj, .vs, and publish folders
git ls-files | Where-Object {
    $_ -match '\\(bin|obj|\.vs|publish)\\'
} | ForEach-Object {
    git rm -r --cached "$_"
}
Clear Cached and Add all
Then, open a command line window, also in the checkout root, and run this to add your gitignore file and commit the cleanup:
NOTE: These must be run as three separate commands to property execute.
git rm -r --cached .
git add .
git commit -m "Refresh tracked files with updated .gitignore"
Once that is done, your checkout will think there is nothing to check in.
So, we need to force it to commit everything.
Rename to Force Checkin
Rename the solution folder, to ensure that the entire solution is considered as a new commit.
TortoiseGit will perceive every file as net-new, being in a different folder.
Checkin All
Open TortoiseGit, and check in all files.
NOTE: Be sure to select All, to capture the unknown and deleted file sets.
Fix Rename
Rename the solution folder, back to its original.
And, do another commit.
Again. Be sure to select All, to capture the unknown and added file sets.
Now, you should have everything properly checked in, with your gitignore file working.
EF: Derived Stored Types
If you want to create an entity type that happens to derive from another entity type, JUST TO simplify the codebase, then you may run into this problem.
For example: We have a type Widget:
public class DOWidget_v1 : DomainBase_v1
{
    public string Name { get; protected set; }
}
And, you derive from it to create a SuperWidget:
public class DOSuperWidget_v1 : DOWidget_v1
{
    public string Description { get; protected set; }

    public Guid? ParentId { get; protected set; }
}
As far as C# is concerned, this is fine, and it deduplicates properties with inheritance.
And, you can define independent DbSet properties on your Db context, to access both types.
HOWEVER
EF Core sees this inheritance as a possible shared table... of the base type.
And, it throws an exception, because you haven't chosen to tell EF how to treat the inheritance.
The exception will be something like this:
Initialization method TestAppDomain_InMem_Tests.TestDbContext_Tests.Setup threw exception.
System.InvalidOperationException: A key cannot be configured on 'DOSuperWidget_v1' because it is a derived type.
The key must be configured on the root type 'DOWidget_v1'.
If you did not intend for 'DOWidget_v1' to be included in the model, ensure that it is not referenced by a DbSet property on your context, referenced in a configuration call to ModelBuilder, or referenced from a navigation on a type that is included in the model.
So, you have to tell EF core that the derived type does not have a base.
To do so, add this line to the top of your mapping class, like this:
public class DOSuperWidget_v1MapConfig : IEntityTypeConfiguration<DOSuperWidget_v1>
{
    public void Configure(EntityTypeBuilder<DOSuperWidget_v1> builder)
    {
        // NOTE: We only need this statement if we want DOSuperWidget to be a separate root entity from DOWidget.
        // Our SuperWidget inherits from Widget, just to simplify the codebase.
        // It does NOT inherit, so that the two types share a common table.
        // So, we must tell EF to not treate SuperWidget as a derived type of Widget.
        // Break EF inheritance here...
        builder.Metadata.BaseType = null;
Once the above line is included in your mapping Configure() method, EF will know that your derived type has no base to concern with.
And, EF Core will treat the derived type as an independent type from its base.
EF: Data Contexts - DbContexts
When working in EF, you will come across the need to create a DbContext type.
MS has a base class that you inherit from, called: DbContext.
It is useful to implement either a two or three layer DbContext.
See this page for EF Logging implementation: EF: Logging
Two Layer DbContext
The two layers in this organizational pattern include:
- A base type with common elements.
- A top-level type with provider-specific details.
The base type inherits from DbContext, and bolts in dynamic entity registration and EF log management.
And, the top layer adds in the provider-specific logic for the backing store.
This would include logic for composing connection strings for SQL Server, Postgres, SQLite, etc.
Three Layer DbContext
The three layer pattern for DbContext adds a middle layer that separates out the domain-specific logic.
Here are the three layers:
- Base Layer - common elements and logic
- Domain Layer - A middle layer for domain registrations
- Provide Layer - A top-level type with provider-specific details
Base Layer DbContext
This layer inherits from DbContext.
It includes common logic for all data context types.
It includes properties and logic to manage EF logging.
This includes controlling the logging level and a delegate for directing log output.
Here's what the base layer data context would look like:
using System;
using System.Diagnostics.CodeAnalysis;
using Microsoft.EntityFrameworkCore;
using Microsoft.Extensions.Logging;

namespace DbContextLibrary
{
    /// <summary>
    /// Wraps the base db context class to provide late-bound entity mapping and date setting on save.
    /// To, use, derive a context class from this base that includes your DbSet props. Then, derive a datastore-specific type from that for each storage type you have: PostGres, MSSQL, InMem, etc...
    /// NOTE: The OnModelCreating override, in this class, makes use of AssemblyHelper to prescreen and compose a list of assemblies where IEntityTypeConfiguration<> implementations can be found.
    /// NOTE: So, be sure, during early process startup, to set the AssemblyHelper_Base.AssemblyHelperRef with a valid AssemblyHelper instance.
    /// </summary>
    public class cDBDContext_Base : DbContext
    {
        #region Private Fields

        protected string _classname;

        #endregion


        #region Public Properties

        /// <summary>
        /// Indicates what database implementation this context maps to: MSSSQLSERVER, POSTGRES, SQLITE, etc...
        /// </summary>
        public string DatabaseType { get; protected set; } = "";

        /// <summary>
        /// Behavior property that affects whether or not, this class and derivatives will pull in all implementations of IEntityTypeConfiguration<>, from the process's referenced assemblies.
        /// If not aware, these are the custom mapping models that tell EF how to map entity properties to table columns, what value conversions to perform, etc.
        /// This property (behavior) is enabled by default.
        /// If you don't want this behavior to occur in your implementation, set this property to false in the constructor of the derived class.
        /// NOTE: Leaving this enabled doesn't cause trouble for stray mappings to be pulled into a database context, because only the mappings of a DbSet will be used.
        /// </summary>
        public bool Cfg_LoadAllMapConfigsfromAssemblies { get; set; } = true;

        /// <summary>
        /// Set this if you want EF to dump logs.
        /// </summary>
        static public bool Cfg_Enable_EFLogging { get; set; } = false;

        /// <summary>
        /// If you hav enabled EF logging, you can assign a callback, here, to redirect logs.
        /// Logs are dumped to console, if this is unset.
        /// </summary>
        static public Action<string>? Cfg_LogTarget { get; set; } = null;

        /// <summary>
        /// This defaults logging to informational, if logging is enabled.
        /// </summary>
        static public LogLevel Cfg_LogLevel { get; set; } = LogLevel.Information;

        #endregion


        #region ctor / dtor

        public cDBDContext_Base([NotNullAttribute] DbContextOptions options) : base(options)
        {
            var tt = this.GetType();
            this._classname = tt.Name;

            OGA.SharedKernel.Logging_Base.Logger_Ref?.Info(
                $"{_classname}:DataContext - started.");

            OGA.SharedKernel.Logging_Base.Logger_Ref?.Info(
                $"{_classname}:DataContext - completed.");
        }

        public cDBDContext_Base() : base()
        {
            var tt = this.GetType();
            this._classname = tt.Name;

            OGA.SharedKernel.Logging_Base.Logger_Ref?.Info(
                $"{_classname}:DataContext - started.");

            OGA.SharedKernel.Logging_Base.Logger_Ref?.Info(
                $"{_classname}:DataContext - completed.");
        }


        #endregion


        #region Private Methods

#if NET5_0
        // NOTE: The convention converter in this block is only available in EF6 and forward.
        // So, EF5 usage will require individual value converters for each DateTime property in the model builder logic of each entity.
#else
        // NOTE: The convention converter in this block is only available in EF6 and forward.
        // So, EF5 usage will require individual value converters for each DateTime property in the model builder logic of each entity.


        /// <summary>
        /// This was added to globally retrieve all stored DateTime properties with their UTC flag set.
        /// If your implementation of classes has a mix of UTC and local time properties, you will need to be
        /// more surgical, and use individual value converters instead of this override.
        /// If this is the case, override this method (in your derived class) to be blank and not call the base, and assign individual value converters in the appropriate model builder instances.
        /// See this usage wiki: https://oga.atlassian.net/wiki/spaces/~311198967/pages/66322433/EF+Working+with+DateTime
        /// </summary>
        /// <param name="configurationBuilder"></param>
        protected override void ConfigureConventions(ModelConfigurationBuilder configurationBuilder)
        {
            configurationBuilder
                .Properties<DateTime>()
                .HaveConversion<DateTimeUTCConverter>();
        }

#endif
        /// <summary>
        /// This override retrieves all the IEntityTypeConfiguration<> implementations in process assemblies, and makes them available as entity mappings.
        /// If you don't want this behavior, set Cfg_LoadAllMapConfigsfromAssemblies = false in your derived class' constructor.
        /// You can
        /// </summary>
        /// <param name="modelBuilder"></param>
        protected override void OnModelCreating(ModelBuilder modelBuilder)
        {
            // Search for IEntityTypeConfiguration<> implementations if required...
            if(Cfg_LoadAllMapConfigsfromAssemblies)
            {
                // Iterate all assemblies, and search for types that implement IEntityTypeConfiguration, and register each one.
                var asl = OGA.SharedKernel.Process.AssemblyHelper_Base.AssemblyHelperRef.Get_All_Assemblies();
                foreach (var fff in asl)
                {
                    modelBuilder.ApplyConfigurationsFromAssembly(fff);
                }
            }

            base.OnModelCreating(modelBuilder);
        }

        /// <summary>
        /// This override lets us convert the Options instance we got at construction,
        ///     and convert it to a DbContextOptions, which is required by the DbContext base.
        /// This override is called on first usage of the context, not at construction.
        /// </summary>
        /// <param name="options"></param>
        protected override void OnConfiguring(DbContextOptionsBuilder options)
        {
            // Dump logs if asked...
            if(Cfg_Enable_EFLogging)
            {
                options.EnableSensitiveDataLogging(); // shows parameter values
                options.LogTo(LogInfeed, Cfg_LogLevel);
            }
        }


        /// <summary>
        /// This method protects the dbcontext, by allowing it to always have a logging target method, to call.
        /// And, this method decides what that target points to, based on runtime-accessible config.
        /// We include this indirection, to allow the logging target to be changed at runtime, without causing problems in the db context.
        /// </summary>
        /// <param name="msg"></param>
        private void LogInfeed(string msg)
        {
            try
            {
                if(Cfg_LogTarget != null)
                    Cfg_LogTarget(msg);
                else
                    Console.WriteLine(msg);
            } catch (Exception) { }
        }

        #endregion
    }
}
Domain Layer DbContext
Provider Layer DbContext
EF: Dynamic DBContext
This library contains a slightly different dbcontext implementation than our typical three-layer dbcontext library.
We've created a library that fits the following use cases:
- Provides an Entity Framework DbContext.
- Works with these backends:
- MSSQL
- Postgres
- SQLite
- In-Memory
- Compatible with NET Core 5, 6, and 7.
- Makes use of reflection where possible, to avoid hard
Project Info
The GitHub repo is here: https://github.com/ogauto/OGA.DynamicDomain.Lib
The JIRA page is here:
The Jenkins Job is here: http://192.168.1.200:8080/job/oga-jobs/job/Libraries/job/Build-OGA.DynamicDomain.Lib/
Capabilities
Here are the capabilities of this library.
Included Backend Provider
This library implements the backend database provider, via reflection.
What this does is, it allows the base library, itself, to contain the backend-specific, boilerplate logic, that is normally in the top-level of the regular dbcontext implementation.
EF Logging
This library implements a method of EF logging that allows us to hook into EF events and filter for ones of log-able interest, that are sunk to our existing NLog logging.
Details are on this page: EF: Logging
EF: Logging
Here's some notes on how we implement logging in EF.
We've currently implemented it in our dynamic domain dbcontext, DynamicDbContext.
To make it work, we just have to create an instance of DbContextLoggingConfig, and pass it to our top-level dbcontext constructor.
NOTE: Our logging implementation is to use Nlog as a log sink.
But, this page contains notes on how to adapt the logging boilerplate to other backend types.
DbContextLoggingConfig
Our logging implementation requires an instance of this class to define the EF logging behavior.
It is passed to the dbcontext constructor, and remains through the lifecycle of the dbcontext.
NOTE: It is possible to change logging behavior at runtime, by creating a new instance of this, that is passed to newly generated dbcontext instances.
But, we will leave that as an advanced topic.
Here are some notes on how to setup the config.
Enabled
To run a dbcontext without logging, you don't actually have to pass an instance of DbContextLoggingConfig to the dbcontext constructor.
But if you do want to pass one in, and still have logging disabled, just set Enabled = False;
IncludeSensitiveData
If you set IncludeSensitiveData to True, then EF log events will include things, such as passwords and connection strings.
Specifically, setting this makes a call to options.EnableSensitiveDataLogging().
Level
This defines the logging level for EF logging.
Set the Level to the desired logging level for EF log-able events.
NOTE: Your process logging has to meet or exceed the EF logging level, in order to see the higher-diagnostic messages from EF.
This is because we are still using NLog as out logging output, and we translate the EF log message levels to NLog levels, to determine what level to log something at.
EventCategories
This is a bit-wise enumeration of EF events that can be logged.
We've grouped events into this enum: eEFLoggingEvents.
They are:
- Commands - Add this to capture high-level execution metrics and errors.
- Connection Life Cycle - Includes these Logging to diagnose connection pool issues or intermittent DB problems.
- Transactions - These are for debugging partial failures, deadlocks, rollback scenarios, and long-running transactions.
- Save Changes - These are useful to detect persistence-level exceptions.
- Query Warnings - These are useful to detect unordered paging, client-side evaluation risks, lazy loading mistakes.
Some of these categories create tons of log messages and performance penalties.
So, use care when enabling them in production.
To define the log event categories, you do an OR (||) of the desired categories.
Like this:
config.EventCategories = eEFLoggingEvents.Commands | eEFLoggingEvents.ConnectionLifeCycle;UseEFLogClass
Normally, this will be False, so the running process will use the global logger.
But if you want a dedicated NLog logger, set this to true.
When true, a logger, named "EF" will be used.
NOTE: Your process startup should provide any setup required for this named logger, so that it will have the desired formatting and target.
LoggerOptions
This property doesn't need adjustment, for our current implementation (using a custom log format).
So, it can be left alone.
This is because we accept the EventData object from EF, and apply our own formatting to the log message.
But if you do decide to accept pre-formatted log strings from EF, then this property would define some aspects of it, such as timestamp format, and line-wrap.
To apply options to the property, it is best to use the predefined option flags from the DbContextLoggerOptionsPresets class.
Sink
Normally, this property can be left alone, since our current implementation is to send logs to Nlog.
But if you do want logs to go elsewhere, assign a callback delegate, to this property that will accept and record formatted log messages from EF.
EFLogFilterBuilder
This helper class contains methods that are used by the logging boilerplate of the dbcontext.
NOTE: There is no need to directly call methods of this class.
But, we will explain what it does.
This class type's goal is to generate a filtering predicate, a callback method, that EF accepts as an argument in its options.LogTo() method.
The filter predicate tells EF what events are to be logged for the logging level.
You can evolve this class as you come across other EF event types to log, or have different category groupings to use.
Following its pattern, will generate the appropriate filter predicate methods that EF uses.
DbContext Logging Boilerplate
Here are notes on the boilerplate logic that is used in the dbcontext.
Constructor
The base constructor accepts an optional DbContextLoggingConfig instance.
If not given or is null, no EF logging will occur.
If you are adapting this for a new dbcontext constructor, be sure that the private logging config field (_logging) is always set by the constructor.
Here is an example of how to do it:
public DynamicDbContext([NotNullAttribute] DbContextOptions options, DbContextLoggingConfig? logging = null) : base(options)
{
    // Accept any logging config that was passed in...
    _logging = logging ?? new DbContextLoggingConfig { Enabled = false };
}

public DynamicDbContext() : base()
{
    // Accept a default logging config...
    _logging = new DbContextLoggingConfig { Enabled = false };
}
Dispose Methods
Each of the Dispose method types (sync and async) need to release logging.
This is done, so that any Sink callback is cleared, preventing dangling references.
It can be done, like this:
override public void Dispose()
{
    if (!_disposed)
    {
        // Release logging...
        this.ReleaseLogging();

        _disposed = true;
    }
    base.Dispose();
}

/// <summary>
/// We override DisposeAsync() so we can unhook logging.
/// </summary>
override public async ValueTask DisposeAsync()
{
    if (!_disposed)
    {
        // Release logging...
        this.ReleaseLogging();

        _disposed = true;
    }
    await base.DisposeAsync();
}
OnConfiguring() Override
The OnConfiguring() override needs to grab the DbContextOptionsBuilder instance and setup logging with it.
This is done by simply calling into our logging boilerplate, like this:
protected override void OnConfiguring(DbContextOptionsBuilder options)
{
    // Do any logging setup...
    this.SetupLogging(options);
}
SetupLogging()
This method is called by OnConfiguring(), to stand up logging for the dbcontext.
It's purpose is to make a call to: options.LogTo(), and pass in a filter predicate and log callback.
NOTE: options.LogTo() is our hook into the logging mechanism of EF.
So, all of our logging logic works to call this method.
The options.LogTo() method is where we apply filtering and assign a logging callback method.
It accepts the logging filter predicate (created by EFLogFilterBuiler) to define what events to log.
And, it accepts the logging callback delegate, our EfEventInfeed() method, to perform the actual logging.
NOTE: Specifically, the logging callback delegate is directly called by EF core, when a log-able event has occurred.
The delegate's job is to do the actual logging.
There is no need to modify anything in this method, to change logging behavior.
If you are adapting logging to a new dbcontext type, just copy this method across.
ToNLogLevel()
This method is used to convert the Microsoft log levels to our NLog log levels.
It is called each time a log-able event triggers.
If you are adapting logging to a new dbcontext type, just copy this method across.
EfEventInfeed()
This is the callback method that hooks into EF, to receive log-able events.
This method performs the actual logging.
It will send logs to one of three places:
- If the Sink property (of the logging config) is set, logs will be diverted there.
- If the UseEFLogClass (of the logging config) is True, logs will be sent to the named NLog logger, "EF".
- Otherwise, logs will be sent to the normal NLog target.
If you are adapting logging to a new dbcontext type, just copy this method across.
If you are adapting a new logging backend, this is where you will start splicing in your logging backend, replacing the Nlog calls with yours.
FormatLogMessage()
This method is a bit of purposeful function indirection, that we use to reduce unnecessary formatting of messages that will not be logged.
NOTE: If you review the EfEventInfeed() method, you will notice that we feed this FormatLogMessage() method directly into the nlog.Log() statement.
That ensures that the FormatLogMessage() call is only executed IF the Nlog logging level is adequate.
When executed, this method composes the log message with a prepended context line that contains data from the log level and eventdata.
It returns the composed log string, for logging.
If you are adapting logging to a new dbcontext type, just copy this method across.
If you are wanting to change the shape and information of log messages, modify this method.
ReleaseLogging()
This method is used during Dispose(), to release any explicit log sink callback.
If you are adapting logging to a new dbcontext type, just copy this method across.
VS Library - csproj Contents
Here are some standard things for the csproj file of a .NET library project.
The top Property Group should list the following things:
  <PropertyGroup>
    <TargetFramework>net6.0</TargetFramework>
    <PackageId>OGA.NugetRepoClient.Lib</PackageId>
    <Product>OGA Nuget Repository Client Library</Product>
    <Description>Wrapper library for Nuget Repository client usage.</Description>
    <RootNamespace>OGA.NugetRepoClient</RootNamespace>
    <AssemblyName>OGA.NugetRepoClient.Lib</AssemblyName>
    <Version>1.0.0</Version>
    <AssemblyVersion>1.0.1.0</AssemblyVersion>
    <FileVersion>1.0.1.0</FileVersion>
    <Company>OGA</Company>
    <Authors>Lee White</Authors>
    <Configurations>DebugWin;ReleaseWin;DebugLinux;ReleaseLinux</Configurations>
    <GeneratePackageOnBuild>true</GeneratePackageOnBuild>
    <IncludeSymbols>true</IncludeSymbols>
    <SymbolPackageFormat>snupkg</SymbolPackageFormat>
    <ImplicitUsings>enable</ImplicitUsings>
    <Nullable>enable</Nullable>
    <GenerateDocumentationFile>True</GenerateDocumentationFile>
  </PropertyGroup>
Special for .NET5
If the project is for .NET5, be sure to add the warning suppression from this page: VS IDE Suppress Compiler Warnings Project Wide
OS-Based Conditional Source Code
If the library uses conditional compilation statements (preprocessor directives) to suppress or enable source code for different OS targets, you will need to add these additional property groups:
  <PropertyGroup Condition="$(Configuration.EndsWith('Win'))">
    <DefineConstants>$(DefineConstants);Windows</DefineConstants>
  </PropertyGroup>

  <PropertyGroup Condition="$(Configuration.EndsWith('Linux'))">
    <DefineConstants>$(DefineConstants);Linux</DefineConstants>
  </PropertyGroup>

  <PropertyGroup Condition="$(Configuration.EndsWith('OSX'))">
    <DefineConstants>$(DefineConstants);OSX</DefineConstants>
  </PropertyGroup>
.NET 5 Global Using Error
If you have a project that is targeting a .NET 5, and you see the following error, follow this page:

The error indicates that your csproj file likely has a statement that only works in .NET6 (C# v10) and later.
Open your csproj file and look for a statement, like this:

If set to enable (in a .NET 5 project), that is causing the problem.
Set it to 'disable', and rebuild.
Template Project Structures
NET5 Unit Test CSPROJ Content
  <PropertyGroup>
    <TargetFramework>net5.0</TargetFramework>
    <!-- NoWarn below suppresses NETSDK1138 project-wide -->
    <!-- This suppresses the IDE warning that NET5.0 is out of support. -->
    <NoWarn>$(NoWarn);NETSDK1138</NoWarn>

    <!-- NoWarn below suppresses CS1998 project-wide -->
    <!-- This suppresses the IDE warning that the async method lack await. -->
    <!-- We default all test methods to async, so the timing and dependency calls are the consistent. -->
    <NoWarn>$(NoWarn);CS1998</NoWarn>

    <RootNamespace>OGA.HBD_Tests</RootNamespace>
    <IsPackable>false</IsPackable>
    <IsTestProject>true</IsTestProject>
  </PropertyGroup>

  <ItemGroup>
    <PackageReference Include="Microsoft.NET.Test.Sdk" Version="17.6.2" />
    <PackageReference Include="MSTest.TestAdapter" Version="3.0.4" />
    <PackageReference Include="MSTest.TestFramework" Version="3.0.4" />
    <PackageReference Include="coverlet.collector" Version="3.1.2" />

    <PackageReference Include="Nanoid" Version="2.1.0" />
    <PackageReference Include="Newtonsoft.Json" Version="13.0.3" />
    <PackageReference Include="NLog" Version="5.2.8" />
    <PackageReference Include="OGA.Common.Lib.NetCore" Version="3.8.0" />
    <PackageReference Include="OGA.DomainBase" Version="2.2.6" />
    <PackageReference Include="OGA.SharedKernel" Version="3.6.0" />
    <PackageReference Include="OGA.Testing.Lib" Version="1.12.0" />
  </ItemGroup>

  <PropertyGroup Condition="'$(Configuration)|$(Platform)'=='Debug|AnyCPU'">
    <DefineConstants>$(DefineConstants);NET5</DefineConstants>
  </PropertyGroup>

  <PropertyGroup Condition="'$(Configuration)|$(Platform)'=='Release|AnyCPU'">
    <DefineConstants>$(DefineConstants);NET5</DefineConstants>
  </PropertyGroup>
NET6 Unit Test CSPROJ Content
  <PropertyGroup>
    <TargetFramework>net6.0</TargetFramework>
    <ImplicitUsings>enable</ImplicitUsings>
    <Nullable>enable</Nullable>

    <IsPackable>false</IsPackable>
    <IsTestProject>true</IsTestProject>

    <!-- NoWarn below suppresses CS1998 project-wide -->
    <!-- This suppresses the IDE warning that the async method lack await. -->
    <!-- We default all test methods to async, so the timing and dependency calls are the consistent. -->
    <NoWarn>$(NoWarn);CS1998</NoWarn>
    <RootNamespace>OGA.HBD_Tests</RootNamespace>
  </PropertyGroup>

  <ItemGroup>
    <PackageReference Include="Microsoft.NET.Test.Sdk" Version="17.6.2" />
    <PackageReference Include="MSTest.TestAdapter" Version="3.0.4" />
    <PackageReference Include="MSTest.TestFramework" Version="3.0.4" />
    <PackageReference Include="coverlet.collector" Version="3.2.0">
      <PrivateAssets>all</PrivateAssets>
      <IncludeAssets>runtime; build; native; contentfiles; analyzers; buildtransitive</IncludeAssets>
    </PackageReference>

    <PackageReference Include="Nanoid" Version="2.1.0" />
    <PackageReference Include="Newtonsoft.Json" Version="13.0.3" />
    <PackageReference Include="NLog" Version="5.2.8" />
    <PackageReference Include="OGA.Common.Lib.NetCore" Version="3.8.0" />
    <PackageReference Include="OGA.DomainBase" Version="2.2.6" />
    <PackageReference Include="OGA.SharedKernel" Version="3.6.0" />
    <PackageReference Include="OGA.Testing.Lib" Version="1.12.0" />
  </ItemGroup>
NET7 Unit Test CSPROJ Content
  <PropertyGroup>
    <TargetFramework>net7.0</TargetFramework>
    <ImplicitUsings>enable</ImplicitUsings>
    <Nullable>enable</Nullable>

    <IsPackable>false</IsPackable>
    <IsTestProject>true</IsTestProject>

    <!-- NoWarn below suppresses CS1998 project-wide -->
    <!-- This suppresses the IDE warning that the async method lack await. -->
    <!-- We default all test methods to async, so the timing and dependency calls are the consistent. -->
    <NoWarn>$(NoWarn);CS1998</NoWarn>
    <RootNamespace>OGA.HBD_Tests</RootNamespace>
  </PropertyGroup>

  <ItemGroup>
    <PackageReference Include="Microsoft.NET.Test.Sdk" Version="17.6.2" />
    <PackageReference Include="MSTest.TestAdapter" Version="3.0.4" />
    <PackageReference Include="MSTest.TestFramework" Version="3.0.4" />
    <PackageReference Include="coverlet.collector" Version="3.1.2" />

    <PackageReference Include="Nanoid" Version="2.1.0" />
    <PackageReference Include="Newtonsoft.Json" Version="13.0.3" />
    <PackageReference Include="NLog" Version="5.2.8" />
    <PackageReference Include="OGA.Common.Lib.NetCore" Version="3.8.0" />
    <PackageReference Include="OGA.DomainBase" Version="2.2.6" />
    <PackageReference Include="OGA.SharedKernel" Version="3.6.0" />
    <PackageReference Include="OGA.Testing.Lib" Version="1.12.0" />
  </ItemGroup>

  <PropertyGroup Condition="'$(Configuration)|$(Platform)'=='Debug|AnyCPU'">
    <DefineConstants>$(DefineConstants);NET7</DefineConstants>
  </PropertyGroup>

  <PropertyGroup Condition="'$(Configuration)|$(Platform)'=='Release|AnyCPU'">
    <DefineConstants>$(DefineConstants);NET7</DefineConstants>
  </PropertyGroup>
NET5 CSPROJ Content
  <PropertyGroup>
    <TargetFramework>net5.0</TargetFramework>
    <!-- NoWarn below suppresses NETSDK1138 project-wide -->
    <!-- This suppresses the IDE warning that NET5.0 is out of support. -->
    <NoWarn>$(NoWarn);NETSDK1138</NoWarn>
    <PackageId>OGA.HBD.Lib</PackageId>
    <Product>OGA HBD Library</Product>
    <Description>OGA Host Bootstrap Document Library</Description>
    <AssemblyName>OGA.HBD.Lib</AssemblyName>
    <RootNamespace>OGA.HBD</RootNamespace>
    <Version>1.0.1</Version>
    <AssemblyVersion>1.0.1.1</AssemblyVersion>
    <FileVersion>1.0.1.1</FileVersion>
    <Authors>Lee White</Authors>
    <Company>Lee White</Company>
    <GeneratePackageOnBuild>true</GeneratePackageOnBuild>
    <IncludeSymbols>true</IncludeSymbols>
    <SymbolPackageFormat>snupkg</SymbolPackageFormat>
    <SignAssembly>False</SignAssembly>
    <GenerateDocumentationFile>True</GenerateDocumentationFile>
    <Configurations>DebugWin;ReleaseWin;DebugLinux;ReleaseLinux</Configurations>
    <Nullable>enable</Nullable>
  </PropertyGroup>

  <PropertyGroup Condition="$(Configuration.EndsWith('Win'))">
    <DefineConstants>$(DefineConstants);Windows;NET5</DefineConstants>
  </PropertyGroup>

  <PropertyGroup Condition="$(Configuration.EndsWith('Linux'))">
    <DefineConstants>$(DefineConstants);Linux;NET5</DefineConstants>
  </PropertyGroup>

  <PropertyGroup Condition="$(Configuration.EndsWith('OSX'))">
    <DefineConstants>$(DefineConstants);OSX;NET5</DefineConstants>
  </PropertyGroup>
NET6 CSPROJ Content
  <PropertyGroup>
    <TargetFramework>net6.0</TargetFramework>
    <PackageId>OGA.HBD.Lib</PackageId>
    <Product>OGA HBD Library</Product>
    <Description>OGA Host Bootstrap Document Library</Description>
    <AssemblyName>OGA.HBD.Lib</AssemblyName>
    <RootNamespace>OGA.HBD</RootNamespace>
    <Version>1.0.1</Version>
    <AssemblyVersion>1.0.1.1</AssemblyVersion>
    <FileVersion>1.0.1.1</FileVersion>
    <Authors>Lee White</Authors>
    <Company>Lee White</Company>
    <GeneratePackageOnBuild>true</GeneratePackageOnBuild>
    <IncludeSymbols>true</IncludeSymbols>
    <SymbolPackageFormat>snupkg</SymbolPackageFormat>
    <SignAssembly>False</SignAssembly>
    <GenerateDocumentationFile>True</GenerateDocumentationFile>
    <Configurations>DebugWin;ReleaseWin;DebugLinux;ReleaseLinux</Configurations>
    <Nullable>enable</Nullable>
  </PropertyGroup>

  <PropertyGroup Condition="$(Configuration.EndsWith('Win'))">
    <DefineConstants>$(DefineConstants);Windows;NET6</DefineConstants>
  </PropertyGroup>

  <PropertyGroup Condition="$(Configuration.EndsWith('Linux'))">
    <DefineConstants>$(DefineConstants);Linux;NET6</DefineConstants>
  </PropertyGroup>

  <PropertyGroup Condition="$(Configuration.EndsWith('OSX'))">
    <DefineConstants>$(DefineConstants);OSX;NET6</DefineConstants>
  </PropertyGroup>
NET7 CSPROJ Content
  <PropertyGroup>
    <TargetFramework>net7.0</TargetFramework>
    <PackageId>OGA.HBD.Lib</PackageId>
    <Product>OGA HBD Library</Product>
    <Description>OGA Host Bootstrap Document Library</Description>
    <AssemblyName>OGA.HBD.Lib</AssemblyName>
    <RootNamespace>OGA.HBD</RootNamespace>
    <Version>1.0.1</Version>
    <AssemblyVersion>1.0.1.1</AssemblyVersion>
    <FileVersion>1.0.1.1</FileVersion>
    <Authors>Lee White</Authors>
    <Company>Lee White</Company>
    <GeneratePackageOnBuild>true</GeneratePackageOnBuild>
    <IncludeSymbols>true</IncludeSymbols>
    <SymbolPackageFormat>snupkg</SymbolPackageFormat>
    <SignAssembly>False</SignAssembly>
    <GenerateDocumentationFile>True</GenerateDocumentationFile>
    <Configurations>DebugWin;ReleaseWin;DebugLinux;ReleaseLinux</Configurations>
    <Nullable>enable</Nullable>
  </PropertyGroup>

  <PropertyGroup Condition="$(Configuration.EndsWith('Win'))">
    <DefineConstants>$(DefineConstants);Windows;NET7</DefineConstants>
  </PropertyGroup>

  <PropertyGroup Condition="$(Configuration.EndsWith('Linux'))">
    <DefineConstants>$(DefineConstants);Linux;NET7</DefineConstants>
  </PropertyGroup>

  <PropertyGroup Condition="$(Configuration.EndsWith('OSX'))">
    <DefineConstants>$(DefineConstants);OSX;NET7</DefineConstants>
  </PropertyGroup>
Sorting a List Collection of Type
You will come across the need to sort a list of types, at some point.
This method will do In-Place Sorting:
list.Sort((a, b) => a.SomeProperty.CompareTo(b.SomeProperty));Example:
var people = new List<Person>
{
    new Person { Name = "Alice", Age = 30 },
    new Person { Name = "Bob", Age = 25 },
    new Person { Name = "Charlie", Age = 35 }
};

// Sort by Age ascending...
people.Sort((a, b) => a.Age.CompareTo(b.Age));

// Or, by Age descending...
people.Sort((a, b) => b.Age.CompareTo(a.Age));
If you don't need In-Place sorting, you can use LINQ, like this:
// Ascending...
var sorted = people.OrderBy(p => p.Age).ToList();

// Descending...
var sorted = people.OrderByDescending(p => p.Age).ToList();