Ubuntu Server Setup
- Ubuntu Host Setup
- Ubuntu: Setup SSH Server
- Ubuntu: Setup Static IP Address
- Ubuntu: Set Hostname
- Linux: Manually Installing SSH Keys
- How to Setup SSH Key Authentication to Linux
Ubuntu Host Setup
Here are the minimal steps to setup a clean Ubuntu VM.
Note: These instructions are tested on on Ubuntu v22 through v24.
They may require updates for other versions.
Spawn VM Clone
The first step is to spawn a clone of the template VM.
Be sure to do the following:
- Give it an inventory name that fits its hostname.
- Update the CPU count.
- Set the memory size.
- Set its disk space for the intended service.
- Assign the VM's NIC to the Provisioning portgroup (VLAN 170).
This will ensure that we can access it via SSH, for faster setup.
Once the VM is started, log into its console session.
Update Packages
From the console, update packages of the VM.
Do this before anything else, to ensure the latest package versions are used.
sudo apt-get update && sudo apt-get upgrade -yUbuntu: SSH Server
See this page for setting up the SSH Server: Ubuntu: SSH Server
Initial Remote Access (VLAN 170)
Once the VM is started up, and in the Provisioning VLAN (VLAN 170), it should have a DHCP address that we can reach.
From the VM's local console, run this to get its IP on the provisioning VLAN:
ifconfigOpen an SSH session to the VM, for remote setup.
Setting the Host Name
See this page for how to set the hostname: Ubuntu: Set Hostname
Other Packages
We will install net-tools on each host, for diagnostic purposes.
sudo apt install net-toolsManaged Host Setup
If the VM will be managed by Ansible and deployment tools, see this page for setup steps: Managed Host User Setup
User Setup
Configure any users and groups that the VM will need.
This may include a deployment user.
SSH Keys
We need to add SSH public keys for users added, above.
See this page for the various method of adding SSH keys to a remote linux host: Linux SSH Key Management
Switch SSH to Key Auth
Once you have installed SSH public keys in the VM, you need update the SSH config to SSH authentication.
To do so, open the sshd config file, with this:
sudo nano /etc/ssh/sshd_configLook for the line with this directive, 'PasswordAuthentication'.
Uncomment the line, and set it to no, like this:
PasswordAuthentication noIn the config file, set Key Auth to yes:
PubkeyAuthentication yesSave and close the SSH config file.
Restart SSH with this:
sudo systemctl restart sshVerify SSH Keys
Now that SSH key authentication is enabled, you need to verify that each added SSH public key works.
Attempt to connect with the VM, using each configured SSH key.
Verify each one works.
See this page for steps on how to connect to a Linux host from Windows: Connecting to SSH Server from Windows
Routing and Firewall
So far, we are accessing the VM on a temporary provisioning network.
We need to set things up for its final location.
Create a proper firewall rule for accessing the VM at its final IP address, in its target VLAN.
Static IP Address
With the above firewall rule in place, we will be able to access the VM, once it's moved to its target VLAN.
But first, we need to set its static IP address: Ubuntu: Setup Static IP Address
Change VLAN PortGroup
Setting the static IP address, above, means that we lost temporary SSH access.
We need to fix that.
In the hypervisor, change the VM's portgroup to the target VLAN.
Remote Access
With the VM at its assigned static IP, in the target VLAN, and with access firewall rule exists, we can remote SSH to it.
Attempt to open a remote SSH session to the VM.
Root CA Certs
If you are looking for the local intranet Root CA certificate, see this: Current Intranet Root CA Certificate
If your institution or company uses has its own certificate authority (CA), you should install its root CA into the following folder:
/usr/local/share/ca-certificates/For example, to add the root CA for the local network, create the file with this:
sudo nano /usr/local/share/ca-certificates/ogsofttech.lan_ca.crtSave and close the file.
Once all root CA certs are added, you need to update the runtime's CA list, with this:
sudo update-ca-certificatesSee this page for how to add Root CA certificates: How to Add Root CAs to Ubuntu
NTP Client Needs
If the VM will be located in an isolated VLAN with restricted internet access, it may need access to the local NTP server.
See this page for how to setup each host/VM to use the local private NTP server: Ubuntu: Use Private NTP Server
Further Setup
With the above things done, we can continue on with other setup.
Ubuntu: Setup SSH Server
Here are steps to setup the SSH server on an Ubuntu host.
Here's a good reference article for how to do what we're doing here: How to Enable SSH on Ubuntu 20.04
Here are the commands to execute:
sudo apt updateInstall the SSH server with this:
sudo apt install openssh-serverStart the SSH server:
sudo systemctl enable --now sshVerify it is running:
sudo systemctl status sshAdd a firewall rule for the SSH server:
sudo ufw allow sshUbuntu: Setup Static IP Address
Here are notes and steps to assign a static IP address for an Ubuntu host.
These steps are known to work with Ubuntu 22 and 24.
NOTE: If you are doing for a Debian host, see this page: Debian: Setup Static IP Address
Net Tools (ipconfig)
Install net tools, so we can use commands like: ipconfig
sudo apt install net-tools
Static IP Address
Static addresses will be defined in a netplan file, configured below.
But, we need to do a few things, first:
- Get the Gateway IP
- Enable Adapters
Get the Gateway IP
You will need to know the gateway address that your host will use.
If the host is not on the desired network, you will need to determine the gateway IP, manually.
Or, you can join the host to the network, and do the following to determine it.
If the host is up, you can run this command to get the current default gateway assigned to it:
ip r | grep default
This command will return the default gateway address, like this:

Enable Adapters
If you added an adapter to the host, it may be in a down state.
To enable it, use this command to find the name:
sudo ip a | grep ^[[:digit:]]The above will give a list, like this:

And, you can enable it with this:
sudo ifconfig eth1 upNOTE: Be sure to use the name of the nic, from the previous call.
NetPlan YML
We will assign our static address, via NetPlan.
Open the netplan file, so you can edit the network config.
It will be located here:
/etc/netplan/
Existing Cloud YML
If this folder contains a cloud yaml, you may have to disable cloud network config.
To do so, create a file at:
/etc/cloud/cloud.cfg.d/99-disable-network-config.cfg
And, give it this content:
network: {config: disabled}
Delete the existing cloud yml file, so it does not interfere with the config you will build, next.
Now, you can write a config yaml file that will be accepted through a reboot.
Editing NetPlan YML
If a non-cloud netplan yml file exists, you may be able to edit it. The file on your host may have a different name, depending on OS version.
Check the filename before running this command.
Here’s the name of a valid netplan file that can be created, if one does not already exist.
sudo nano /etc/netplan/01-network-manager-all.yaml
Edit the file to reflect the following.
Be sure to use your ethernet adapter name (enps3s0), or whatever its name was discovered to be earlier.
Create the netplan file with the above name, 01-network-manager-all.yaml
Set it up with your ether adapter names, static address, DNS, and gateway addresses.
The following are examples you can use:
network:
    version: 2
    renderer: networkd
    ethernets:
        enp3s0:
            addresses:
                - 10.10.10.2/24
            nameservers:
                search: [mydomain, otherdomain]
                addresses: [10.10.10.1, 1.1.1.1]
            routes:
                - to: default
                  via: 10.10.10.1
Here’s a working netplan file, in use on AWS, that has two NICs (public and private subnets):
# This sample has two network adapters, each in different subnets.
# The first NIC has a configured gateway and DNS.
# The second NIC is in a private subnet.
network:
  version: 2
  renderer: networkd
  ethernets:
    eth0:
      addresses:
        - 10.0.1.10/24
      nameservers:
        addresses: [127.0.0.53,8.8.8.8,8.8.4.4]
      routes:
        - to: default
          via: 10.0.1.1
    eth1:
      addresses:
        - 10.0.2.10/20
Create the Save changes to the file.
Make sure the created netplan file is only accessible by root, by doing this:
sudo chmod 600 ./01-network-manager-all.yamlAnd, apply changes with:
sudo netplan applyCheck that connectivity exists through a reboot, to make sure settings persist.
Ubuntu: Set Hostname
Here are steps to properly set the hostname of an Ubuntu server.
HostnameCtl
Get the current hostname with this:
hostnamectl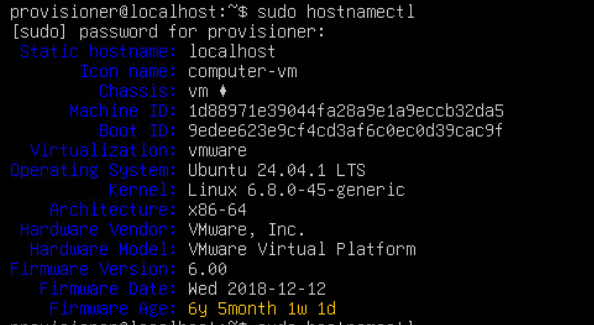
To set it, use this:
sudo hostnamectl set-hostname new-hostname (replace new-hostname)Once set, confirm it with the previous command.
Hosts File
Now, you need to update the hostname in your hosts file, with this:
sudo nano /etc/hostsThe hosts file lists the hostname in the second entry: 127.0.1.1, like this:

Update the 127.0.1.1 entry with the correct hostname.
Save and close the hosts file after update.
Linux: Manually Installing SSH Keys
Here's some steps on how to manually install SSH public keys in a host.
1. SSH Key Folder
cd /home/usernameCheck if the .ssh folder exists (it is hidden, requiring the -a switch):
ls -alIf the .ssh folder does not exist, create it with the following commands (from the user folder):
sudo mkdir ~/.sshsudo chmod 0700 ./.ssh2. SSH Key File
Enter the ssh key folder with:
cd ./.sshAnd, check if any key files are there, with:
ls -l
Make sure the key file has the same name that was defined in the ssh config file, in previous steps.
If no key file, create one with (making sure to use the correct key file name):
sudo touch ./authorized_keysSet permissions on the key file:
sudo chmod 600 ./authorized_keysFrom Windows
This section is for copying the public key string from a Windows, host.
The tricks to successfully pasting in an SSH key to the ssh key file are:
-
Always paste the key string as a single line
-
The key string must being with, “ssh-rsa“
-
Strip out any “Begin SSH2 PUBLIC KEY” and ending
-
The key line should contain the key comment at the end of the line, for easy identification
-
A key string should be of the form: ssh-rsa [really long base64 key string here] [key comment]
-
Single whitespace is needed between each component of the key line
-
The key comment must have no whitespace in it
The easiest way to get this string is to load a key in PuttyGen.
Then, paste the entire key string directly from the text window of the form, like this:

From Linux
If you do not have password-based SSH access to your server available, you will have to complete the above process manually.
We will manually append the content of your id_rsa.pub file to the ~/.ssh/authorized_keys file on your remote machine.
To display the content of your id_rsa.pub key, type this into your local computer:
cat ~/.ssh/id_rsa.pubYou will see the key’s content, which should look something like this:
Outputssh-rsa AAAAB3NzaC1yc2EAAAADAQABAAACAQCqql6MzstZYh1TmWWv11q5O3pISj2ZFl9HgH1JLknLLx44+tXfJ7mIrKNxOOwxIxvcBF8PXSYvobFYEZjGIVCEAjrUzLiIxbyCoxVyle7Q+bqgZ8SeeM8wzytsY+dVGcBxF6N4JS+zVk5eMcV385gG3Y6ON3EG112n6d+SMXY0OEBIcO6x+PnUSGHrSgpBgX7Ks1r7xqFa7heJLLt2wWwkARptX7udSq05paBhcpB0pHtA1Rfz3K2B+ZVIpSDfki9UVKzT8JUmwW6NNzSgxUfQHGwnW7kj4jp4AT0VZk3ADw497M2G/12N0PPB5CnhHf7ovgy6nL1ikrygTKRFmNZISvAcywB9GVqNAVE+ZHDSCuURNsAInVzgYo9xgJDW8wUw2o8U77+xiFxgI5QSZX3Iq7YLMgeksaO4rBJEa54k8m5wEiEE1nUhLuJ0X/vh2xPff6SQ1BL/zkOhvJCACK6Vb15mDOeCSq54Cr7kvS46itMosi/uS66+PujOO+xt/2FWYepz6ZlN70bRly57Q06J+ZJoc9FfBCbCyYH7U/ASsmY095ywPsBo1XQ9PqhnN1/YOorJ068foQDNVpm146mUpILVxmq41Cj55YKHEazXGsdBIbXWhcrRf4G2fJLRcGUr9q8/lERo9oxRm5JFX6TCmj6kmiFqv+Ow9gI0x8GvaQ== demo@test
Access your remote host using whichever method you have available.
Once you have access to your account on the remote server, you should make sure the ~/.ssh directory exists. This command will create the directory if necessary, or do nothing if it already exists:
mkdir -p ~/.sshNow, you can create or modify the authorized_keys file within this directory. You can add the contents of your id_rsa.pub file to the end of the authorized_keys file, creating it if necessary, using this command:
echo public_key_string >> ~/.ssh/authorized_keysIn the above command, substitute the public_key_string with the output from the cat ~/.ssh/id_rsa.pub command that you executed on your local system. It should start with ssh-rsa AAAA....
Finally, we’ll ensure that the ~/.ssh directory and authorized_keys file have the appropriate permissions set:
chmod -R go= ~/.sshThis recursively removes all “group” and “other” permissions for the ~/.ssh/ directory.
If you’re using the root account to set up keys for a user account, it’s also important that the ~/.ssh directory belongs to the user and not to root:
chown -R sammy:sammy ~/.sshNOTE: The above example uses sammy as the username. Change this to the appropriate username for the target account.
Connecting to SSH Server from Windows
See this page for steps on how to connect to a Linux host from Windows: Connecting to SSH Server from Windows
How to Setup SSH Key Authentication to Linux
This how to consolidates several aspects of setting up SSH key access to a Linux server.
NOTE: We currently have two tutorials for this, that need to be consolidated into one. So, maybe this alternate tutorial fills your use-case: Ubuntu SSH Key Access
NOTE: If you are creating ssh keys for recent Ubuntu distributions, do not use RSA, as it is no longer an accepted key type (as of Ubuntu 21, I think). Use ecdsa instead.
SSH Server Setup
Follow this link to setup the SSH server on Ubuntu: Ubuntu: Setup SSH Server
Update SSH Config
The SSH service needs to be configured to disallow passwords, and to require SSH key authentication.
The following is list of actions to perform in the service configuration.
SSH Key File Name
NOTE: Not all ssh configuration files include the naming of the authorizedkeys file for users.
And, different flavors of Ubuntu and linux use different naming conventions for the SSH key file of a user.
So, we have to determine the file name for ssh key files, and make sure it is set in the config file, and we use the same name.
To find the ssh key file name, open the ssh config with the following:
sudo nano /etc/ssh/sshd_configLocate the line in the config file with, AuthorizedKeysFile. Uncomment the line if necessary.

Make a note of the filename used. This will be needed when installing SSH keys.
Prevent Remote Root Login
This is also done in the ssh config file.
Locate the line with PermitRootLogin, and set it to no, like this:

Disable Password Authentication
This requires three changes in the ssh config file.
Locate the line with ChallengeResponseAuthentication, and set it to no, like this:

Locate the UsePAM line and set it to no, like this:

Locate the PasswordAuthentication line and set it to no, like this:

Disable interactive keyboard authentication by setting this:
KbdInteractiveAuthentication noSave changes to the config file.
Restart SSH
With the changes made above, we need to restart the SSH service, with this:
sudo systemctl restart ssh