NOTE: This works on Debian 13.4.
Here are notes and steps to assign a static IP address for a Debian host.NOTE: If you are doing this for an Ubuntu host, see this page: [Ubuntu: Setup Static IP Address](https://wiki.galaxydump.com/link/119)
#### Net Tools (ipconfig) Install net tools, so we can use commands like: ipconfig `sudo apt install net-tools` #### Static IP Address Static addresses will be defined in a netplan file, configured below. But, we need to do a few things, first: - Get the Gateway IP - Enable Adapters #### Get the Gateway IP You will need to know the gateway address that your host will use. If the host is not on the desired network, you will need to determine the gateway IP, manually. Or, you can join the host to the network, and do the following to determine it. If the host is up, you can run this command to get the current default gateway assigned to it: `ip r | grep default` This command will return the default gateway address, like this: [](https://wiki.galaxydump.com/uploads/images/gallery/2025-02/h6MJkA6IxvRSQ4ii-image.png) #### Enable Adapters If you added an adapter to the host, it may be in a down state. To enable it, use this command to find the name: ```bash sudo ip a | grep ^[[:digit:]] ``` The above will give a list, like this: [](https://wiki.galaxydump.com/uploads/images/gallery/2025-02/uVSzS5rVVjzGu6Oi-image.png) And, you can enable it with this: ```bash sudo ifconfig eth1 up ```NOTE: Be sure to use the name of the nic, from the previous call.
#### Network Interfaces Open the interfaces file at: /etc/network/interfaces ```bash sudo nano /etc/network/interfaces ``` ```bash auto ens192 iface ens192 inet static address 192.168.1.50/24 gateway 192.168.1.1 dns-nameservers 192.168.1.2 8.8.8.8 ``` Replace: - `ens192` with your actual interface name (found above) - `192.168.1.50` with your desired static IP - `192.168.1.1` with your gateway/router - Set the dns-nameservers you need with a space between each. Save and close the interfaces file. Restart Networking With the config updated, we need to restart networking. Do this: ```bash sudo systemctl restart networking ``` Now, check the IP address with this: ```bash sudo ifconfig ``` You'll see something like this: [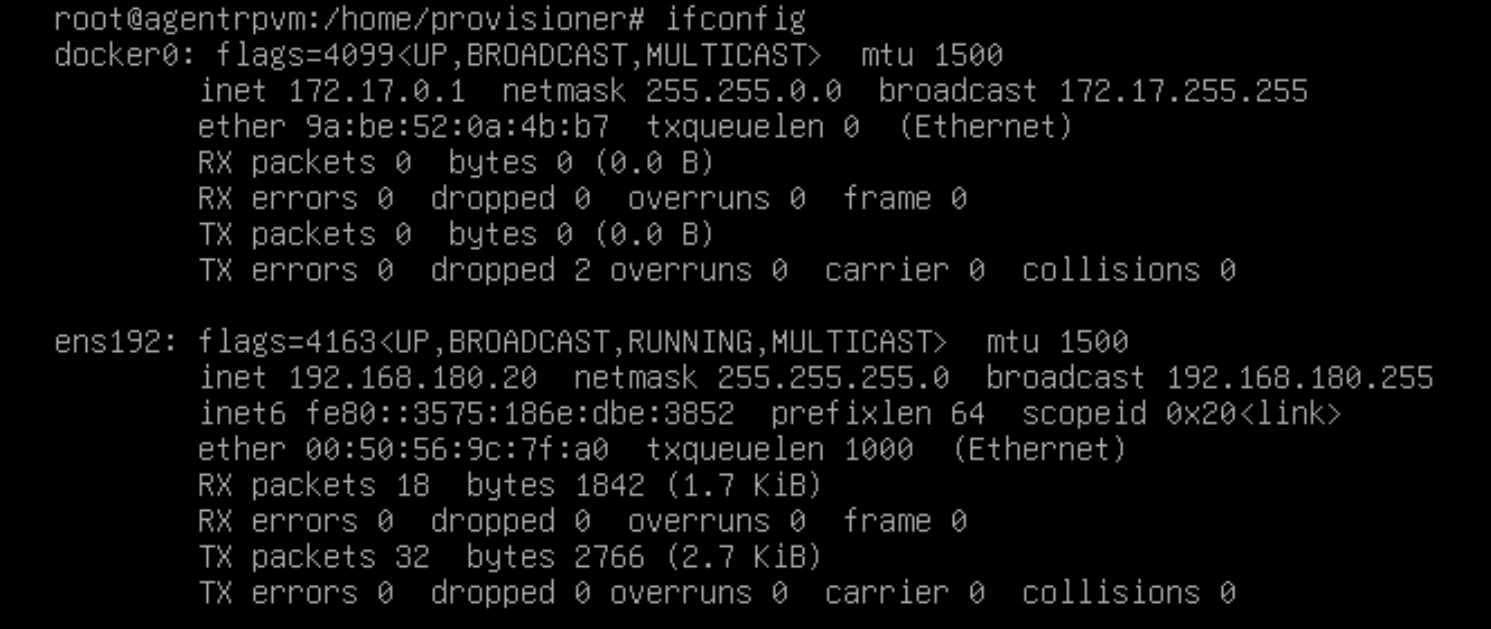](https://wiki.galaxydump.com/uploads/images/gallery/2026-05/vLzzNb9VY1MYjKRW-image.png)