Installing Node.js on Ubuntu
Here'sThis notespage onincludes howtwo tomethod installof a singleinstalling Node.js version on an Ubuntu 22 host.
One as a single, global Node.js version.
The other, using NVM (Node Version Manager.
NOTE: If you will need to work with multiple versions of Node.js on the same host, such as performing automated builds of Angular apps for different Angular versions, then these steps won't work for you.
Instead, you need to install NVM to manage those versions of Node.js.
UbuntuBefore 22installing comesNode.js, withit anmay be necessary to remove any existing version of node.js,Node v12, that is difficult to upgrade.
This is becausefrom the libnode-dev package is holding onto it, and we must release it, first.host.
RemoveRemoving ConflictsOld Versions
RunBe thesesure to remove theany conflicting package:
sudo apt-get remove libnode-dev
sudo apt-get update
Now, you can remove oldexisting versions of node.js:Node.js before continuing.
NOTE: If you're running Ubuntu 22, you will need to follow this: Ubuntu 22: Removing Existing Node.js
Check if Node.js was installed via APT:
dpkg -l | grep nodejsIf found, remove it with this:
sudo apt remove --purge nodejs cdnpm /etc/apt/sources.list.d
sudo rm nodesource.list-y
sudo apt autoremove --fix-brokenyIf sudoNode.js aptwas updateinstalled, sudovia aptNVM (Node Version Manager), and you want to remove nodejsa sudoversion aptthat removeNVM nodejs-docis maintaining, do this:
nvm uninstall <version>Ex; nvm uninstall 16 or nvm uninstall 18
Install NodeSingle Node.js Version
OnceNOTE: that’sThis done,will youinstall cana single Node.js version.
See the later section for installing multiple Node.js versions.
Use this to install the desired version of node.Node.js:
sudo apt update
sudo apt-get install -y ca-certificates curl gnupg
sudo mkdir -p /etc/apt/keyrings
curl -fsSL https://deb.nodesource.com/gpgkey/nodesource-repo.gpg.key | sudo gpg --dearmor -o /etc/apt/keyrings/nodesource.gpg
NODE_MAJOR=20
echo "deb [signed-by=/etc/apt/keyrings/nodesource.gpg] https://deb.nodesource.com/node_$NODE_MAJOR.x nodistro main" | sudo tee /etc/apt/sources.list.d/nodesource.list
sudo apt-get update
sudo apt-get install nodejs -y
Verify the node version with this: sudo node -v
If you wanted a single Node.js version, you can stop here.
Installing Multiple Node.js Versions (Using NVM)
Run the following:
curl -fsSL https://raw.githubusercontent.com/nvm-sh/nvm/v0.39.5/install.sh | bashThen, add the following to your shell profile (~/.bashrc, ~/.profile, or ~/.bash_profile):
export NVM_DIR="$HOME/.nvm"
[ -s "$NVM_DIR/nvm.sh" ] && \. "$NVM_DIR/nvm.sh"
Apply Changes:
source ~/.bashrcVerify NVM is installed:
nvm --versionOnce confirmed installed, you can install the desired Node.js versions that NVM will manage for you.
Install Managed Node.js Version
Follow these steps for each version of Node.js that NVM will manage.
Once installed, you need to tell NVM to install the desired Node.js versions that it will manage for you:
nvm install 16
nvm install 20
Usage
With the desired versions of Node.js installed, you can use these commands to switch between them:
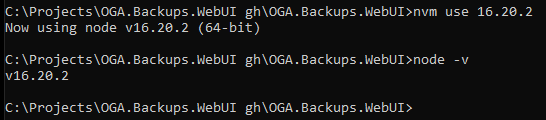
To run Node.js v16 (for Angular v14):
nvm use 16.20.2
To run Node.js v20 (for Angular v17):
nvm use 20.18.3
NOTE: Each time you tell NVM to switch versions, it may require answering a UAC popup.
And once NVM has switched in the desired Node.js version, you can call this, to verify:
node -v