
Jenkins: Add Angular Build Support
Here are steps to perform on a Jenkins build server, so it's capable of building Angular Apps and libraries.
NOTE: If you are installing NVM and Node on a Jenkins server, you will need to run all of the following under the jenkins user context.
See this page for how to impersonate the Jenkins user: Linux: Impersonating Users
As a quick answer, run this to become the Jenkins user, for the purpose of the steps in this article, you can use:sudo su jenkins
Or:sudo -u jenkins bash
And, be sure to exit from the jenkins user context, when finished.
Housekeeping
A few things to note about these steps:
These steps are aligned for an Ubuntu 22 host, so they may require adjustment for other distros and versions.
These are designed for a build server that will be able to build for versions of Angular.
So, we use NVM to manage Node.js, as different Angular versions are compatible with non-overlapping Node.js versions.
Removing Existing
Remove Existing Angular Versions
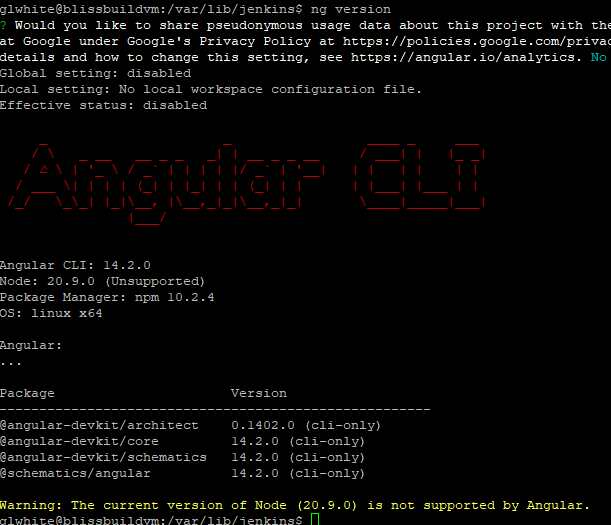
This command will indicate what Angular version is active for the session: ng version
If installed, you will see this:
But, the above command could be responding to a locally scoped Angular version.
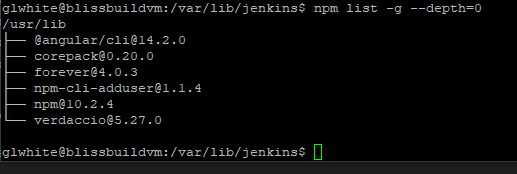
So, instead. We want to see what's globally installed, with this:npm list -g --depth=0
If Angular is installed globally, it will appear in the output, like this:
If Angular is globally installed, you can remove it with this: sudo npm uninstall -g @angular/cli
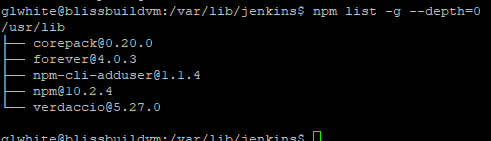
Once removed, you can confirm it with the same command that listed it: npm list -g --depth=0
And, it should be missing from the output:
Now, run this to see if Angular is still installed: ng version
If it returns an Angular banner, then you need to be more drastic.
Run this, to see where Angular is installed: which ng
If installed, you will see something like this:

Remove via Package Managers
Check if Angular is installed, via Snap:
snap list | grep angularIf installed, remove it with this:
sudo snap remove angular-cliCheck for other package manager installations:
dpkg -l | grep angularIf found, remove with this:
sudo apt remove --purge angular-cli -yManual Removal
You can manually remove Angular with this:
sudo rm -rf $(which ng)Or, if you installed Angular under npm root -g run these:
sudo rm -rf /usr/local/lib/node_modules/@angular
sudo rm -rf /usr/local/bin/ng
Now, a call to this should fail: ng version
Installing Node.js
Once Angular has been scrubbed from the host, we need to install Node.js, as this is a dependency of Angular.
Since building Angular apps and libraries may require multiple versions of Angular, we will follow steps to install NVM, to let us have multiple versions of Node.js.
So, follow these pages, to install Node.js on the build server:
Remove any existing Node.js versions with the removal steps from here: Installing Node.js on Ubuntu
Follow this to install NVM, to allow the install of multiple versions of Node.js: NVM - Node.js Version Manager
No Comments