
Generate SSL Cert
Here’s some steps on how to generate and setup an SSL certificate for a web site.
-
First, order a certificate from a CA, like Sectigo, or Digicert.
-
Once your order is active, they will require you to submit a CSR.
This must be generated by you, and will output two things.
It will generate your private key (for all SSL traffic). And, it will generate the CSR that contains your public key to be signed by the CA. -
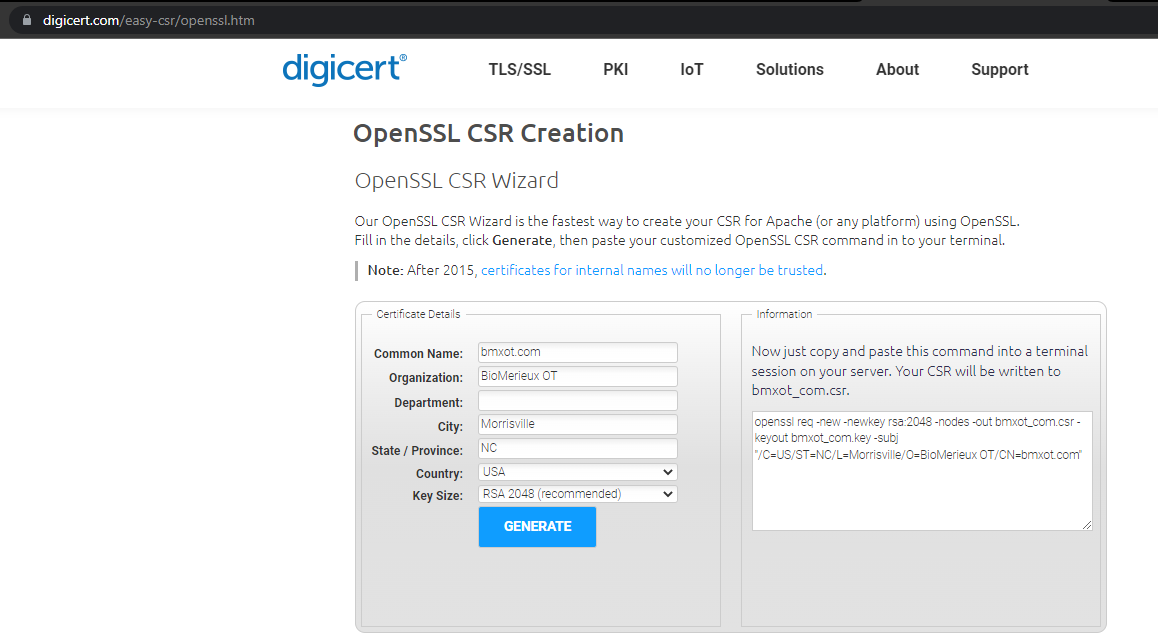
To generate a CSR is pretty easy. There’s a wizard tool, here, that will give you the command line string that you can execute on a linux box using openssl.
OpenSSL CSR Tool - Create Your CSR Faster | DigiCert.com
The CSR wizard looks like this:
Here’s what the CSR wizard looks like for a wildcard domain:
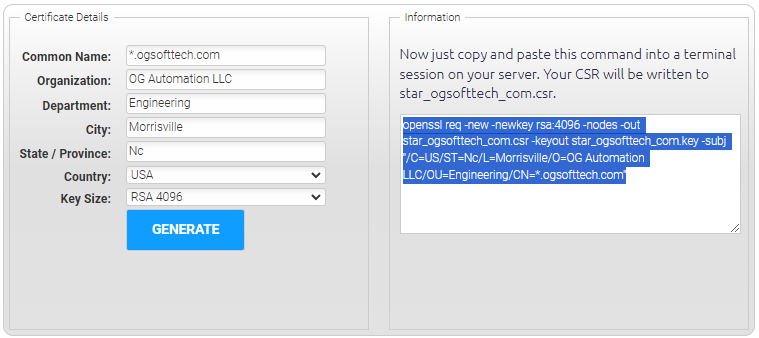
For the wildcard domain, the tool generates this output:
openssl req -new -newkey rsa:4096 -nodes -out star_ogsofttech_com.csr -keyout star_ogsofttech_com.key
-subj "/C=US/ST=Nc/L=Morrisville/O=OG Automation LLC/OU=Engineering/CN=*.ogsofttech.com"
NOTE: The above is listed on multiple lines ONLY for display in this article. For usage, it must entered all on one command line.
Fill out the fields in the CSR request tool, and the right-hand pane will be what you execute as a shell statement in linux.
-
Open a linux shell, and execute the generated command, to create your private SSL key and CSR, like this:
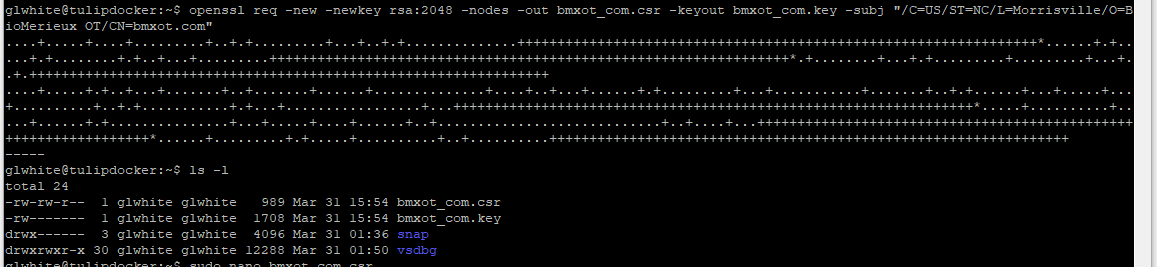
NOTE: The second statement lists the folder contents, showing the generated key and CSR files.
-
Take your SSL key and put it in a safe place, until ready to deploy it to your website.
NOTE: We’ve had some trouble with the Sectigo validation flow, in that the validation will report failure (on the web page), when the certificate actually got issued.
So, don’t discard the private key you created, until you’ve confirmed via email that your CSR failed validation.
On a previous occasion, we saw the validation fail in the UI, and deleted the private key, to redo the CSR submission. But, it had actually passed and the certificate was issued… but the key was then deleted.
So, keep all versions until you have a validated key-crt pair.
-
Open the CSR file. It should look something like this:
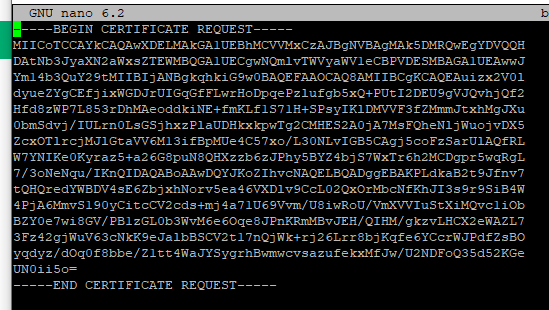
Paste its contents into a notepad session, so you can easily submit it to the CA website.
-
Go back to your CA website’s setup flow, and submit your CSR.
Once submitted, your CA will require some form of proof (validation) that you own the domain they’re creating the SSL key for. This will be via email reply, a custom DNS entry, or a file to expose on your website. -
Go through the validation of that, and your CA will send you your signed SSL certificate and bundle.
For example: The validation flow with Sectigo has an option for DNS registration.
To use it, you must log into your domain registrar, and add a special CNAME record to your domain, that Sectigo will use to verify that you own the domain being registered.
A CNAME DNS entry for validating domain ownership with Sectigo looks like this:

NOTE: It’s not clear if the Name field (of the DNS record) should include the domain at the end of the hash string. So, we added two entries; one with, and one without.
-
Once the validation steps have passed, the CA will issue your certificate (crt file) and a ca bundle.
-
Download the crt and bundle files from your CA.
Now, you should have a key file (the private key you created with your CSR), a crt file (your public certificate), and your CA should have given you a CA bundle file as well. -
For Nginx to use your certificate, it must be chained with the CA bundle.
This is a simple concatenation operation. To so, make sure both crt and CA bundle files are in the same folder, and execute the following: -
To make one, run the following command:
$ cat www.sitecertificatefile.com.crt intermediatebundle.crt > www.example.com.chained.crtThe above command takes the site certificate file and adds on the intermediate certificate, putting both into a composite file, called a chained certificate.
NOTE: The order of concatenation is important in the above command, as NGINX will consider the first certificate in the chained file as your SSL certificate.
When NGINX starts up, it will attempt to match the key and first certificate in the chained file. If they don’t match, it will give you an error like this:
SSL_CTX_use_PrivateKey_file(" ... /www.example.com.key") failed
   (SSL: error:0B080074:x509 certificate routines:
    X509_check_private_key:key values mismatch)
This chained certificate is what needs to be pushed into the NGINX server configuration.
Refer to this: Configuring HTTPS servers
-
Move the key and chained crt files to your Nginx host, and configure Nginx to use them.
No Comments